- Kenmore refrigerator water filters
- Whirlpool refrigerator water filters
- Samsung refrigerator water filters
- GE refrigerator water filters
- LG refrigerator water filters
- Frigidaire refrigerator water filters
- KitchenAid refrigerator water filters
- Maytag refrigerator water filters
- Kenmore Elite refrigerator water filters
- Estate refrigerator water filters
- GE Profile refrigerator water filters
- Amana refrigerator water filters
- Bosch refrigerator water filters
- Dacor refrigerator water filters
- Electrolux refrigerator water filters
Top DIY repair help
View All Repair Categories
Appliances
Lawn & Garden
Power Tools
Home Improvement
Sports & Leisure
Heating & Cooling
Quick Links
How to replace a freezer compressor start relay
less than a minute readMar 17Lyle Weischwill
Repair time and Difficulty
15 minutes or less
Tools Required
- Phillips screwdriver
- Pliers
- Work gloves
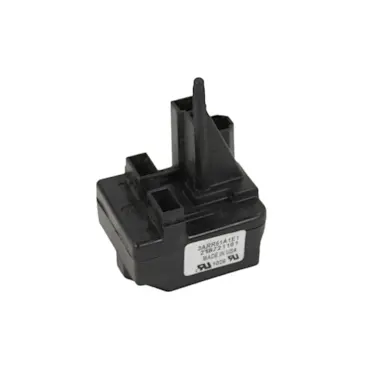
This DIY repair guide explains how to replace the compressor start relay on a freezer. The compressor start relay helps start the freezer compressor. A broken relay—which may rattle when you shake it or have burn marks—can keep the compressor from running. Replace the compressor start relay with the manufacturer-approved freestanding freezer part.
Follow these steps to replace the compressor start relay on common Kenmore, Frigidaire, Crosley, Gibson, White-Westinghouse and Kelvinator chest freezers.
Instructions
- 1. Disconnect the electrical power
Unplug the freezer or shut off the circuit breaker for the freezer.
- 2. Remove the grille cover
Pull the control knob straight off of the cold control thermostat.
Remove the screws securing the compressor grille cover to the freezer cabinet.
Hinge the grille cover down to access the back of the cold control thermostat.
Squeeze together the 2 locking tabs that secure the cold control thermostat to the compressor grille cover and release the cold control thermostat from the grille.
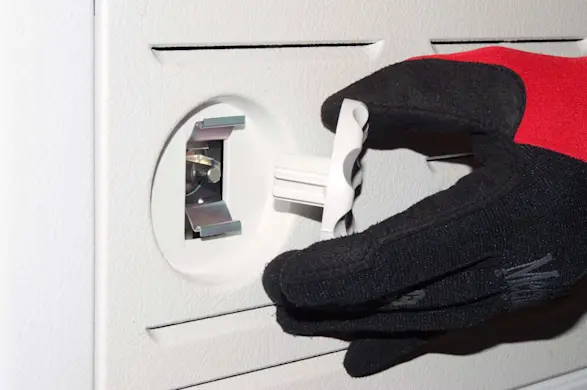
PHOTO: Pull off the control knob. 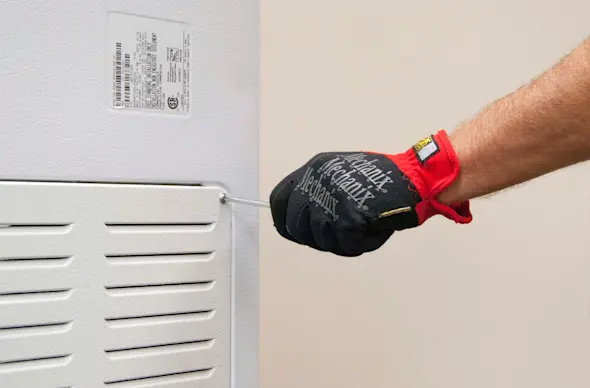
PHOTO: Remove the screws. 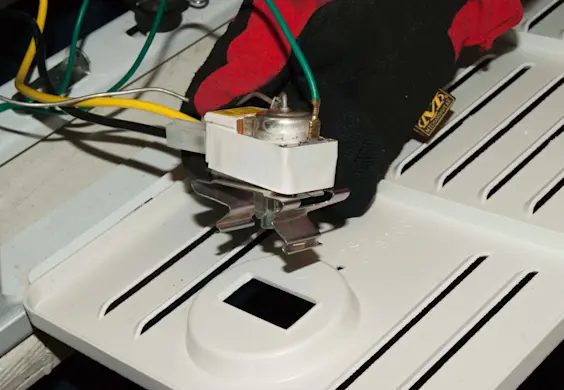
PHOTO: Release the thermostat from the grille cover.
- 3. Disconnect the wires from the compressor start relay
Squeeze the wire harness plug to release the locking tabs and remove the wire harness from the compressor start relay.
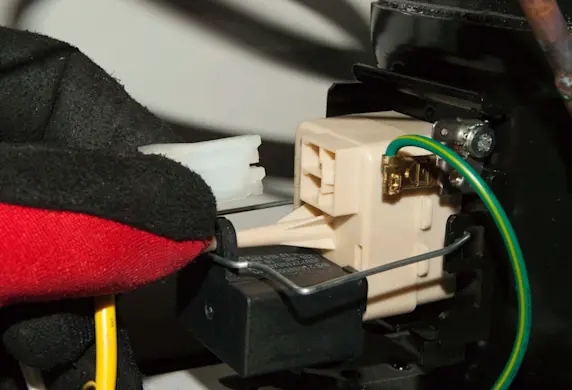
PHOTO: Disconnect the start relay wires.
- 4. Remove the compressor start relay
Release the wire retainer from the compressor start relay.
Grasp the compressor start relay firmly and pull it out of the connection terminals on the compressor.

PHOTO: Release the wire retainer. 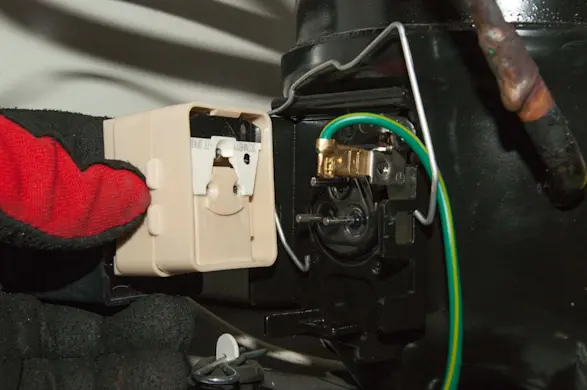
PHOTO: Remove the start relay.
- 5. Install the new compressor start relay
Position the new compressor start relay next to the compressor and line up the terminal prong connections.
Push the compressor start relay onto the compressor terminal prongs.
Reinstall the wire retainer on the start relay.

PHOTO: Install the new relay. 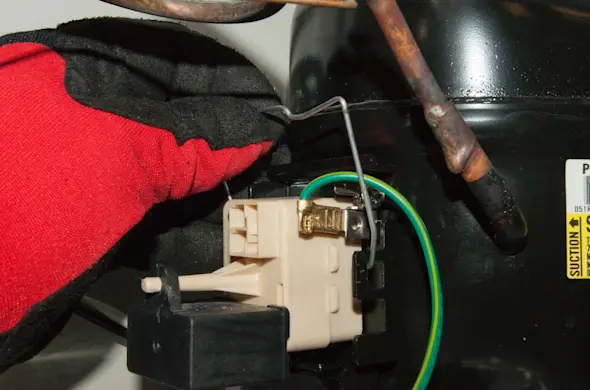
PHOTO: Reinstall the wire retainer.
- 6. Reconnect the wires to the compressor start relay
Push the wire harness plug into the start relay. Make sure that the locking tabs snap into place.

PHOTO: Plug in the wire harness.
- 7. Reinstall the grille cover
Position the cold control thermostat on the compressor grille cover and push it into the grille cover. Make sure that the locking tabs on the cold control thermostat snap into place on the grille cover.
Position the control knob on the front of the cold control thermostat and push the control knob down on the stem of the cold control thermostat.
Position the compressor grille cover properly on the freezer cabinet and secure it using the mounting screws.
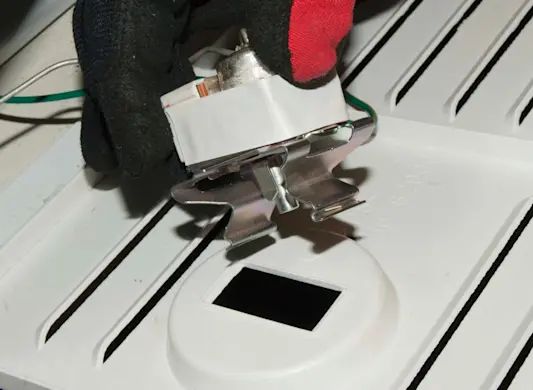
PHOTO: Attach the cold control to the grille. 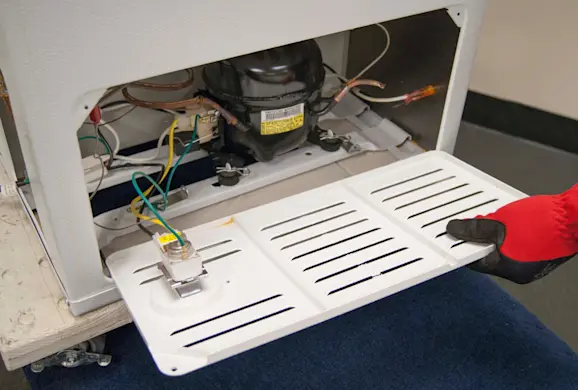
PHOTO: Reinstall the grille. 
PHOTO: Reinstall the grille cover screws. 
PHOTO: Reinstall the control knob.
- 8. Restore electrical power
Plug in the freezer or turn on the house circuit breaker to restore power.