


Can I replace dishwasher parts myself?
Yes, for Whirlpool model WDT750SAKZ1, we recommend DIY replacement for many common, non-technical parts if you can safely shut off power and water and work carefully; jobs like replacing a rack, door seal, or drain hose are typically straightforward, while control and wiring repairs take more skill.
What you can usually replace yourself
These repairs are commonly DIY-friendly because they involve basic access and fasteners:
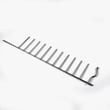
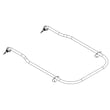
- Racks and rack components (fit and slide issues): dishwasher dishrack, lower W10728159
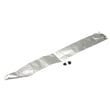
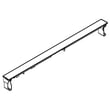
- Door sealing parts for leaks at the front edge: seal, door bottom W11664713
- Tub and cabinet sealing surfaces (leaks around the perimeter): gasket-tub,d W11483553, seal, cabinet W11414078
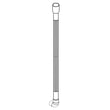
- Drain path parts (standing water, slow drain): hose-drain,e W11414944
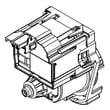
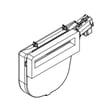
- Door closing and “won’t start” latch problems: latch assembly (includes switch) W11412299
Repairs that are still DIY, but take more care
These involve water supply connections or electrical diagnosis. Many customers still do them successfully, but plan extra time.
| Repair type | What you’ll handle | Typical risk | Good prep step |
|---|---|---|---|
| Water fill problems | Supply line, clamps, leak checks | Leaks | Towel test and visual leak check after install |
| No wash or weak wash | Pump area access, seals | Drips, misalignment | Take photos before disconnecting anything |
| No power or dead controls | Console access, connectors | Miswiring | Label connectors and verify tight seating |
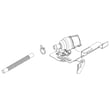
Model-matched examples include the fill valve assembly W11434044, water inlet W11535094, and control, electronic W11672039.
Safety checklist before you start
- Turn off the dishwasher breaker (do not rely on the door switch).
- Shut off the water supply valve under the sink.
- Protect the floor; keep towels ready for residual water.
- Take a photo of wire routing and hose routing before removal.
- Run a short cycle and check for leaks after any water-related repair.
Why it matters
DIY repairs can restore cleaning, draining, and leak performance quickly and save service costs, but the wrong part or a missed seal can cause repeat leaks. Using model-specific parts for WDT750SAKZ1 helps ensure proper fit and reliable operation.
For “won’t start” or odd light patterns, we also use how to reset a Whirlpool dishwasher and the Whirlpool dishwasher error codes guides to narrow down whether the issue is a latch, control, or power problem.
Last updated: February 2026
How to fix E1 F1 Whirlpool dishwasher?
On Whirlpool model WDT750SAKZ1, the E1 F1 error is most often tied to a water fill or drain problem. We fix it by resetting the dishwasher, then checking for a kinked drain hose, a blocked air gap/garbage disposal inlet, or a water supply issue; repair the failed part if the code returns.
Step-by-step checks (fastest to most common)
- Reset the control using the steps in how to reset a Whirlpool dishwasher.
- Cancel/Drain and listen: you should hear the drain pump run and water move to the sink/disposal.
- Check the drain path: straighten the hose, clear the sink air gap (if used), and clear the disposal inlet plug (new disposals often keep it installed).
- Verify water supply: confirm the shutoff valve is fully open and the supply line is not kinked.
- Look for standing water in the tub; remove debris around the sump area if accessible.
- If the dishwasher fills slowly or not at all, suspect the inlet valve or inlet assembly.
Parts that commonly solve E1 F1 on this model
If your troubleshooting points to a failed component, these are common fixes for fill and drain related faults on WDT750SAKZ1:
| Symptom you notice | Most likely area | Model-matched part to consider |
|---|---|---|
| No/low fill, humming, long fill time | Water inlet valve | Fill valve assembly W11434044 |
| Leaking at door edges, water on floor | Door sealing | Gasket-tub,d W11483553 or seal, door bottom W11664713 |
| Won’t start after closing door, intermittent | Door latch/switch | Latch assembly (includes switch) W11412299 |
| Won’t drain or drains slowly | Drain hose restriction/leak | Hose-drain,e W11414944 |
Why it matters
When E1 F1 is caused by a fill or drain fault, the dishwasher can stop mid-cycle to prevent poor washing, overheating, or water overflow. Fixing the restriction or replacing the failed valve, latch, or seal restores normal cycle operation.
If the code keeps coming back
Use Whirlpool dishwasher error codes to match the exact blink pattern or display behavior to the most likely circuit or component, then re-check wiring connections to the inlet valve and door latch.
Last updated: February 2026
Is the WDT750SAKZ1 a good dishwasher?
Yes. The Whirlpool WDT750SAKZ1 is a solid choice if you want strong cleaning performance with efficient water and energy use; it is generally rated well for handling heavily soiled loads while keeping operating costs reasonable.
What “good” means for this model
A dishwasher is only as good as how it performs in the areas that matter most day to day:
- Cleaning ability: should remove baked-on and greasy soils without rewashing
- Efficiency: lower water and electricity use per cycle
- Reliability basics: consistent filling, draining, and door sealing
- Usability: racks roll smoothly and fit your typical dishes
- Serviceability: common wear items are replaceable
Quick checklist before you buy or troubleshoot
If you are evaluating a WDT750SAKZ1 you already own (or one you are considering), these checks tell you a lot:
- Run a normal cycle and confirm the tub fills quickly and wash action sounds strong
- Verify it drains fully at the end (no standing water)
- Inspect the door perimeter for leaks; a worn tub gasket can cause drips
- Make sure racks glide and don’t shed coating; rust can spread once it starts
- Confirm the door latches firmly; a weak latch can prevent starting
Common “good dishwasher” upgrades and fixes (when symptoms show up)
| Symptom | Most common cause | Part to consider for WDT750SAKZ1 |
|---|---|---|
| Not filling or fills slowly | Water supply issue or valve problem | Fill valve assembly W11434044 |
| Leaks at the door | Worn seals or gasket | Gasket-tub,d W11483553 or seal, door bottom W11664713 |
| Won’t start or stops mid-cycle | Door not sensing closed | Latch assembly (includes switch) W11412299 |
| Poor rack function | Bent or rusted rack | Dishwasher dishrack, lower W10728159 |
Why it matters
A dishwasher can test well and still disappoint if it is not filling, draining, or sealing correctly. When those basics are right, the WDT750SAKZ1 typically delivers the “set it and forget it” cleaning most households want.
For control-panel flashing lights or cycle issues, use our how to reset a Whirlpool dishwasher steps first; if codes return, check our Whirlpool dishwasher error codes guide to narrow the problem.
Last updated: February 2026
What is the average lifespan of a whirlpool dishwasher?
A Whirlpool dishwasher like model WDT750SAKZ1 typically lasts 10 to 12 years. With lighter use and consistent care (cleaning, correct detergent, and fixing small leaks early), many units reach the higher end of the normal range.
Typical lifespan range (what we see most often)
- Average: 10 to 12 years
- Common overall range: 7 to 15 years
- Heavy daily use: tends to shorten lifespan
- Hard water without maintenance: speeds up wear on valves, seals, and the wash system
| Usage and care level | What to expect | What usually fails first |
|---|---|---|
| Light use + good maintenance | 12 to 15 years | Racks, seals, minor leaks |
| Normal family use | 10 to 12 years | Drain issues, latch, inlet valve |
| Heavy use + minimal maintenance | 7 to 10 years | Pump/sump, leaks, control issues |
What extends the life of your WDT750SAKZ1
- Clean the interior and run a monthly cleaning cycle (dishwasher cleaner or vinegar routine).
- Keep the door sealing surfaces clean to prevent leaks.
- Avoid overloading; it strains the wash system and reduces cleaning performance.
- Use the right detergent and rinse aid for your water conditions.
- Address draining or filling problems quickly before they stress the motor and electronics.
Parts that commonly wear and why they matter
Small wear items can make a dishwasher seem “worn out” when it really needs a targeted fix.
- Leaks at the door: check the seal, door bottom W11664713 and the tub seal area.
- Filling problems: a weak or sticking inlet can point to the fill valve assembly W11434044.
- Not starting or stopping mid-cycle: a worn latch can involve the latch assembly (includes switch) W11412299.
Why it matters
Knowing the expected lifespan helps you decide whether to repair or replace. If your WDT750SAKZ1 is under about 10 years old, fixing a drain, fill, or door-seal issue often restores reliable performance for years.
Last updated: February 2026
What's the most common problem with a whirlpool dishwasher?
For the Whirlpool WDT750SAKZ1 dishwasher, the most common day-to-day problem we see is a drain or wash-performance issue: standing water after the cycle or dishes coming out with food residue. In many cases, the fix is clearing a blockage, cleaning key areas, or addressing a weak drain path.
Quick checks that solve the most calls
- Cancel the cycle and run a drain; confirm water leaves the tub quickly.
- Clear the sump area of labels, glass, bones, and seeds.
- Check the sink/disposer inlet for a clog (especially after a new disposer install).
- Verify the drain hose has a high loop and is not kinked or crushed.
- Load so spray arms spin freely; avoid tall pans blocking rotation.
- Use fresh detergent and rinse aid; run hot water at the sink before starting.
Most common symptoms and what they usually point to
| Symptom | Most likely cause | What to do first |
|---|---|---|
| Standing water | Clog in hose, air gap, disposer inlet, or drain path | Inspect and clear the drain path; check the hose-drain,e W11414944 for kinks or blockage |
| Not cleaning well | Blocked spray, poor loading, low water fill, weak wash circulation | Clean spray paths; confirm proper fill; consider wash system issues |
| Won’t start | Door not latching, control lock, power issue | Confirm door closes firmly; inspect the latch assembly (includes switch) W11412299 |
| Leaking at door | Worn door seals, debris on sealing surfaces | Clean sealing surfaces; inspect the gasket-tub,d W11483553 and seal, door bottom W11664713 |
Why it matters
Drain and cleaning problems often start small (a partial clog or a kinked hose) but can lead to odors, poor results, and repeated cycle interruptions. Catching the cause early also helps you avoid replacing good parts.
Helpful DIY guides
- Use our how to reset a Whirlpool dishwasher steps if the control seems stuck.
- If you’re seeing a code or flashing pattern, check Whirlpool dishwasher error codes.
Last updated: February 2026
Why is my Whirlpool dishwasher leaking from the bottom of the door?
A Whirlpool dishwasher like model WDT750SAKZ1 usually leaks from the bottom of the door when the door sealing surfaces are not closing evenly or water is being pushed toward the front by oversudsing, a loading/spray issue, or a worn door seal. Start by checking the seals and correcting anything that prevents a tight door close.
Most common causes (and what to check first)
- Dirty or damaged door seals: Food debris, detergent film, or a nicked seal lets water escape.
- Door not closing squarely: A rack or tall item can keep the door from fully sealing.
- Oversudsing: Hand soap, wrong detergent, or too much detergent creates foam that spills past the seal.
- Spray arm deflection: A large pan or utensil can redirect spray straight at the door.
- Tub not level: A forward-tilted dishwasher encourages water to pool at the front edge.
Quick fix checklist (10 minutes)
- Wipe the inner door edge and sealing surfaces with a damp cloth; remove grit and detergent residue.
- Inspect the bottom edge of the door for gaps when closed; re-load dishes so nothing contacts the door.
- Confirm you are using dishwasher detergent only (no hand dish soap) and reduce dose if you see foam.
- Run a short rinse cycle empty; watch for water tracking from the corners or center bottom.
- Check that the unit is level side-to-side and not leaning forward.
Parts that commonly stop door-bottom leaks
If cleaning and loading changes do not help, these model-matched parts are the most common leak fixes:
| Leak location/symptom | Likely part | What it does |
|---|---|---|
| Water drips from the center bottom of the door | Seal, door bottom W11664713 | Seals the lower edge of the door against splash and runoff |
| Water tracks along the sides/top edge of the opening | Gasket-tub,d W11483553 | Seals the tub opening where the door closes |
| Moisture appears around the cabinet perimeter | Seal, cabinet W11414078 | Helps seal between the tub area and cabinet edges |
Why it matters
A door-area leak can soak the toe-kick and flooring, and it often gets worse over time as residue builds up or seals deform. Fixing the root cause also improves wash performance and reduces detergent waste.
Related DIY help: how to clean and maintain your dishwasher
Last updated: February 2026