Owner’s manual
 Error Codes



Can I fix the LG dryer D80 error myself?
Yes, on the LG DLG7401WE, the d80 message usually means the dryer is sensing restricted airflow in the home venting, not a failed dryer part. We fix it by cleaning and correcting the entire exhaust path from the lint screen housing to the outside vent hood.
LG’s Flow Sense system monitors how well air is moving through the exhaust. When it detects restriction, it can show d80 (and in more severe cases d90 or d95). Drying times get longer and energy use goes up.
- Clean the lint screen before every load; wash and dry it if it looks film-coated.
- Inspect the flexible vent hose behind the dryer; straighten kinks and replace crushed sections.
- Confirm you are using a 4-inch heavy metal duct, not plastic or thin foil.
- Check the outside vent hood while the dryer runs; you should feel strong airflow.
- Remove lint buildup from the duct run (wall ducting and any elbows); shorten the run and reduce turns when possible.
- If the run is long or hard to access, schedule a professional duct cleaning and inspection.
| Display | What it typically indicates | What we do next |
|---|---|---|
| d80 | Moderate restriction | Clean and correct the full vent path |
| d90 / d95 | Severe restriction | Stop using the dryer until the vent is cleaned/repaired |
Restricted venting traps heat and moisture in the dryer, which causes poor drying performance and can overheat components like thermostats and sensors. Fixing airflow is the fastest way to clear d80 and protect the dryer.
- Follow the venting material and routing guidance in the DLG7401WE manual.
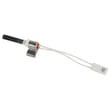
- If you want to understand how the dryer is built and where airflow moves, see what are the main parts of a clothes dryer.
Last updated: February 2026
How do I reset my LG dryer flow sensor?
On the LG DLG7401WE, the Flow Sense (flow sensor) indicator resets automatically after you clear the vent restriction and run several normal drying cycles; there is no manual reset button for Flow Sense. If the indicator stays on, focus on improving exhaust airflow and lint filtration.
- Clean the lint screen before every load; a clogged screen can keep airflow low.
- Inspect and clean the entire vent path: dryer outlet, transition duct, wall duct, and outside hood.
- Replace crushed, kinked, or overly long venting; rigid or semi-rigid metal venting performs best.
- Run multiple consecutive cycles after cleaning; the dryer needs several cycles to confirm airflow has improved.
- If the indicator remains active for more than five cycles after you have cleared the restriction, schedule service.
| Checkpoint | What “good” looks like | What to fix |
|---|---|---|
| Lint screen | Clear mesh, light passes through | Wash residue off, replace if torn |
| Transition duct | Short, smooth, not kinked | Re-route or replace duct |
| Outside vent hood | Strong airflow, flap opens fully | Remove lint, clear bird screen blockage |
| Duct length/turns | Minimal elbows | Shorten run, reduce bends |
If airflow is good but drying is still inconsistent, these model-compatible parts are common maintenance or troubleshooting items:
- Dryer lint screen by LG 5231EL1001C (improves lint capture and airflow)
- Dryer blower wheel 5835EL1002A (moves air through the drum and vent)
- Dryer moisture sensor 6500EL3001A (affects sensor-dry cycle shutoff timing)
Flow Sense helps protect drying performance and efficiency. Restricted venting causes long dry times, higher energy use, and overheating stress on components such as thermostats and the blower system.
For model-specific operating notes and troubleshooting steps, follow the DLG7401WE manual.
Last updated: February 2026
How to remove front of LG dryer to clean?
To remove the front on an LG DLG7401WE dryer for cleaning, we unplug the dryer first, then remove the top panel and front panel fasteners so the front panel can lift off while we support its weight and disconnect any wiring (such as the door switch harness).
- Unplug the dryer before any disassembly or cleaning.
- If this is a gas dryer, shut off the gas supply valve before opening the cabinet.
- Wear cut-resistant gloves; cabinet edges can be sharp.
- Take a photo of wire connections before disconnecting anything.
- Keep screws grouped by location so reassembly is straightforward.
- Unplug the dryer.
- Remove the lint screen, then remove the screws in the lint screen housing (these usually secure the top).
- Release the top panel (rear screws and/or spring clips at the front edge), then lift the top.
- Remove screws securing the control panel (if it overlaps the front panel on your configuration) and set it aside without straining wires.
- Remove the screws securing the front panel (commonly at the top corners and sometimes near the bottom).
- Tilt the front panel forward, support it, and disconnect the door switch wire harness.
- Lift the front panel up and off the lower mounting tabs.
- Lint buildup around the blower housing area and cabinet base
- The drum perimeter and seals (vacuum gently)
- The lint duct path you can safely access
- The moisture sensor bars (wipe with rubbing alcohol if drying is inconsistent)
If you find wear while you have the cabinet open, these are common service items for this model:
| Symptom you notice | Common area to inspect | Example part for DLG7401WE |
|---|---|---|
| Squealing or chirping | Idler pulley, belt | Dryer idler pulley 4560EL3001A |
| Thumping or rumbling | Drum rollers | Dryer drum support roller assembly 4581EL2002H |
| Drum not turning | Belt, idler, motor | LG dryer drum belt 4400EL2001F |
Cleaning lint from inside the cabinet helps airflow and drying performance, and it reduces overheating risk. LG’s Flow Sense feature is designed to alert you to restricted ducting, but internal lint buildup can still contribute to long dry times.
For model-specific panel fastener locations and cautions, follow the DLG7401WE manual.
Last updated: February 2026
What is the most common problem with LG dryers?
The most common LG dryer problem is long dry times or “no heat,” and it’s usually caused by restricted airflow from a clogged lint filter or vent duct. On the LG DLG7401WE, start with airflow and power checks before replacing parts; see the DLG7401WE owner's manual.
- Clothes still damp at end of cycle (long dry time)
- Dryer runs but doesn’t heat
- Flow Sense indicator stays on after you clear the vent
- Dryer shuts off too soon on Sensor Dry
- Unusual noises while tumbling (squeal, thump)
- Clean the lint filter before every load; heavy-lint loads (like new towels) may need a mid-cycle cleaning.
- Check the vent path: crushed flex duct, lint buildup, blocked exterior hood, too many elbows.
- Run smaller loads: overloaded drums dry slowly; very small loads can end early on Sensor Dry.
- Verify power: a tripped breaker can let some dryers run without heat.
- For gas models: confirm the house and dryer gas shutoff valves are fully open.
If airflow and power are good but drying is still poor, these parts are often involved:
| Symptom | Common cause | Example part for DLG7401WE |
|---|---|---|
| Dryer tumbles, weak airflow, long dry time | Blower issue or restriction | Dryer blower wheel 5835EL1002A |
| Dryer shuts off too soon on Sensor Dry | Moisture sensing problem | Dryer moisture sensor 6500EL3001A |
| Loud squeal or thump while running | Worn drum support parts | Dryer drum support roller assembly 4581EL2002H |
Restricted airflow is the root cause behind many LG dryer complaints because it prevents moisture from leaving the drum. That leads to longer cycles, poor drying, and repeated “no heat” reports even when the heater or burner is working.
Last updated: February 2026