Error Codes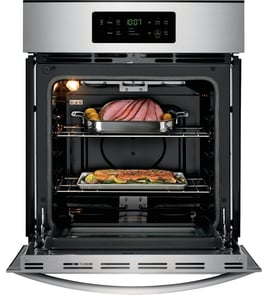

What is the probe on a GE profile oven?
On a GE Profile electric wall oven like model CTS70DP2N4S1, the “probe” is a meat probe that plugs into the oven and measures the internal temperature of food while it cooks, so you can cook to a target temperature without opening the door.
We see the probe used most often for roasting and baking proteins where internal temperature matters.
- Monitors internal food temperature in real time
- Helps prevent overcooking and undercooking
- Reduces door opening (more stable oven temperature)
- Works best when the probe tip is centered in the thickest part of the food
- Useful for large roasts, whole poultry, and thick cuts
These steps apply to most GE electric wall ovens that support a probe.
- Insert the probe into the food before cooking.
- Plug the probe into the oven’s probe receptacle (use an oven mitt if the oven is hot).
- Set the cooking mode (Bake, Roast, etc.).
- Program the desired internal temperature on the control.
- Remove the probe when cooking is complete and let it cool before cleaning.
| Mistake | What happens | Better approach |
|---|---|---|
| Tip touches bone or pan | False high readings | Keep tip in the center of the thickest area |
| Pinched probe wire in the door | Intermittent readings or damage | Route the cable so it is not trapped |
| Leaving probe in during broil (common issue) | Overheating and probe failure | Use probe with bake/roast unless your recipe says otherwise |
Using the probe helps you hit safe, consistent doneness while keeping the oven door closed, which improves temperature stability and cooking results.
If you need a replacement probe for this model, use the exact part listed for your oven: meat probe WB18X23585.
Last updated: February 2026
How to replace the control panel on a GE oven?
On the GE CTS70DP2N4S1 electric wall oven, replacing the control panel typically means shutting off power, removing the control panel mounting screws, transferring the wiring one connector at a time, and reinstalling the panel. This is a moderate DIY repair because it involves live-voltage wiring if power is not fully disconnected.
- Turn off the oven at the circuit breaker (double wall ovens often use a 240V circuit).
- Confirm the display is fully off before touching any wiring.
- Protect the door and trim with a towel to prevent scratches.
- Take a clear photo of every connector before you unplug it.
- Label connectors with tape if more than one looks similar.
- Shut off power at the breaker.
- Open the oven door and locate the screws securing the control panel (often along the underside or behind a trim piece).
- Support the panel as you remove screws; tilt the bottom outward, then lift to release tabs.
- Disconnect wiring harness plugs from the old panel (move one plug at a time to the new panel to avoid mix-ups).
- Reinstall the panel, tighten screws, restore power, and test Bake, Broil, light, and any WiFi features.
On this model, the control panel is commonly replaced as an assembly.
| Symptom | Most likely fix | Related part to check |
|---|---|---|
| Dead or glitchy touch panel | Replace control panel assembly | Control panel w/ wifi-stainless WB56X47974 |
| Oven works but runs hot/cold | Check temperature feedback | Wall oven temperature sensor WB21X10165 |
| Fan runs oddly or error after heat | Check cooling fan controls | Wall oven cooling fan sensor board WB27T11463 |
A miswired connector or a pinched harness can cause a no-power condition, error codes, or overheating. Moving connectors one at a time and securing the panel correctly helps prevent repeat failures.
Last updated: February 2026
How long do GE wall ovens last?
Most GE electric wall ovens like model CTS70DP2N4S1 last about 12 to 15 years with normal household use. Lifespan depends most on heat exposure over time, how often self-clean is used, and whether airflow and door sealing stay in good shape.
- Self-clean frequency: high heat stresses wiring, controls, and door lock parts.
- Cooling airflow: a weak fan can overheat electronics and shorten control life.
- Door seal condition: leaks force longer heat cycles and can overwork components.
- Power quality: repeated surges can damage boards and sensors.
- Cleaning habits: spills left to bake on can cause smoke, odors, and extra heat cycling.
- Keep vents clear and listen for the cooling fan after baking.
- Avoid running self-clean back-to-back; let the oven fully cool between cycles.
- Wipe up sugary or greasy spills once the oven is safe to touch.
- If preheat times suddenly increase, check for temperature accuracy issues.
- Replace worn sealing parts promptly to prevent heat loss.
| Symptom | Common cause | Example part for CTS70DP2N4S1 |
|---|---|---|
| Oven temperature swings, underbakes or overbakes | Temperature sensing problem | Wall oven temperature sensor WB21X10165 |
| Control area gets unusually hot, fan is noisy or not running | Cooling fan issue | Wall oven cooling fan assembly WB26X31060 |
| Heat leaks, longer cook times, hot cabinet face | Door gasket not sealing | Wall oven door seal WB35X32825 |
| Self-clean will not start or door will not unlock | Door lock problem | Wall oven door lock assembly WB10X28391 |
A wall oven can still “turn on” well past 10 years, but small issues (like a weak cooling fan or a leaking door seal) make it run hotter and longer. Fixing those early helps protect expensive components such as the control panel and wiring.
Last updated: February 2026
What are the parts of an electric oven?
An electric oven like the GE CTS70DP2N4S1 is built around heating, temperature sensing, airflow cooling, and door sealing components. The most common parts you will see are the oven racks, oven light parts, temperature sensor, cooling fan parts, and door hardware that keeps heat safely contained.
- Heating system parts (bake and broil elements, sometimes convection heating)
- Temperature control parts (sensor probe, electronic control)
- Air movement and cooling parts (cooling fan, fan blade, related control board)
- Door and heat-retention parts (door seal, door glass/window, door liner)
- Interior convenience parts (racks, sliding racks, oven light)
These are model-matched examples from our parts list for GE CTS70DP2N4S1:
- Wall oven temperature sensor WB21X10165
- Wall oven cooling fan assembly WB26X31060
- Wall oven cooling fan sensor board WB27T11463
- Wall oven door seal WB35X32825
- Wall oven light bulb WB25T10102
- Wall oven rack WB48X31582
| Part type | What it does | Common symptom when it fails |
|---|---|---|
| Temperature sensor | Tells the control the actual oven temperature | Overheats, underheats, temp swings |
| Cooling fan and controls | Cools the oven cabinet and electronics | Fan not running, overheating, shutdowns |
| Door seal and glass | Keeps heat in and protects the outer door | Heat leaks, longer cook times |
| Light bulb/assembly | Illuminates the oven cavity | No interior light |
| Racks/sliding rack | Supports cookware and improves access | Sticking, wobbling, hard to slide |
Knowing the main oven parts helps you troubleshoot faster and order the right replacement the first time. For example, temperature problems often point to a sensor issue, while overheating around the control area often points to cooling fan components.
Last updated: February 2026