Owner’s manual
 Error Codes



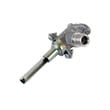

How to change Kenmore spark electrode igniter?
To change a spark electrode igniter on your Kenmore 66475113611 slide-in gas range, we shut off power and gas, lift the burner parts, remove the old electrode from the burner base, then install and align the new electrode so it sits correctly by the burner notch.
- Turn off power to the range at the breaker (spark ignition is electrical).
- Shut off the gas supply valve.
- Let the cooktop cool completely.
- Work in good light and keep screws organized.
- If you smell gas at any point, stop and have the range checked.
- Remove the grate and lift off the burner cap.
- Note alignment: the igniter electrode must line up with the notch in the burner base, and the gas tube opening must align with the orifice holder.
- Remove the screw holding the electrode to the burner base (if equipped).
- Disconnect the electrode wire connector.
- Install the new electrode in the same position and secure it.
- Reconnect the wire connector firmly (a loose connection can cause weak or no sparking).
- Reinstall the burner cap and grate, restore gas and power, then test ignition.
- Burner cap is seated flat and centered.
- Burner ports are clear (spills can block gas flow).
- Electrode tip is clean and not bent away from the burner.
- Burner base is aligned to the orifice holder.
- Spark is present at the electrode when the knob is turned to LITE.
| Item | Correct position | What happens if it’s off |
|---|---|---|
| Electrode | Tip sits by the burner notch | No spark to the gas stream, delayed ignition |
| Burner cap | Fully seated, not rocking | Uneven flame, hard lighting |
| Gas tube opening | Clear and aligned | Burner may not light or lights weakly |
On this model, electric igniters light the surface burners when the knob is turned to LITE. Correct electrode and burner alignment prevents delayed ignition, uneven flames, and repeated clicking.
For diagrams and model-specific burner assembly details, use the 66475113611 owner’s manual.
Last updated: January 2026
Where to find Kenmore gas range model number?
On the Kenmore slide-in gas range model 66475113611, the model and serial label is typically on the oven frame behind the top side of the oven door. Open the oven door and look along the frame area where the door closes; the label is usually easy to spot once you know where to look.
Check these spots in order:
- Oven frame behind the top side of the oven door (most common)
- Left or right door jamb area around the oven opening
- Behind the storage drawer (pull the drawer out and look at the frame)
- Back panel of the range near the lower area
- Side panel near the bottom edge (less common)
For a diagram and model-specific references, use the 66475113611 owner's manual.
- Make sure the oven is OFF and cool.
- Open the oven door fully.
- Look at the oven frame near the top edge (just behind where the door closes).
- Write down both the model number and serial number.
| Item on label | What it’s used for |
|---|---|
| Model number (example format: 664.7511*) | Matching the correct parts and diagrams |
| Serial number | Identifying production details for service |
| Brand (Kenmore) | Confirming manufacturer family |
We use the model number to match the exact version of your range to the correct parts (like a surface burner knob, spark module, or oven door components). Even small model-number differences can change which part fits.
Last updated: January 2026
What is the average lifespan of 66475113611?
A Kenmore slide-in gas range like model 66475113611 typically lasts 13 to 15 years with normal household use. Regular cleaning, correct burner flame, and replacing wear items (like knobs, racks, and door seals) helps you reach that lifespan.
- Heat exposure and spills on the cooktop and control area
- Oven door seal condition (heat loss makes components work harder)
- Ignition system health (spark module, switches, wiring)
- Gas burner flame quality (steady blue flame, minimal yellow tips)
- Ventilation and cleaning habits (grease buildup shortens component life)
Use these habits to keep your 66475113611 running for years:
- Keep burner ports clear; clean caps and heads so ignition is quick and even.
- Avoid slamming the oven door; it protects hinges, glass, and the door seal.
- Wipe up acidic spills promptly to prevent corrosion on stainless and enamel.
- Replace worn sealing parts when you notice heat leaking or longer preheat times.
- Use the correct bulb type and wattage for the oven light.
| Part | What you’ll notice when it’s worn | Why it matters |
|---|---|---|
| Door seal W11542153 | Heat escaping, uneven baking, hot handle | Protects controls and improves baking performance |
| Range surface burner knob (stainless) W11409283 | Loose fit, hard to set flame | Helps you control flame accurately |
| Oven bulb 8009 | Oven light out | Makes it easier to monitor food without opening the door |
Knowing the expected lifespan helps you decide whether to maintain, repair, or refresh key parts. On a gas range, small issues like a weak ignition spark or a leaking door seal can increase heat stress on the control and wiring over time.
For model-specific care and cleaning guidance, follow the owner's manual.
Last updated: March 2026