Installation guide
 Owner’s manual
 Error Codes




How to replace a water filter on a KitchenAid side by side refrigerator?
To replace the water filter on your KitchenAid KSSC42QVS03 side-by-side refrigerator, remove the old cartridge, insert the new one fully, then push in and twist clockwise until it stops. After replacement, flush the water system and discard the first batches of ice.
Step-by-step: replace the filter cartridge
- Dispense a little water first to relieve pressure (if your model has a dispenser).
- Remove the old filter by pulling it out, or by pushing in and turning it counterclockwise (depending on the filter housing style).
- Insert the new refrigerator water filter EDR3RXD1 and seat it fully.
- Push in and twist clockwise (to the right) until it stops and feels locked.
- Reinstall the filter cap if your model uses one (a loose cap can cause leaks).
- Check for drips around the filter area for the next few minutes.
Water system prep after replacing the filter
After connecting the refrigerator to a water source or replacing the water filter, we follow the model’s water-system preparation steps to clear air and rinse the new cartridge.
- Run and discard several glasses of water to flush air from the line.
- If your ice maker is on, discard the first two full containers of ice after a filter change.
- If water sputters, keep dispensing until the flow is steady.
Quick troubleshooting if water flow is weak after a filter change
Weak flow is usually a water-pressure or restriction issue.
| What you notice | Most common cause | What we do next |
|---|---|---|
| Slow dispenser flow | Low supply pressure | Confirm supply is in the 30 to 120 psi range |
| Flow drops with reverse osmosis | RO system pressure too low or RO filter clogged | Replace the RO sediment filter; allow RO tank to refill |
| Drips at filter area | Filter not fully seated or cap not tight | Reseat filter; check the cap fit |
Why it matters
A properly installed filter helps protect the water inlet valve and dispenser from debris, improves taste and odor, and prevents air in the line that can cause sputtering, hollow ice, or slow fill.
For model-specific diagrams and the exact filter housing style used on KSSC42QVS03, use the installation guide.
Last updated: February 2026
Is there a reset button on a KitchenAid refrigerator ice maker?
KitchenAid built-in refrigerators like model KSSC42QVS03 do not use a dedicated ice maker “reset button.” We reset ice production by switching the ice maker OFF, then ON at the freezer’s ice maker On/Off switch and allowing the unit time to cycle and refill.
How to reset the ice maker on KSSC42QVS03
Use the ice maker On/Off switch in the freezer compartment (commonly at the top right).
- Open the freezer door.
- Move the switch to OFF (right).
- Wait 1 minute.
- Move the switch to ON (left).
- Close the door and wait for the next harvest and fill.
For the exact switch location and water-system prep steps, follow the installation guide.
What to expect after turning it back on
Startup timing is normal after an OFF/ON reset, water hookup, or filter change.
| After reset | Normal expectation | Action |
|---|---|---|
| First ice is delayed | Up to 24 hours for first batch | Wait and keep freezer closed |
| Early cubes look odd | First batches can be imperfect | Discard first batches |
| Small/hollow cubes | Air in line or restricted flow | Flush dispenser, check filter |
If it still will not make ice
These checks solve most “no ice” complaints after a reset:
- Confirm the household shutoff valve is fully open.
- Make sure the ice maker was OFF until the water line was connected.
- If you replaced the filter, flush water to clear air; see how to replace the water filter in a KitchenAid refrigerator.
- Check for a frozen fill tube (often tied to low temps or slow-seeping valve).
- Listen for a fill sound after a harvest; no fill points to water supply or a valve issue.
Why it matters
An OFF/ON reset restarts the ice maker cycle without disassembly and is the right first step after water line work or a water filter replacement.
Last updated: February 2026
Why is my KitchenAid side by side refrigerator leaking water?
Water leaking from your KitchenAid KSSC42QVS03 side-by-side refrigerator is usually caused by a clogged or frozen defrost drain, a loose or kinked water supply line, or a leaking water system component (filter housing, fittings, or inlet valve). Start by checking for ice or debris in the drain area and inspecting all water connections.
Quick checks that solve most leaks
- Look for water under the freezer side; that often points to a defrost drain issue.
- Check the water filter area for drips, especially after a recent filter change.
- Inspect the water supply tube behind the refrigerator for kinks or rubbing.
- Confirm the shutoff valve location allows the line to stay unkinked when the unit is pushed in (see the installation guide).
- Verify doors close fully and gaskets seal; warm air can create excess frost that later melts and leaks.
Most common leak sources (and what you will notice)
| Leak location | Most likely cause | What you will see |
|---|---|---|
| Inside freezer, water on bottom | Defrost drain clogged or frozen | Ice sheet, then water after defrost |
| Under front of unit | Drain pan overflow or drain tube issue | Intermittent puddles |
| At filter area | Filter not seated, cap/housing leak | Drips near filter compartment |
| Behind unit | Supply line or fitting leak | Water trail from rear |
| Dispenser/ice maker area | Inlet valve or tubing seep | Slow leak, low ice production |
Parts that commonly fix water leaks on this model
If you find the leak is coming from the filtration or water supply system, these model-matched parts are common solutions:
- Refrigerator water filter EDR3RXD1 if the filter is due or was installed incorrectly
- Refrigerator water filter cap (black) WP2260518B if the cap is cracked or not sealing
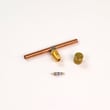
- Refrigerator fitting WP2300868 if a connection is seeping
- Refrigerator water inlet valve WPW10159842 if the valve weeps or won’t fully close
Why it matters
Even a small leak can lead to ice buildup, poor cooling airflow, and floor damage. Fixing the source early also helps your compressor and fans run less, improving temperature stability.
Last updated: February 2026