Owner’s manual
 Error Codes


Is WRS325SDHB08 energy star certified?
We treat the Whirlpool WRS325SDHB08 as not confirmed ENERGY STAR certified unless the ENERGY STAR mark is shown on the model’s rating label or listed in the model documentation. The quickest way to verify is to check the product label and the specifications section in the WRS325SDHB08 owner's manual.
How to check ENERGY STAR status on your refrigerator
Use these quick checks on your WRS325SDHB08:
- Look for the ENERGY STAR logo on the rating label (typically inside the fresh food compartment on a side wall).
- Check the model number on the label matches WRS325SDHB08 exactly.
- Review the specifications or feature list in the WRS325SDHB08 owner's manual.
- If you have a retailer listing, confirm it references WRS325SDHB08 (not a close model like WRS325SDHZ).
- Compare your unit’s annual kWh (if shown) to typical side-by-side usage to sanity-check the claim.
Why model numbers matter (WRS325SDHB08 vs similar models)
Whirlpool model numbers that look almost identical can have different finishes, options, and efficiency listings. A claim for WRS325SDHZ does not automatically apply to WRS325SDHB08.
| What you’re checking | Must match | Where to find it |
|---|---|---|
| Model number | WRS325SDHB08 | Rating label inside refrigerator |
| Certification mark | ENERGY STAR logo | Rating label or documentation |
| Documentation | WRS325SDHB08 manual | WRS325SDHB08 owner's manual |
Why it matters
ENERGY STAR certification affects expected operating cost and can be required for some rebates. Verifying using the rating label and manual prevents ordering the wrong parts or relying on specs from a different Whirlpool side-by-side model.
Last updated: February 2026
What is the life expectancy of a Whirlpool side-by-side refrigerator?
A Whirlpool side-by-side refrigerator like model WRS325SDHB08 typically lasts 12 to 18 years. Reaching the high end depends on steady airflow, correct room temperature, and basic care like cleaning and keeping door seals tight; see the WRS325SDHB08 owner's manual for model-specific care guidance.
What affects lifespan the most
- Condenser coil cleanliness: Dust buildup makes the compressor run hotter and longer.
- Door seal condition: Leaks force longer run times and can cause frost issues.
- Room temperature: This model is intended for locations roughly 55°F to 110°F, with best performance around 60°F to 90°F.
- Ventilation clearance: Allow about 1/2 inch at the sides and top, and about 2 inches behind the refrigerator.
- Ice and water system upkeep: Regular filter changes and purging air after service reduce dispenser and ice maker strain.
Maintenance checklist (simple, high impact)
- Vacuum coils and the grille area every 6 to 12 months.
- Keep doors closed as much as possible; avoid long “door open” times.
- Clean and dry door gaskets; correct any gaps or warping.
- Keep vents inside the fresh food and freezer sections unblocked.
- Replace the water filter on schedule; follow how to replace the water filter in a Whirlpool refrigerator.
Quick “repair vs. replace” guide
| What you’re seeing | Most common cause | What we do first |
|---|---|---|
| Warm temps, compressor runs a lot | Dirty coils, poor airflow, door leak | Clean coils, verify clearances, check gaskets |
| Frost buildup, weak airflow | Door leak or evaporator airflow issue | Check gasket seal; inspect fan airflow |
| Noisy fan sound | Fan blade rubbing or ice buildup | Inspect fan area; clear ice and obstructions |
Why it matters
A side-by-side refrigerator’s sealed system and compressor last longer when heat can escape easily. Good ventilation and clean coils reduce run time, which is the biggest driver of wear on Whirlpool refrigerators.
Last updated: February 2026
What is the most common problem with a Whirlpool refrigerator?
The most common Whirlpool refrigerator complaints are cooling issues (too warm, uneven temperatures) and water or ice system problems (no ice, slow water dispensing, leaks). On the Whirlpool WRS325SDHB08, start with the basic checks and the model’s troubleshooting steps in the WRS325SDHB08 owner's manual.
Quick checks we recommend first
- Confirm the unit is plugged into a grounded 3-prong outlet (no extension cord).
- Verify the outlet has power; test it with a lamp.
- Check the house breaker or fuse.
- After a new install or power loss, allow 24 hours for full cooling.
- If not connected to a water line, turn the ice maker off to prevent valve noise.
- Listen for normal sounds (clicking, gurgling, sizzling) during ice making and defrost.
Most common symptoms and what they usually mean
| Symptom | Most common cause | What to do next |
|---|---|---|
| Refrigerator or freezer too warm | Not enough time after install, airflow blocked, dirty condenser area | Give it 24 hours, clear vents, clean around the unit |
| Compressor runs a lot | Energy-efficient design, warm room, frequent door openings | Reduce door openings, confirm doors seal well |
| Buzzing or clicking near back | Water valve opening/closing for ice maker or dispenser | If no water line, turn ice maker off |
| Noisy operation | Normal fan/compressor adjustments | Compare to the “normal sounds” list in the manual |
When it points to a part issue
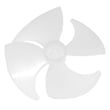
If you have warm temperatures plus weak airflow in the freezer, the evaporator fan area is a common place to inspect. A damaged fan blade can cause noise and poor circulation; for this model, see the refrigerator evaporator fan blade WP2169142.
Why it matters
Cooling and water/ice problems can lead to food spoilage, recurring frost buildup, and dispenser leaks. Catching simple causes early (power, time-to-cool, door sealing, water hookup) prevents unnecessary part replacement.
For model-specific fault indicators, we also use the Whirlpool refrigerator error codes guide alongside the manual.
Last updated: February 2026
Why is my Whirlpool side by side refrigerator not making ice but water works?
If your Whirlpool WRS325SDHB08 dispenses water but is not making ice, the most common causes are the ice maker being turned off, the ice bin not seated correctly, a partially closed water shutoff valve, or a kinked water supply line reducing flow to the ice maker. Use the WRS325SDHB08 owner's manual steps to confirm the ice maker ON/OFF setting and allow time for production.
Quick checks that fix most “no ice” issues
- Make sure the ice maker is turned on (wire shutoff arm down, or switch in the ON position depending on your version).
- Confirm the ice storage bin is fully installed and seated firmly.
- Verify the household water shutoff valve is fully open.
- Inspect the water source line for a kink or pinch behind the refrigerator.
- If this is a new installation or recent reconnect, wait 24 hours for ice to start and up to 72 hours for full production.
- Discard the first three batches of ice after a new hookup or system flush.
Why water can work when ice does not
The dispenser and ice maker share the water supply, but the ice maker can still stop if it is switched off, the bin is out of position, or flow is marginal (ice maker fill is more sensitive to low flow than a quick cup of water).
What to expect after changes (timing guide)
| Situation | What you’ll see | Normal wait time |
|---|---|---|
| Ice maker was OFF and you turned it ON | No ice at first | Up to 24 hours |
| New water connection or system flush | Small output at first | Up to 72 hours for full output |
| Kinked line straightened or valve opened | Gradual improvement | 12 to 24 hours |
If it still won’t make ice
- Make sure the freezer door closes fully and stays closed.
- Listen for a brief buzz/click when the ice maker calls for water (valve opening and closing can be a normal sound).
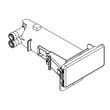
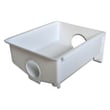
- If the bin is cracked, jammed, or not engaging, replace it with the correct part for this model: refrigerator ice container WPW10670845.
Why it matters
No-ice problems are usually a simple ON/OFF, bin seating, or water-flow issue. Fixing those first prevents unnecessary part replacement and gets normal ice production back faster.
Last updated: February 2026