 Error Codes




What is the most common problem with GE dishwashers?
The most common problems we see on GE dishwashers like model GDF535PGR5WW are not draining, not cleaning well, and not starting. These usually trace back to a clogged drain path, a wash system issue (spray arm or pump), or a door latch/control problem.
Most common symptoms and what they usually mean
- Water left in the bottom: drain hose/air gap clog, sump blockage, or a failing drain pump
- Dishes still dirty: clogged spray arm holes, low water fill, or a weak wash pump
- Won’t start or stops mid-cycle: door not latching, control issue, or a blown control fuse
- Leaking at the front: door seal alignment, tub gasket wear, or loading issues causing splash-out
- Poor drying: heater circuit issue, rinse aid problems, or cycle selection
Quick checks you can do first (no parts)
- Cancel the cycle and run a drain; listen for the drain pump running.
- Clean the filter area and remove debris from the sump (glass, labels, food).
- Confirm the door closes firmly and the latch “clicks” (no rack interference).
- Run hot water at the sink for 30 to 60 seconds before starting a cycle.
- Check that the lower spray arm spins freely and holes are not plugged.
Parts that commonly fix these issues on GDF535PGR5WW
| Problem | Common fix | Example part for this model |
|---|---|---|
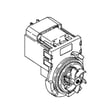
| Not draining | Replace drain pump | Dishwasher drain pump WD19X25461 |
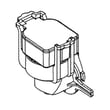
| Won’t start / door errors | Replace latch or strike | Dishwasher door latch lock WD01X29878 |
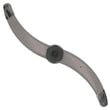
| Not cleaning well | Replace lower spray arm | GE dishwasher spray arm, lower WD22X33499 |
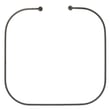
| Not heating / poor drying | Replace heating element | GE dishwasher heating element WD05X35098 |
Why it matters
Drain, wash, and heat problems can look similar during a cycle, but the fix is very different. Matching the symptom (standing water, weak spray, no heat, no start) to the right system helps you avoid replacing the wrong part.
For display or beeping faults, we use the GE electronic dishwasher error codes guide to narrow the failure to the wash motor, drain circuit, heater circuit, or door sensing.
Last updated: February 2026
What is the average lifespan of a GE dishwasher?
A GE dishwasher like model GDF535PGR5WW typically lasts 10 to 12 years. With consistent cleaning, correct detergent use, and quick repairs when symptoms start (leaks, poor draining, weak wash), many units reach the upper end of that range.
Typical lifespan and what changes it
Most dishwashers fall into a predictable life range; what shortens life is usually heat, moisture, and food soil stressing pumps, seals, and electronics.
- 10 to 12 years is the typical average lifespan for a GE dishwasher
- Heavy daily use can shorten lifespan; light use can extend it
- Hard water and poor cleaning habits accelerate wear on the sump, spray arms, and heater
- Small leaks that go unchecked often lead to bigger failures
- Replacing a few wear parts on time can prevent secondary damage
Quick “wear item” checklist for GDF535PGR5WW
If performance drops, these are common parts to inspect or replace on this model.
- Dishwasher drain pump WD19X25461 (won’t drain, standing water)
- GE dishwasher spray arm, lower WD22X33499 (poor cleaning, no spray pattern)
- GE dishwasher heating element WD05X35098 (not drying, cool wash water)
- Dishwasher tub gasket WD08X23476 (leaks at the door or tub seam)
- Dishwasher door latch lock WD01X29878 (won’t start, stops mid-cycle)
What to expect by age
| Dishwasher age | What’s common | Best action |
|---|---|---|
| 0 to 5 years | Minor clogs, loading or detergent issues | Clean filters, verify water temp, improve loading |
| 6 to 9 years | Drain or wash performance decline | Inspect spray arms, sump area, drain path |
| 10 to 12 years | Pumps, heater, seals, controls show wear | Replace key parts or compare repair vs replace |
| 13+ years | Multiple failures become more likely | Plan replacement if repairs stack up |
Why it matters
Knowing the typical lifespan helps us decide whether a symptom is likely a simple maintenance issue or a sign of end-of-life wear. Catching problems early (especially draining and leaking) protects the motor, control board, and wiring from moisture damage.
For cycle-time expectations that can affect perceived “wear,” use how long is a dishwasher cycle.
Last updated: February 2026
Can I replace dishwasher parts myself?
Yes, for the GE GDF535PGR5WW dishwasher, we can usually replace many common parts ourselves with basic hand tools, especially mechanical items like spray arms and door latches. For electrical diagnosis or leak-related repairs, we still DIY the swap, but we troubleshoot carefully and test step-by-step.
Good DIY repairs vs. better left to a pro
Typically DIY-friendly
- Replacing a spray arm (for poor cleaning or no spray)
- Replacing a door latch or strike (for “won’t start” because the door won’t latch)
- Replacing a dishrack roller/bracket (for racks that bind or fall off track)
- Replacing a tub gasket (for minor leaks at the door opening)
Usually more advanced
- Replacing control boards or harnesses (requires careful wiring and safe handling)
- Replacing pumps or sump assemblies (more disassembly, leak risk if seals are mis-seated)
- Replacing the water valve (plumbing connection and leak checks)
Parts we see replaced most often on this model
If your symptom matches, starting with the correct part saves time.
| Symptom | Common DIY check | Part that may be needed |
|---|---|---|
| Won’t start, door feels loose | Verify latch engages strike | Dishwasher door latch lock WD01X29878 or dishwasher door latch strike WD13X10071 |
| Not cleaning well | Inspect spray arm holes for clogs | GE dishwasher spray arm, lower WD22X33499 or GE dishwasher spray arm, middle WD22X33498 |
| Not draining | Check for blockage, then pump | Dishwasher drain pump WD19X25461 |
DIY safety and prep checklist
- Shut off power at the breaker (dishwashers are hard-wired or plugged in under the sink).
- Turn off the water supply valve under the sink.
- Pull the dishwasher out only as far as needed; protect the floor and water line.
- Take photos of wire connections before disconnecting anything.
- After reassembly, run a short cycle and check for leaks underneath.
Why it matters
Dishwasher repairs are often straightforward, but a small wiring mistake or a mis-seated seal can cause repeat failures or leaks. Using the right part and a careful test run helps the GE GDF535PGR5WW get back to normal quickly.
For troubleshooting help before you buy parts, use GE dishwasher error codes.
Last updated: February 2026
How to remove dishwasher control panel GE?
On the GE dishwasher model GDF535PGR5WW, we remove the control panel by opening the door, taking out the inner-door screws, separating the inner door from the outer door, then releasing the control panel tabs so the panel can lift off and unplug from the harness.
Before you start (safety and prep)
- Turn off power at the breaker (dishwashers use 120 VAC).
- Open the door and support it so it does not drop or twist.
- Use a towel to protect the stainless or painted surfaces.
- Keep screws grouped by location; lengths can vary.
- Take a quick photo of wire routing before unplugging anything.
Steps to remove the control panel (typical for this GE design)
- Open the door and locate the screws around the perimeter of the inner door.
- Remove the inner-door screws (leave the hinge-area screws for last if present).
- Separate the inner door liner from the outer door; lift or slide the inner panel as needed to disengage tabs.
- Release the control panel: press the locking tabs along the top edge of the control panel and lift the panel away.
- Disconnect wiring: unplug the user interface connector(s) and set the control panel aside.
What to check while the panel is off
- Loose or corroded connectors at the UI.
- Pinched wires near the door hinge area.
- Moisture tracks or residue that can cause intermittent button response.
- Broken latch alignment that prevents normal operation.
Common related parts for this model
| Symptom | Part to consider | What it affects |
|---|---|---|
| Buttons dead or erratic | Configured ui control board WD21X33549 | Touchpad/UI response |
| No response, intermittent power | Ac harness WD21X32679 | Power and signal connections |
| Won’t start unless you push hard | Dishwasher door latch lock WD01X29878 | Door-closed switch input |
| Door won’t catch consistently | Dishwasher door latch strike WD13X10071 | Latch alignment |
Why it matters
The control panel houses the user interface and wiring connections; removing it correctly prevents broken tabs, stripped screws, and damaged harness connectors that can create “won’t start” or “no response” problems.
Last updated: February 2026





