 Owner’s manual
 Error Codes



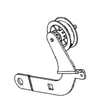
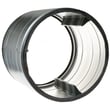
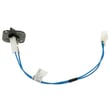

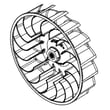
How to replace GE dryer sensor?
On the GE GFD55ESSN1WW dryer, the “sensor” most people mean is the moisture-sensing bars inside the drum area; replacing it is a straightforward access-and-swap job once power is disconnected. Use the GFD55ESSN1WW owner's manual to confirm panel access and cycle behavior before you start.
Before you start (safety and prep)
- Unplug the dryer (or switch off the breaker) before servicing.
- If you have a gas version, shut off the gas supply valve before opening panels.
- Work with the drum empty and the lint screen removed.
- Take a quick photo of wire routing and connector positions.
- Have a Phillips screwdriver and slip-joint pliers available.
How to replace the moisture sensor (typical steps)
- Disconnect power and pull the dryer forward for access.
- Open the door and locate the moisture sensor bars (usually near the lint filter housing or on the front bulkhead inside the drum opening).
- Remove the front access area as needed (lint screen housing and/or front panel screws, depending on configuration).
- Disconnect the sensor wiring (often a small harness). If your harness is damaged or loose, replace the sensor rod harness WE08X29688.
- Remove the sensor assembly (screws or clips) and install the new one in the same orientation.
- Reassemble panels, restore power, then run a sensor dry cycle to confirm normal operation.
Quick diagnosis: is it really the sensor?
| Symptom | Common cause | What we check first |
|---|---|---|
| Clothes overdry or cycle ends too soon | Dirty sensor bars | Clean bars with rubbing alcohol and a soft cloth |
| Sensor cycles act “random” | Loose/broken harness | Inspect connector fit; consider sensor rod harness WE08X29688 |
| Dryer will not start | Door not detected | Test the door switch WE04X34281 and door strike alignment |
Why it matters
The moisture sensor helps the dryer stop at the right dryness level. A dirty sensor, a loose connector, or a failed harness can make sensor dry cycles run too long, shut off early, or behave inconsistently, which wastes energy and can stress fabrics.
Last updated: February 2026
Is GFD55ESSN1WW stackable?
Yes. The GE GFD55ESSN1WW dryer is designed to be stacked on a compatible GE front-load washer when you use the correct stacking hardware. For safe, stable installation, we recommend following the stacking instructions in the GFD55ESSN1WW owner's manual.
What you need to stack it correctly
To stack this dryer, plan on these basics:
- A compatible GE front-load washer (stacking is washer-specific)
- The correct GE stacking kit for this platform (commonly GFA28KITN)
- A solid, level floor and enough overhead clearance
- Proper venting materials (rigid or UL-listed flexible metal ducting)
- A second person to help lift and position the dryer safely
Quick compatibility and safety checks
Before you stack, we recommend confirming these items:
- Washer model compatibility: stacking kits fit specific washer and dryer platforms
- Electrical and vent routing: make sure the vent will not kink or crush behind the stacked set
- Leveling: the washer must be level first; the dryer stacks on top of that base
- Fasteners and brackets: use only the kit hardware, not generic screws
Stacking overview (what the install typically involves)
Stacking is straightforward, but it must be done in the right order:
- Position and level the washer in its final location.
- Install the stacking brackets per the manual.
- Lift the dryer onto the washer and secure it to the brackets.
- Reconnect venting and power, then run a short test cycle.
Stacking vs side-by-side: what changes
| Setup | Pros | Watch-outs |
|---|---|---|
| Stacked | Saves floor space | Harder vent routing, lifting required |
| Side-by-side | Easier access and service | Uses more floor space |
Why it matters
A dryer that is stacked without the correct kit can shift during operation, increase vibration, and stress the cabinet and door alignment. Using the approved stacking method helps keep the drum, belt path, and airflow system operating normally.
Last updated: February 2026
What is the life expectancy of a GE dryer?
A GE dryer typically lasts 10 years. With consistent care on your GE GFD55ESSN1WW, many owners get longer service life by keeping airflow strong (lint screen and venting) and addressing wear items like the belt and idler before they cause bigger damage; see the GFD55ESSN1WW owner’s manual for the maintenance schedule.
Typical lifespan and what changes it
Most dryers land in a similar range, but these factors move the needle the most:
- Vent restriction (long runs, crushed duct, clogged wall cap) increases heat and run time
- Lint screen habits (clean every load; never run without it)
- Load size (overloading strains the drive system and drum support)
- Installation quality (kinks in transition duct, poor airflow)
- Preventive service (annual interior and exhaust duct cleaning by qualified service personnel)
Maintenance that extends life (high impact)
The GFD55ESSN1WW manual calls out airflow and cleaning as key. We recommend:
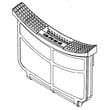
- Clean the lint screen every load; replace a damaged screen such as the dryer lint screen WE16X32537
- Inspect and clean the exhaust ducting at least once a year
- Use rigid metal duct when possible; avoid crushed or kinked transition duct
- Wipe spills off the cabinet and keep pretreat products away from the control panel
- Have the interior and exhaust duct cleaned yearly by qualified service personnel
Common wear items vs. what you’ll notice
| Symptom | Likely area | Example part for this model |
|---|---|---|
| Squealing, thumping, drum not turning smoothly | Belt/idler/drum support | Dryer idler assembly WE03X30657 |
| Long dry times, overheating, cycling heat | Airflow or thermostats | Dryer blower thermostat WE04X29714 |
| Dryer will not start when door closes | Door switch/strike | Door switch WE04X34281 |
Why it matters
A dryer that runs hot or takes too long to dry wears out the heater, thermostats, motor, and drum support faster. Keeping airflow clear is the simplest way to protect performance and extend the service life of your GE dryer.
Last updated: February 2026
What is the most common problem with a GE dryer?
The most common GE dryer problem is poor drying performance: no heat or long dry times. On the GE GFD55ESSN1WW, the fastest wins are restoring airflow (clean lint screen and venting) and confirming the dryer has full power, since a tripped breaker can let the drum tumble but stop heating (see the GFD55ESSN1WW owner's manual).
Quick checks we recommend first (5 to 10 minutes)
- Clean the lint screen before every load; never run the dryer without the filter in place.
- Check the exhaust vent path for restriction (crushed flex duct, lint buildup, blocked hood).
- Verify the dryer is on the correct cycle and heat setting (Auto vs Timed, heat level selected).
- For electric models, reset both breakers or replace both fuses; some dryers tumble with only one side of power.
- Avoid overloading; large loads dry slower and can trap moisture.
What the symptoms usually point to
| Symptom | Most common cause | What to do next |
|---|---|---|
| Tumbles but no heat | House breaker/fuse issue, heat circuit problem | Reset both breakers; then move to heater/thermostat checks |
| Takes too long to dry | Restricted exhaust airflow | Inspect and clean the exhaust ducting at least yearly |
| Lint on clothes | Lint screen full, sorting/overloading | Clean screen each load; reduce load size |
Parts that commonly relate to these issues
If airflow and power check out, heating and temperature control parts are frequent culprits on electric dryers.
- Dryer heater assembly WE11X29790 (no heat or weak heat)
- Dryer blower thermostat WE04X29714 (temperature regulation issues)
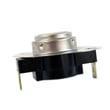
- Dryer outlet backup thermostat WE04X10190 (overheat protection trips)
Why it matters
Restricted venting and a dirty lint screen make the dryer run hotter and longer, which increases wear on the heater circuit and safety thermostats. Keeping airflow strong is the simplest way to prevent “no heat” and “long dry time” complaints.
Last updated: February 2026
Where to find part number on GE dryer?
On your GE dryer model GFD55ESSN1WW, we find the model and serial tag (the sticker you use to match parts) most often on the inside of the dryer door opening or on the door frame. Once you have that tag info, you can match the correct replacement part number with confidence using the GFD55ESSN1WW owner's manual.
What to look for on the ID tag
The tag usually lists several identifiers; the most important ones for ordering parts are:
- Model number (example: GFD55ESSN1WW)
- Serial number (helps confirm production series)
- Electrical ratings (volts/amps, useful for power cord and heating issues)
- Manufacturing date code (sometimes shown)
Common GE dryer label locations
If you do not see the sticker right away, check these typical spots in this order:
- Inside the door opening on the front panel
- On the door frame (left or right side)
- Behind the lint screen housing area (visible when the door is open)
- On the rear panel (less common, but possible)
Why the model number matters for parts
GE often uses similar-looking parts across multiple dryer families, but mounting points, wiring connectors, and firmware can differ. Matching the model number first helps us avoid ordering the wrong component.
| What you have | What it’s used for | Example part you might match on this model |
|---|---|---|
| Model number | Ensures correct fit and wiring | Door switch WE04X34281 |
| Serial number | Confirms version/production run | Control board or user interface selection |
| Symptom (noise, no heat, no start) | Targets the right system | Heater, thermostat, idler, motor |
Quick tip for ordering the right part
Before you place an order, we recommend:
- Write down the full model number exactly as shown
- Take a clear photo of the tag for reference
- Compare the part name and ID to your symptom (for example, a door that will not start the cycle can point to a door switch)
Why it matters
Using the correct model tag information prevents returns and downtime, especially on electrical parts like a door switch, heater assembly, or main control board.
Last updated: February 2026





