

Where to find part number on GE dryer?
On a GE electric dryer like model GTD58EBSV1WS, the model and serial tag is typically the fastest way to identify the correct replacement part number; it’s usually located around the door opening (on the door frame) or just inside the door.
- Open the dryer door and check the door frame (cabinet front) near the latch area.
- Look on the inside edge of the door itself.
- Check the front panel just inside the door opening.
- If you don’t see a tag, inspect the rear panel area for an ID label.
For accurate GE parts lookup, we use these fields:
- Model number (example: GTD58EBSV1WS)
- Serial number (helps confirm production run)
- Electrical rating (volts/amps, sometimes listed)
- Optional codes (revision or engineering codes, if shown)
Dryers don’t usually have one single “part number” printed on the cabinet for every component. Instead, you use the model number to find the correct part number for what you’re replacing.
| What you have | What it’s used for | Example for this model |
|---|---|---|
| Model number | Identifies the exact dryer version | GTD58EBSV1WS |
| Part ID / part number | Identifies a specific replacement part | GE dryer drum belt WE03X29897 |
GE often uses similar-looking parts across multiple dryer series; using the exact model number from the tag helps prevent ordering a belt, heater, thermostat, or switch that does not match your GTD58EBSV1WS configuration.
Last updated: February 2026
How to remove front panel of GE front load dryer?
To remove the front panel on your GE electric dryer model GTD58EBSV1WS, we typically lift the top, remove the screws securing the front panel, then disconnect the door switch wiring and any harness clips before lifting the panel off the lower retaining tabs.
- Unplug the dryer (or switch off the breaker) before opening any panels.
- If the dryer is hardwired, shut off power at the breaker and confirm the drum light and controls are off.
- Protect the floor and cabinet edges; the front panel can scratch easily.
- Have a container ready for screws so nothing gets lost.
- Disconnect power.
- Remove the top panel screws (commonly at the back edge), then slide the top back slightly and lift it up.
- Locate the front panel mounting screws near the top inside corners (left and right) and remove them.
- Support the front panel with one hand while you disconnect wiring:
- Unplug the connector for the door switch (often routed to the front panel).
- Release any wire harness clips attached to the front panel.
- Lift the front panel up and off the lower tabs or locating pins, then pull it forward and set it aside.
| Item you see | What to do | Why it matters |
|---|---|---|
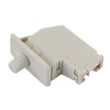
| Door switch connector | Unplug it before pulling the panel away | Prevents wire damage and broken terminals |
| Harness clips/retainers | Pop them out gently | Keeps wiring from tearing |
| Lint duct/chute overlap | Watch for tight fit at the bottom | Avoids cracking plastic parts |
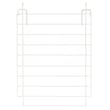
If the front panel is bent, rusted, or the mounting points are broken, the correct replacement for this model is the dryer front panel WE20X25260.
Removing the front panel correctly prevents broken harness connectors, misaligned drum support parts, and air leaks that can cause long dry times and overheating.
For more dryer maintenance tips that help prevent repeat issues, use our how to clean and maintain your clothes dryer guide.
Last updated: February 2026
How to replace GE dryer sensor?
On the GE GTD58EBSV1WS electric dryer, the most commonly replaced “sensor” is the moisture sensor (used for Auto/Sensor Dry cycles). Replacing it is usually a straightforward front-access repair: unplug the dryer, open the cabinet area needed, swap the sensor, then reassemble and test a timed cycle.
- Unplug the dryer (or switch off the breaker); this is a 240V appliance.
- Let the dryer cool completely if it was running.
- Protect the floor and edges; sheet metal can be sharp.
- Take a quick photo of wire locations before disconnecting anything.
- If you smell burning or see melted wiring, stop and have the harness checked.
- Disconnect power.
- Access the front area where the sensor mounts (commonly near the lint screen housing or inside the front drum area).
- Remove the mounting screws and pull the sensor forward.
- Transfer wires one at a time to the new sensor (match terminals exactly).
- Reinstall the sensor, reassemble panels, and restore power.
- Run a Timed Dry test first; then verify Sensor Dry operation.
For this model, the moisture sensor is the correct starting point: dryer moisture sensor WE1M575.
| Symptom | Most likely “sensor” part | What you’ll notice |
|---|---|---|
| Clothes overdry or cycle ends too soon | Moisture sensor | Sensor/Auto cycles act erratic |
| Dryer shuts off from overheating | High-limit thermostat | Hot cabinet, repeated shutoffs |
| Heat cycles oddly, temperature swings | Thermistor | Inconsistent heat, long dry times |
- Clean the lint screen and confirm strong airflow at the outside vent.
- Check for crushed, kinked, or excessively long venting.
- Inspect the lint chute for buildup.
- If heat is missing, test the heater circuit components.
Helpful reading: dryer not drying clogged lint screen, dryer takes a long time to dry.
A working moisture sensor helps the GTD58EBSV1WS stop at the right dryness level, which prevents overdrying, reduces wrinkles, and improves energy efficiency.
Last updated: February 2026
How to reset GE dryer heating element?
On the GE GTD58EBSV1WS electric dryer, there is no button or “reset” on the heating element itself. The practical reset is to remove power (breaker off, then back on) and correct the airflow or heating circuit issue that caused the heater to stop warming.
- Turn the dryer OFF.
- Switch the dryer’s circuit breaker OFF for 1 minute.
- Switch the breaker ON.
- Run a timed dry cycle with heat for 3 to 5 minutes.
- If it still does not heat, stop and troubleshoot before repeated restarts.
Most “no heat” complaints come from airflow restrictions or a failed heat-safety component, not the heater coil needing a reset.
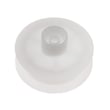
- Clogged lint screen or lint buildup in the chute (check GE dryer lint screen WE03X23881)
- Crushed, kinked, or long vent run
- Blocked exterior vent hood
- Failed heater circuit parts such as:
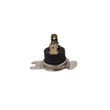
- Dryer high-limit thermostat WE04X26139
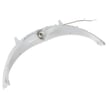
- GE dryer heater assembly WE11X21156
| Check | What you want | What it points to if wrong |
|---|---|---|
| Airflow at outside vent | Strong, steady flow | Vent restriction, lint blockage |
| Cycle selection | Timed dry with heat | Sensor cycle confusion, low load |
| Power supply | Proper 240V supply (2 hot legs) | One breaker leg tripped, wiring issue |
| Drum turning | Drum rotates normally | Belt/idler issue can mimic heat problems |
Restricted venting can overheat the heater housing and trip heat-limit protection. Fixing airflow first helps the GE dryer heat normally and prevents repeat failures of the heating element, thermostat, or thermistor.
If your control is showing a code, use these guides to narrow the cause:
Last updated: February 2026