Owner’s manual




What do you call the plate in the microwave?
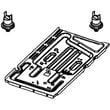
In a Kenmore 40185059210 microwave/hood combo, the “plate” is commonly called the turntable (or turntable tray). It’s the removable glass plate that rotates during cooking to help heat food more evenly; see the naming and care details in the 40185059210 owner's manual.
Common names you might hear
- Turntable
- Turntable tray
- Glass tray (everyday term)
- Rotating plate
What the turntable does (and why it matters)
The turntable keeps food moving through the microwave energy pattern, which reduces hot and cold spots. If it is missing, dirty, or not seated correctly, you can get uneven heating and longer cook times.
Quick checks if the plate is not turning
- Make sure the plate is seated flat on the roller ring (if your model uses one).
- Clean the plate and the floor of the cavity; grease can make the plate slip.
- Confirm the coupler is engaged and not stripped.
- Avoid oversized dishes that rub the walls and stall rotation.
- If the motor hums but nothing turns, inspect the coupler and motor.
Turntable-related parts you may need
| Symptom | Most likely area | Example part for this model |
|---|---|---|
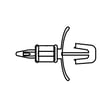
| Plate does not rotate | Coupler not engaged or worn | Microwave turntable motor coupler DE67-00236A |
| No rotation, no motor sound | Turntable motor or wiring | (Motor is model-specific; confirm in the parts list) |
Why it matters
A properly working turntable helps your Kenmore microwave cook more evenly and prevents repeated reheating that can dry out food.
Last updated: February 2026
How do I reset a Kenmore microwave?
To reset your Kenmore microwave/hood combo model 40185059210, we recommend starting with a simple power reset (unplug or switch off the breaker briefly) to clear a control glitch; then restore power and re-set the clock. For model-specific button sequences, use the 40185059210 owner's manual.
Quick reset options (start here)
- Power reset: Unplug the microwave or turn off the circuit breaker.
- Wait 60 seconds (longer is fine).
- Restore power.
- Set the clock and test a short cook cycle with a cup of water.
- If the display is locked, try holding STOP/CLEAR (or CANCEL) for about 3 seconds to toggle control lock.
If the microwave still acts “stuck”
These steps address the most common symptoms after a surge or keypad confusion.
- If the keypad beeps but won’t start, press STOP/CLEAR once and re-enter the time.
- If the fan or light behavior seems odd, verify the vent fan and cooktop light settings are not set to an automatic mode.
- If the unit is completely dead after reset, check the kitchen outlet and breaker first.
What to expect after a reset
| What you did | What resets | What usually does not reset |
|---|---|---|
| Unplug/breaker reset | Control board “glitches”, clock | Saved preferences on some models |
| STOP/CLEAR hold | Control lock (if equipped) | Power to the unit |
Why it matters
A reset is the fastest way to clear a temporary control-board or keypad logic issue without replacing parts. If the microwave repeatedly needs resets, that points to an underlying power, door-switch, or control problem.
When to stop and get service
Microwaves contain high-voltage components that can retain a dangerous charge even when unplugged.
- Burning smell, arcing, or smoke
- Loud humming with no heat
- Repeated tripping of the breaker
For heating problems after a reset, our Why is my microwave not heating guide helps you narrow down likely causes.
Last updated: February 2026
How many cubic feet is a Kenmore Model 40185059210 microwave?
The cooking capacity (cubic feet) for Kenmore microwave/hood combo model 40185059210 is listed in the product specifications for that exact model. The fastest way to get the correct number is to check the specifications section in the 40185059210 owner's manual.
Where to find the capacity
Look for these common labels in the specs pages of the manual:
- “Oven capacity”
- “Cavity capacity”
- “Capacity (cu. ft.)”
- “Specifications” or “Product specifications”
- Sometimes listed near electrical ratings (volts/amps) and exterior dimensions
What “cubic feet” means on an over-the-range microwave
Cubic feet is the interior cavity volume, not the outside size. It helps you judge what cookware fits and how much space you have above the turntable.
| Spec you see | What it describes | Why you care |
|---|---|---|
| Capacity (cu. ft.) | Interior cooking space | Fit for plates, bowls, casserole dishes |
| Exterior dimensions | Outside width/height/depth | Cabinet fit and mounting clearance |
| Turntable diameter | Size of rotating tray | Largest plate that rotates freely |
Quick checks to avoid mix-ups
Capacity varies by model, so confirm you are reading the correct document for your unit.
- Match the model number on the microwave’s rating label to 40185059210
- Use the manual’s “Specifications” section rather than a similar-looking Kenmore model online
- If the unit was replaced in the past, re-check the rating label before ordering parts
Why it matters
Knowing the correct capacity helps when comparing replacement microwaves, choosing microwave-safe cookware that rotates properly, and confirming the unit fits your cooking needs.
Last updated: February 2026
Are Kenmore microwaves good?
Kenmore microwaves are a strong choice for everyday cooking because they typically deliver solid heating performance and useful features for the price. For your Kenmore 40185059210 microwave/hood combo, “good” also depends on correct venting setup, clean filters, and normal door and control operation; use the 40185059210 owner’s manual for model-specific use and care.
What “good” means for a microwave/hood combo
A microwave/hood combo has two jobs: heat food consistently and move smoke and odors away from the cooktop.
- Even heating on reheat and defrost
- Smooth door closing and reliable latches
- Vent fan that actually captures steam and smoke
- Filters that are easy to remove and clean
- Replacement parts availability for common wear items
Quick performance checks you can do
These simple checks tell you if your 40185059210 is performing like it should:
- Heat test: warm 1 cup of water for 2 minutes; it should be noticeably hot
- Vent test: run the hood fan on high while boiling water; steam should pull toward the filters
- Door feel: door should close smoothly and sit square with the frame
- Noise: fan and turntable should sound steady, not grinding or rattling
Strengths vs common complaints
| Area | Typical strength | Common complaint |
|---|---|---|
| Heating | Strong on high power | Weak heating when a high-voltage part is failing |
| Controls | Helpful presets and timers | Keypad wear or intermittent response |
| Venting | Convenient built-in hood | Poor capture if filters or ducting are restricted |
If it seems “not good,” common fixable causes
- Not heating: high-voltage components can be involved; see why is my microwave not heating
- Poor venting: grease buildup, blocked ducting, or a saturated charcoal filter
- Overheating shutdowns: a thermostat or thermal cut-off may be opening to protect the unit
Parts often involved in these symptoms
- Microwave magnetron OM75P-21-ESGN (heating)
- Microwave high-voltage diode DE91-70063D (heating)
- Microwave charcoal filter DE63-00367H (recirculating venting)
Why it matters
Good performance means safer, more consistent cooking and better airflow over your range; keeping filters clean and following the manual’s venting and operating guidance prevents weak heating and repeat problems.
Last updated: February 2026