 Owner’s manual

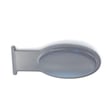
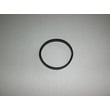
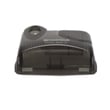
How to change the belt on a Kenmore vacuum?
To change the belt on a Kenmore vacuum power nozzle (such as the Kenmore Pet Powermate used with model 116C85PDEE3V022), we remove the nozzle cover, lift out the brush roll, swap the belt onto the motor shaft and brush roll, then reinstall everything so the brush spins freely. See the 116C85PDEE3V022 owner's manual for your exact latch and screw locations.
- Unplug the vacuum from the outlet.
- Disconnect the wand and hose from the power nozzle.
- Work on a flat surface with good lighting.
- Have a Phillips screwdriver ready (some versions also use a flat-blade for tabs).
- Keep track of screws and clips so the cover seals tightly.
- Remove the bottom plate or nozzle cover: release the latches or remove the screws holding the baseplate.
- Lift out the brush roll: note the orientation of the end caps and any height-adjust parts.
- Remove the old belt from the brush roll and motor drive shaft.
- Install the new belt:
- Loop belt around the motor shaft first.
- Stretch belt over the brush roll pulley.
- Reinstall the brush roll: seat both ends fully in their holders.
- Reinstall the cover/baseplate and secure all clips or screws.
- Test: with the nozzle still off the carpet, briefly power on to confirm the brush roll turns smoothly.
- Belt is off-center on the brush roll pulley.
- Brush roll is jammed with hair or thread; clean the bristles and end caps.
- End caps are reversed or not seated, causing drag.
- Baseplate is pinching the brush roll because a tab is not fully latched.
| Check | What “good” looks like | What to fix if not |
|---|---|---|
| Brush roll by hand | Turns with light resistance | Reseat end caps, clear debris |
| Belt tracking | Stays on pulley center | Reinstall belt, align brush roll |
| Nozzle sound | Smooth, even pitch | Stop and recheck for rubbing |
A worn or stretched belt reduces agitation, so pet hair and grit stay in the carpet. Replacing the belt restores brush roll speed, improves pickup, and helps protect the brush roll bearings from overheating.
Last updated: February 2026
How to open Kenmore Progressive Vacuum?
To open a Kenmore Progressive canister vacuum (including the Kenmore Pet Powermate setup for model 116C85PDEE3V022), we typically release the bag or dust compartment latch, lift the cover, then remove the bag or bin by pulling the cardboard tab straight out of the bag mount. For model-specific latch locations, use the 116C85PDEE3V022 owner's manual.
- Unplug the vacuum before opening any cover.
- Locate the bag compartment door release (usually on the top or side of the canister).
- Press the release and lift the cover fully.
- Grab the cardboard tab on the vacuum bag.
- Pull the tab straight out of the bag mount to release the bag.
- Lift the bag out of the chamber and dispose of it.
Most “won’t open” issues are caused by a mis-seated cover, a stuck latch, or a bag that is not fully seated.
- Make sure the cover is not being pushed sideways by the hose or cord.
- Press down lightly on the cover while pressing the release; then lift.
- Check for debris around the latch area and door edges.
- If the bag is overfilled, it can press against the door; remove it carefully once open.
- Do not pry with a screwdriver; that commonly cracks the cover or latch.
| Area | What it holds | What you do there |
|---|---|---|
| Bag compartment | Vacuum bag, pre-motor filter (varies) | Open door, remove/replace bag |
| Powerhead (Pet Powermate) | Brush roll and belt (varies) | Separate access steps from canister |
| Cord rewind area | Power cord spool | Do not open for routine service |
Opening the compartment the right way prevents broken latches, reduces dust leaks, and keeps airflow strong so the Kenmore vacuum maintains suction and protects the motor.
Last updated: February 2026
How to replace bag in Kenmore vacuum?
The Kenmore 116C85PDEE3V022 is a Pet Powermate tool/attachment, so the vacuum bag is not replaced on this attachment. You replace the bag in the compatible Kenmore canister vacuum (the main unit) that the Pet Powermate connects to; follow the bag-compartment steps in your canister’s instructions.
- Unplug the vacuum.
- Open the canister’s bag compartment door.
- Pull the full bag off the bag dock by the cardboard/plastic collar.
- Slide the new bag collar fully onto the bag holder until it sits flat.
- Tuck the bag into the compartment so it is not pinched.
- Close and latch the door; it should close without forcing.
- Bag is not fully seated on the bag dock
- Bag is overfilled or torn
- Pre-motor or exhaust filter is clogged
- Hose, wand, or floor nozzle is blocked
- Bag door is not fully latched (air leak)
| Item | Where it’s replaced | Why it matters |
|---|---|---|
| Vacuum bag | Canister vacuum body (main unit) | Captures debris and protects the motor |
| Pet Powermate attachment | At the floor tool end | Provides agitation and pickup on carpet |
Replacing the bag in the canister keeps airflow strong to the hose and Pet Powermate, improves cleaning performance, and reduces strain on the vacuum motor.
Use the canister vacuum’s model number (not the Pet Powermate model) to choose the correct bag style and installation steps. The 116C85PDEE3V022 owner’s manual is useful for identifying the attachment and related parts, but bag replacement is handled by the canister vacuum.
Last updated: February 2026
What model is my Kenmore vacuum?
Your Kenmore vacuum’s model number is printed on the model and serial number plate (often on the back of the canister, the underside of an upright, or near the bag or dust cup area). For the matching Pet Powermate tools and attachments, use model 116C85PDEE3V022 and confirm the exact label format in the 116C85PDEE3V022 owner’s manual.
Check these common locations first (the plate is usually a sticker or metal tag):
- Back or bottom of the main vacuum body (canister or upright base)
- Under the handle release area on some uprights
- Inside the bag door or near the bag collar (bagged models)
- Near the dust cup latch or filter cover (bagless models)
- On the power nozzle or Pet Powermate head (tool model may be listed separately)
Kenmore model numbers can include letters and numbers; copying it exactly prevents wrong-fit parts.
- Write it exactly as shown (example: 116C85PDEE3V022)
- Include all letters, numbers, and any suffixes
- If you see both a vacuum model and a tool or attachment model, record both
- Use the serial number only for manufacturing info; parts lookup is driven by the model number
| Item on the label | What it’s used for | What to do with it |
|---|---|---|
| Model number | Identifies the correct parts and diagrams | Use it for parts matching |
| Serial number | Production tracking | Keep it for service records |
Tools and attachments (like a Pet Powermate) can have their own fit requirements. Using the exact model number helps us match the correct hose ends, wands, nozzles, and accessory connections for your Kenmore vacuum.
Last updated: February 2026
Where to find model number on Kenmore canister vacuum?
On a Kenmore canister vacuum (including the Kenmore Pet Powermate model 116C85PDEE3V022), the model number is printed on the model and serial number plate. You will typically find that plate on the canister body, not on the hose or floor nozzle; confirm the exact location in the 116C85PDEE3V022 owner's manual.
Look for a sticker or metal plate with MODEL and SERIAL fields in these spots:
- Back or underside of the canister (near the wheels)
- Behind the bag door or dust compartment cover
- Near the power cord rewind area
- On the bottom of the canister base
- Near the handle area where the hose connects to the canister
The label usually includes a few key identifiers. Use this quick guide when you find it:
| Label item | What it’s used for | Example format |
|---|---|---|
| Model number | Matching the correct parts and diagrams | 116C85PDEE3V022 |
| Serial number | Identifying production run details | Letters and numbers |
| Electrical rating | Verifying power requirements | Volts/amps |
Kenmore canister vacuums often have similar-looking tools and attachments, but the model number is what ensures you get the correct fit for items like the hose, wand, floor nozzle, and Pet Powermate attachment components.
- Copy the model number exactly as printed (include all letters and numbers)
- Take a clear photo of the label for future reference
- If the label is worn, use a flashlight at an angle to make the print easier to read
Last updated: February 2026
Why won't my Kenmore vacuum brush spin?
If the brush on your Kenmore Pet Powermate model 116C85PDEE3V022 will not spin, the most common causes are a worn or slipped belt, hair and debris jammed in the brush roll, or a clogged air path that prevents the nozzle from engaging properly. Use the steps in the 116C85PDEE3V022 owner’s manual to confirm the correct disassembly and checks.
- Unplug the vacuum before servicing the nozzle.
- Remove the nozzle bottom plate and clear hair, string, and debris from the brush roll.
- Inspect the belt for cracks, glazing, stretching, or breakage.
- Make sure the belt is seated on the motor shaft and brush roll (not twisted).
- Spin the brush roll by hand; it should turn smoothly without binding.
- Check for a clog in the nozzle neck or wand that reduces airflow.
| What you see | What it points to | What to do next |
|---|---|---|
| Brush roll is packed with hair | Brush is jammed | Clean ends and bristles; verify end caps spin freely |
| Belt is loose, shiny, or broken | Belt is worn or slipped | Replace belt; reinstall with correct routing |
| Brush roll is hard to turn by hand | Seized bearings/end caps | Clean end caps; replace brush roll if it still binds |
| Suction seems weak at the nozzle | Clog or airflow restriction | Clear nozzle, wand, and hose; clean filters if applicable |
A non-spinning brush reduces carpet cleaning and can overheat the nozzle drive components. Clearing obstructions and keeping the belt and brush roll in good condition helps your Kenmore Power-mate style attachment maintain agitation and pickup.
If you end up checking wiring or a switch in the nozzle, use a meter the right way: how to use a multimeter to test electrical parts video.
Last updated: February 2026