

Where to find part number on GE dryer?
On a GE electric dryer like model GTD84ECPN2DG, the part number is printed on the part itself, and the model and serial tag is typically located inside the dryer door opening on the door frame. Use the model number first, then match the exact part ID/number when ordering.
- Inside the door opening on the cabinet door frame (model and serial tag)
- On the back panel of the dryer cabinet (sometimes a secondary label)
- On the part itself (stamped, printed, or on a small sticker)
- In the control console area (some components have labels behind the panel)
- On serviceable parts you can remove easily, such as the lint screen
When you find the model tag, write down the full model number (GTD84ECPN2DG) and serial number. Then, confirm the exact part ID/part number from the component you are replacing.
| What you found | What it’s used for | Example on this model page |
|---|---|---|
| Model number | Identifies the correct parts list for your dryer | GTD84ECPN2DG |
| Serial number | Helps confirm production run details | (varies by unit) |
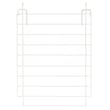
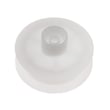
| Part number / part ID | Identifies the exact replacement component | GE dryer lint screen WE03X23881 |
- Look for a sticker or stamp on a flat surface of the part (not on moving edges)
- Wipe lint and dust off before reading; use a flashlight
- Take a photo and zoom in; letters like O and 0 can look similar
- Match the full ID exactly (including X’s and digits)
GE dryers can use different versions of the same style component across production runs. Using the model number GTD84ECPN2DG plus the exact part ID helps ensure fit, wiring compatibility, and proper heating and airflow performance.
Last updated: February 2026
How to replace GE dryer sensor?
On the GE GTD84ECPN2DG electric dryer, “sensor” usually means the moisture sensor (dryness sensor bars) or a temperature sensor (thermistor). Replacement is typically a front-access repair: unplug power, open the cabinet, swap the sensor, then reassemble and test a timed-dry cycle.
- Unplug the dryer (240V); do not rely on the control being off.
- If the dryer is stacked or tight to a wall, pull it forward to avoid stressing the vent.
- Confirm the symptom first: overdrying, underdrying, or error code behavior.
- Clean lint buildup and confirm strong airflow; poor venting can mimic a bad sensor.
- If the issue is “won’t start,” a door switch problem is more likely than a sensor.
Use this quick guide to pick the right part and location.
| What you’re calling a “sensor” | Common symptom | Typical location | Example part for this model |
|---|---|---|---|
| Moisture sensor | Auto cycles end too soon or run too long | Inside the drum area near the lint filter housing/front bulkhead | Dryer moisture sensor WE1M575 |
| Thermistor (temperature sensor) | No heat, heat shuts off early, temperature issues | On the blower housing or heater duct area | Dryer thermistor WE4M448 or dryer heating element control thermistor WE4M398 |
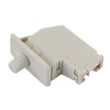
| Door switch (not a sensor, but often confused) | Dryer won’t run when door is closed | In the door frame area | Dryer door switch WE04X28977 |
- Disconnect power.
- Remove the top panel and/or front panel as needed to access the sensor area.
- Take a photo of wire routing and connector positions.
- Disconnect the wire harness from the sensor.
- Remove mounting screws or release locking tabs; remove the sensor.
- Install the new sensor, reconnect wiring, and reassemble panels.
- Run a timed-dry test; then verify an auto cycle dries normally.
On GTD84ECPN2DG, the moisture sensor and thermistors help the control board regulate heat and cycle length. A failed sensor can cause long dry times, overdrying, or inconsistent results, even when the heating element is good.
For code-related symptoms, use GE cleanspeak dryer error codes to match the display behavior to the most likely sensor or wiring issue.
Last updated: February 2026
How to reset GE dryer heating element?
On the GE GTD84ECPN2DG electric dryer, there is no “reset” button on the heating element itself. The practical reset is to remove power at the breaker for about 1 minute, restore power, then run a timed dry cycle to see if heat returns.
- Turn the dryer OFF.
- Switch the dryer’s circuit breaker OFF (or unplug the cord if accessible).
- Wait 60 seconds.
- Turn the breaker ON (or plug back in).
- Run Timed Dry, High Heat for 3 to 5 minutes.
- Check for warm air at the exhaust and normal drum operation.
A power cycle only clears some control glitches. No-heat is usually caused by a power supply issue, airflow restriction, or a failed heating circuit component.
- Confirm 240V supply: many electric dryers will run on 120V but will not heat if one leg of power is missing.
- Check airflow: clean the lint screen and make sure the vent is not crushed or clogged.
- Inspect the heating circuit parts (common no-heat suspects):
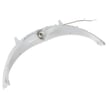
- GE dryer heater assembly WE11X21156
- Dryer heating element WE11M10001
- Thermostat hi limit WE04X30381
- Dryer heating element control thermistor WE4M398
| Symptom | Power cycle helps? | More likely cause |
|---|---|---|
| Dryer heats sometimes, then stops | Sometimes | Thermistor, control, airflow |
| Dryer runs but never heats | Rarely | 240V supply, element, hi-limit thermostat |
| Dryer stops when door opens | No | Door switch |
Running the GTD84ECPN2DG with poor airflow or a weak heating circuit can cause long dry times and repeated overheating shutdowns. Fixing venting and replacing the correct GE parts restores normal heat and protects the heater housing and controls.
Last updated: February 2026
What is the most common problem with a GE electric dryer?
The most common problem we see with a GE electric dryer like model GTD84ECPN2DG is no heat or long dry times caused by restricted airflow (lint buildup or a vent issue) or a failed heating circuit component (heating element, thermistor, or hi-limit thermostat).
- Clean the lint screen every load; replace it if it is torn or warped (see GE dryer lint screen WE03X23881).
- Check airflow at the outside vent hood; it should be strong and steady.
- Inspect the vent path for kinks, crushed flex duct, or heavy lint buildup.
- Avoid overloading; packed loads block airflow through the drum.
- Use a timed dry cycle once to compare performance versus sensor cycles.
| Symptom | Most likely cause | What we recommend first |
|---|---|---|
| Runs but no heat | Heating element or hi-limit thermostat opened | Test the heater circuit; consider dryer heating element WE11M10001 and thermostat hi limit WE04X30381 if failed |
| Takes too long to dry | Vent restriction or lint screen restriction | Clean venting and lint screen; review dryer takes a long time to dry |
| Stops mid-cycle or overheats | Poor airflow causing high temperatures | Fix venting first; then check temperature sensors like dryer thermistor WE4M448 |
| Won’t start when door closes | Door switch not closing electrically | Check the latch and switch; replace dryer door switch WE04X28977 if it tests bad |
Electric dryers depend on steady airflow to carry moisture out. When airflow drops, temperatures rise, drying slows, and safety controls can open to protect the dryer. Fixing the venting often restores heat and prevents repeat failures of thermostats and sensors.
Replace a component after you confirm:
- The venting is clear and the blower is moving air.
- Power supply is correct for an electric dryer (a partial power loss can cause “runs but no heat”).
- The suspect part fails a continuity or resistance test.
For display or diagnostic issues, we use GE code references like GE cleanspeak dryer error codes.
Last updated: February 2026