Owner’s manual



How do I tell what model Electrolux washer I have?
On your Electrolux washer, the model number is on the model and serial tag located in the door opening area. For model ELFW7537AT0 specifically, open the washer door and look around the inner door frame (the cabinet opening) for the label that lists both the model and serial number.
Where to look on ELFW7537AT0
Check these common label locations on this model:
- Along the door opening on the front panel (often near the hinge side)
- On the cabinet opening behind the door (near the door latch area)
- On the inside edge of the door frame where the door seals against the boot
For a visual reference and other model-specific details, use the ELFW7537AT0 use & care manual.
What to write down (and why)
When you find the tag, record these items exactly as shown:
- Model number (example: ELFW7537AT0)
- Serial number (unique to your washer)
- Series info (Electrolux series can be embedded within the model number)
Quick reference table
| Item on the tag | What it’s used for | Why it matters |
|---|---|---|
| Model number | Parts lookup and diagrams | Ensures the right fit for parts like a door boot or drain pump |
| Serial number | Service identification | Helps match production details for troubleshooting |
| Series (within model) | Feature set reference | Explains why controls/options can vary across similar-looking units |
Why it matters
Electrolux model numbers can look very similar, but small differences can change compatible parts and procedures. Using the exact model number helps us match the correct washer door lock, water inlet valve, or door boot the first time.
Last updated: January 2026
How do I clean the rubber seal on my Electrolux front load washer?
On the Electrolux ELFW7537AT0, clean the rubber door seal (door boot) by wiping the folds dry, removing debris, then washing the gasket with mild soap and water; finish by drying thoroughly and leaving the door ajar to prevent odor and mildew. For model-specific care guidance, use the ELFW7537AT0 use & care manual.
Step-by-step: cleaning the door seal (door boot)
- Power off the washer and open the door.
- Pull back the gasket folds and remove coins, hair, lint, and small items.
- Wipe first (dry pass): use paper towels or a dry microfiber cloth to lift slime and residue.
- Wash: use warm water with a small amount of dish soap; scrub the folds with a soft cloth or soft brush.
- Rinse wipe: wipe again with clean water to remove soap residue.
- Dry completely: dry the folds and the bottom lip where water sits.
- Air it out: leave the door slightly open between loads.
What to use (and what to avoid)
- Use: mild dish soap, warm water, microfiber cloths
- Use for stubborn spots: a soft toothbrush for the folds and drain holes
- Avoid: abrasive pads (can damage the gasket surface)
- Avoid: mixing bleach with other household chemicals
If the seal is torn, warped, or won’t stay clean
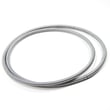
If you see rips, the gasket is pulling away, or you have recurring leaks at the door, the door boot may need replacement on the ELFW7537AT0. The compatible replacement is the washer door boot 5304505004.
| Symptom | Likely cause | Next step |
|---|---|---|
| Musty smell at door | Moisture trapped in folds | Clean, dry, leave door ajar |
| Visible black spots | Mildew on gasket surface | Clean more frequently, run Clean Washer cycle |
| Water leaking at door | Torn or mis-seated boot | Inspect boot; replace if damaged |
Why it matters
The door seal is designed to hold water in during tumbling; if residue and moisture stay in the folds, odors and mildew build quickly and can eventually lead to leaks.
Last updated: January 2026
What are the common problems with Electrolux washing machines?
Common Electrolux washing machine problems on the ELFW7537AT0 typically fall into a few buckets: draining issues, door lock or latch problems, vibration/noise during spin, and fill or temperature complaints. Many are caused by maintenance items (filters, hoses, leveling) before any major part failure; see the troubleshooting and care guidance in the ELFW7537AT0 use & care manual.
Most common issues we see (and what to check first)
- Won’t drain or drains slowly: check the drain hose for kinks and clean the pump filter area; a clogged filter can mimic a bad pump.
- Won’t spin or stops mid-cycle: reduce load size, redistribute items, and confirm the door fully latches.
- Door won’t lock/unlock: inspect the strike and latch area for cracks, looseness, or detergent buildup.
- Leaks at the front: check the door gasket for tears, debris, or a loose clamp.
- Excessive vibration or banging: verify the washer is level and sitting solid on all four feet.
Parts that commonly relate to these symptoms (ELFW7537AT0)
If basic checks do not resolve the issue, these model-compatible parts are often involved:
| Symptom | Likely area | Example model-compatible part |
|---|---|---|
| Slow/no drain | Pump or filter restriction | Washer drain pump filter 5304505165 |
| Door won’t lock | Latch/lock system | Washer door lock assembly 5304514774 |
| Front leak/odor at door | Door gasket/boot | Washer door boot 5304505004 |
| Won’t fill or fills slowly | Water valve/screens | Frigidaire washer water inlet valve assembly 5304528029 |
Why it matters
Ignoring early symptoms can turn a simple cleaning or leveling adjustment into repeat error codes, longer cycle times, wet loads, or water damage. Catching issues early also helps protect high-wear components like the drain pump, door lock, and door boot.
Quick prevention checklist
- Run the Clean Washer cycle as recommended in the manual.
- Leave the door slightly open between loads to reduce odor and gasket buildup.
- Check pockets to prevent coins, pins, and lint from clogging the drain path.
- Use the right detergent amount to reduce oversudsing and residue.
- Keep the washer level to reduce vibration-related wear.
Last updated: January 2026
What are the parts of a front load washing machine?
On the Electrolux ELFW7537AT0 front-load washer, the main parts include the wash drum and outer tub, door and door seal components, water fill and drain components, the drive system, and the electronic controls. For model-specific component names and safety notes, use the ELFW7537AT0 use & care manual.
Main parts you will typically find
These are the core assemblies most front-load washers (including the ELFW7537AT0) use to wash, rinse, and spin:
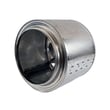
- Wash system: stainless steel wash drum (spin basket) and outer tub
- Door system: door, door latch/lock, door strike, and door boot (rubber gasket)
- Water fill system: water inlet valve assembly, inlet hoses, dispenser drawer and housing
- Drain system: drain pump, pump filter, tub-to-pump hose, drain hose
- Drive system: drive motor and related mounting/hardware
- Controls: electronic control board and user interface
ELFW7537AT0 examples of real replacement parts
If you are identifying parts for repair or ordering, these are examples from the ELFW7537AT0 parts list:
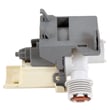
- Washer drain pump assembly 5304514775 (moves water out during drain and spin)
- Washer drain pump filter 5304505165 (catches lint, coins, and debris before the pump)
- Frigidaire washer water inlet valve assembly 5304528029 (controls hot/cold water entering the washer)
- Washer door boot 5304505004 (seals the door opening to prevent leaks)
- Washer electronic control board 5304529897 (controls cycles, motor, valves, and sensors)
Quick “what it does” guide
| Part group | What it does | Common symptom when it fails |
|---|---|---|
| Water inlet valve and dispenser | Fills and routes water/detergent | Won’t fill, fills slowly, wrong water temp |
| Drain pump and filter | Drains water from the tub | Won’t drain, loud buzzing, water left in drum |
| Door lock/boot/strike | Locks door and seals water | Door won’t lock, leaks at front |
| Motor and controls | Tumbles and spins the drum | No spin, no tumble, error codes |
Why it matters
Knowing the major assemblies helps you troubleshoot faster (leak vs no-drain vs no-spin) and match the correct Electrolux-compatible replacement part to your exact washer model.
Last updated: January 2026
What is the life expectancy of an Electrolux washer?
Electrolux washers, including model ELFW7537AT0, typically last 10 to 15 years with normal household use. Lifespan is most affected by load size, detergent choice (HE detergent), and routine care like cleaning the door gasket and running the Clean Washer cycle in the ELFW7537AT0 use & care manual.
What helps an ELFW7537AT0 washer reach 10 to 15 years
- Use HE detergent and avoid over-sudsing (extra suds strain the drain system)
- Don’t overload; heavy loads increase wear on the suspension and drive system
- Leave the door slightly open between loads to help the boot and drum dry
- Clean the dispenser drawer and run the Clean Washer cycle regularly
- Check pockets to reduce coins, screws, and debris that can damage the drain pump filter
Common wear items that can shorten lifespan
Front-load washers often fail early due to leaks, vibration wear, or drainage problems. If you’re troubleshooting those issues on ELFW7537AT0, these model-compatible parts are commonly involved:
- Washer door boot 5304505004 (door gasket that can tear or grow mildew)
- Washer drain pump filter 5304505165 (clogs can cause slow drain and pump strain)
- Washer drain pump assembly 5304514775 (can fail after repeated clogs or heavy use)
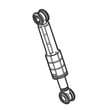
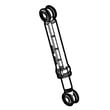
- Washer single stage shock absorber 137412601 (wear can increase vibration during spin)
Quick “repair vs replace” guideline
| If your washer is… | Usually makes sense to… | Why |
|---|---|---|
| Under 8 years old | Repair | Most major components still have useful life |
| 10 to 15 years old | Compare costs | Multiple worn parts can add up |
| Over 15 years old | Replace more often | Efficiency and reliability typically drop |
Why it matters
A realistic life expectancy helps you decide whether to invest in parts like a door boot, drain pump, or shock absorbers, or plan for replacement before a breakdown causes leaks or downtime.
Last updated: January 2026