

What is the lifespan of a GE dryer?
A GE electric dryer like model PTD70EBPT1DG typically lasts 10 years. With good airflow, routine cleaning, and prompt repair of wear items (belt, glides, heater controls), many dryers reach 12 to 15 years of service.
What affects dryer life the most
- Vent restriction (long runs, crushed flex duct, clogged hood)
- Overloading the drum and running back-to-back heavy cycles
- Heat stress from poor airflow (can shorten heater and thermostat life)
- Wear parts aging (belt, idler pulley, drum glides, felt seal)
- Moisture sensor and thermistor accuracy (overheating or overdrying)
Maintenance that extends lifespan
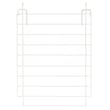
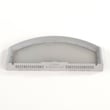
- Clean the lint screen every load; replace a damaged screen such as the GE dryer lint screen WE03X23881.
- Vacuum lint from the lint chute and around the blower area periodically.
- Keep the exhaust duct short, smooth, and unobstructed; confirm strong airflow outside.
- Avoid overfilling; leave room for clothes to tumble freely.
- If drying times increase, follow the steps in dryer takes a long time to dry before parts replacement.
Common “end-of-life” symptoms and likely fixes
| Symptom | Most common cause | Typical fix type |
|---|---|---|
| Runs but no heat | Heater circuit issue | Electrical test, heater/thermostat service |
| Loud squeal or thump | Belt/idler/glides | Replace wear parts |
| Long dry times | Venting or blower restriction | Vent cleaning, airflow correction |
| Stops mid-cycle | Overheat condition | Venting correction, thermostat checks |
Why it matters
A dryer’s lifespan is mostly an airflow and heat-management story. Keeping lint moving out of the machine reduces overheating, shortens cycle times, and protects high-cost components like the heater assembly and motor.
Last updated: February 2026
Is there a lint trap in GE washer dryer combo?
Yes. GE laundry units use a lint filter system, but the location and cleaning method depend on whether you have a true washer-dryer combo or a separate dryer like the GE PTD70EBPT1DG electric dryer. On PTD70EBPT1DG, lint is captured at the lint screen and must be cleaned before or after every load.
Where to find the lint trap (and what it’s called)
For the GE PTD70EBPT1DG dryer, the “lint trap” is the lint screen. If your question is about a GE washer-dryer combo, many combo designs use a lint filter that’s accessed differently than a standard dryer screen.
- GE PTD70EBPT1DG electric dryer: clean the lint screen every load
- Washer-dryer combo: look for a removable lint filter (often near the door opening or behind a small access panel)
- If drying performance drops, treat it like a lint restriction until proven otherwise
A common PTD70EBPT1DG lint-filter part is the GE dryer lint screen WE03X23881.
How to clean it correctly
- Remove the lint screen and peel lint off by hand
- If fabric softener residue is present, wash the screen with warm water and a soft brush; let it dry fully
- Check the lint screen housing for buildup and vacuum it out
- Confirm the exhaust vent is not crushed, kinked, or clogged
- If the dryer still takes too long, inspect the blower area and ducting for lint accumulation
Quick symptoms guide
| Symptom | Most common lint-related cause | What to check first |
|---|---|---|
| Long dry times | Restricted airflow | Lint screen and vent path |
| Clothes feel hot but damp | Poor exhaust flow | Lint screen housing and duct |
| Burning smell | Lint buildup near heater/duct | Stop use and clean venting |
Why it matters
A clean lint filter and clear venting keep airflow high, which helps the heater cycle normally, shortens dry times, and reduces overheating stress on parts like thermostats and the heater assembly.
For more airflow and drying-time tips, use our dryer takes a long time to dry guide.
Last updated: February 2026
What is the most common problem with a GE dryer?
The most common problem we see with GE electric dryers like model PTD70EBPT1DG is poor drying performance (no heat or long dry times). In most cases, the root cause is restricted airflow (lint screen or venting) or a failed heating circuit part such as the heating element, thermistor, or hi-limit thermostat.
Quick checks that fix the most calls
- Clean the lint screen every load; if it is damaged or warped, replace the GE dryer lint screen WE03X23881.
- Check airflow at the outside vent hood; weak airflow points to a clogged or crushed vent.
- Keep vent length short and avoid plastic or foil flex duct.
- Run a timed dry cycle on high heat; if it never warms, focus on the heating circuit.
- If the dryer stops heating mid-cycle, suspect an overheat condition (usually airflow) or a limit device.
Most common symptoms and likely causes (PTD70EBPT1DG)
| Symptom | Most likely cause | What to do first |
|---|---|---|
| Runs but no heat | Failed heating element or heat control issue | Inspect/test the dryer heating element WE11M10001 and wiring; verify strong airflow |
| Takes too long to dry | Vent restriction or lint buildup in ducting | Clean venting and lint path; confirm vent hood opens fully |
| Stops heating, then heats again | Overheating from poor airflow; limit device cycling | Correct venting first; then evaluate the thermostat hi limit WE04X30381 |
| Won’t start when door is closed | Door switch not closing electrically | Check the dryer door switch WE04X28977 and door latch alignment |
Why it matters
Restricted airflow is the number one driver behind “no heat” complaints because it makes the dryer run hotter internally, which can trip safety controls and shorten the life of heating parts. Fixing airflow first prevents repeat failures and improves dry times.
Helpful DIY references
- Use electric dryer wont heat troubleshooting video for a step-by-step no-heat diagnostic flow.
- If your dryer displays a code, check GE cleanspeak dryer error codes for common GE dryer fault meanings.
Last updated: February 2026
Is GE dryer a good dryer?
Yes. GE electric dryers like model PTD70EBPT1DG are a solid, dependable choice for everyday laundry because they typically deliver consistent drying performance, straightforward controls, and widely available replacement parts when normal wear items (belt, glides, heater) eventually need service.
What “good” means for a dryer
A good dryer is one that dries evenly, runs safely, and is economical to maintain over time. For a GE electric dryer, that usually comes down to airflow, heat control, and drum support parts.
Common strengths we see with GE electric dryers:
- Consistent heat when the venting is clear and the heater circuit is healthy
- Simple, serviceable design with readily available parts
- Good day-to-day performance on mixed loads
- Reasonable ownership cost because many repairs are straightforward
- Strong parts support for wear items like belts, glides, and thermostats
What to watch for (and how to prevent problems)
Most “bad dryer” complaints are actually airflow or maintenance issues, not the brand.
- Clean the lint screen every load; replace a damaged screen such as the GE dryer lint screen WE03X23881
- Keep the exhaust vent run short and free of lint buildup
- Avoid overloading; it reduces airflow through the drum
- If drying slows down, check for a restricted vent before replacing parts
- If the dryer runs but won’t heat, the heater circuit parts are common suspects
Quick symptom-to-part map (PTD70EBPT1DG)
| Symptom | Common cause | Example part for this model |
|---|---|---|
| Runs but no heat | Failed heater or heat control | GE dryer heater assembly WE11X21156, dryer heating element control thermistor WE4M398 |
| Takes too long to dry | Vent restriction, weak airflow | Dryer blower wheel WH16X34317 (if airflow is poor and vent is clear) |
| Won’t start when door closes | Door switch not closing circuit | Dryer door switch WE04X28977 |
| Squealing or thumping | Belt or idler wear | Dryer drum belt WE03X33648, dryer idler pulley WE03X31620 |
Why it matters
A dryer’s “quality” shows up over years of use: stable temperatures (protects fabrics), strong airflow (shorter dry times), and easy-to-source parts (lower repair cost). Keeping lint and venting under control is the biggest factor in long-term satisfaction.
For troubleshooting help that applies to many GE dryers, use GE cleanspeak dryer error codes.
Last updated: February 2026