Installation guide
 Owner’s manual
 Error Codes


Does Kenmore make gas ranges?
Yes. Kenmore makes gas ranges, including the Kenmore 79071462700 gas range; these models are designed for everyday cooking with multiple surface burners and an oven with electronic controls. For feature details and safe operation, use the 79071462700 owner's manual.
What you can expect from a Kenmore gas range
Many Kenmore gas ranges (including the 79071462700 series) are built around practical, serviceable features for cooking and baking.
- Multiple surface burner valves/knobs for heat control
- Oven interior light and adjustable oven racks
- Self-cleaning oven features on many models
- Storage drawer or warmer drawer (varies by model)
- Anti-tip safety design that must be installed correctly
Safety and installation basics (important for gas ranges)
We recommend following the installation and grounding steps in the 79071462700 installation guide, especially for anti-tip setup and electrical grounding.
| Topic | What to do | Why it matters |
|---|---|---|
| Anti-tip bracket | Verify the rear leveling leg is secured in the bracket | Helps prevent tip-over injuries |
| Grounding | Use a properly grounded 3-prong outlet | Reduces shock risk |
| LP conversion | Use the included LP conversion kit when converting to LP | Ensures correct fuel delivery |
When a “Kenmore gas range” question is really a parts question
If you are asking because you need a replacement part for your Kenmore 79071462700, match parts by the full model number on the ID plate (typically on the right side of the oven front frame area, inside the storage or warmer drawer compartment).
Common examples for this model include:
- Range oven temperature sensor 316490000 (helps regulate oven temperature)
- Range oven light bulb 316538904 (restores oven light)
- Range bake burner 316404400 (supports oven baking heat)
Why it matters
Kenmore is a brand name used across multiple manufacturers and designs; using the exact model number 79071462700 is what ensures you get the right manual instructions and the correct gas range parts.
Last updated: February 2026
How long should a Kenmore gas stove last?
A Kenmore gas range like model 79071462700 typically lasts 15 years with normal household use. Regular cleaning to prevent grease buildup, correct installation and grounding, and using features like self-clean properly all help you reach that lifespan; see the 79071462700 owner's manual.
What affects lifespan the most
- Cleaning habits: Grease buildup can create overheating and flare-up risks; clean the range regularly, especially under surface burner areas.
- How you cook: Frequent high-heat broiling and long bake times add wear to igniters, valves, and controls.
- Ventilation: Using a vent hood and keeping it clean reduces grease and heat stress around the range.
- Electrical stability: The electronic control can be affected by cold storage; the range should be above 32°F (0°C) for at least a few hours before powering on.
- Door sealing and heat retention: A worn door seal can make the oven run longer to maintain temperature.
Maintenance checklist (simple, high impact)
- Wipe spills and grease after cooking; do not let grease accumulate.
- Use the self-clean cycle correctly; remove items not listed for self-clean before starting.
- Keep burner heads and ports clear so flames stay even.
- Replace failed consumables promptly (for example, an oven light bulb).
- Confirm the range is properly grounded and plugged into a 3-prong receptacle per the 79071462700 installation guide.
Common “wear” items vs. longer-life components
| Item | Typical replacement frequency | What you notice when it’s failing |
|---|---|---|
| Oven light bulb | Every few years | Oven light won’t turn on |
| Igniters/sensors | 5 to 10 years | Slow ignition, temp swings, no heat |
| Gas valve/control | 10+ years | No bake/broil, erratic operation |
Parts that often restore performance
If the oven temperature seems inconsistent, the oven temperature sensor is a common fix point; for this model, see frigidaire range oven temperature sensor 316490000.
Why it matters
A range that is clean, properly vented, and operating with accurate temperature control cooks more evenly, preheats faster, and avoids unnecessary run time that shortens the life of parts like igniters, the control board, and the gas valve.
Last updated: February 2026
How to take the top off a Kenmore gas range?
To remove the cooktop (top) on your Kenmore gas range model 79071462700, we start by removing the grates and burner pieces, then releasing any mounting screws so the main top can lift up. Always shut off gas and power first for safe access. See the 79071462700 installation guide for shutoff and handling basics.
Before you start (safety and prep)
- Turn all surface burner knobs to OFF.
- Shut off the gas supply at the external manual shut-off valve.
- Unplug the range (or switch off the circuit breaker).
- Let the cooktop cool completely; remove cookware.
- Protect the countertop with a towel or cardboard to prevent scratches.
Basic cooktop removal steps (most Kenmore/Frigidaire-built gas ranges)
- Lift off the grates.
- Remove burner caps and burner heads (keep them grouped by burner).
- Look for mounting screws near burner bases or along the front lip; remove them if present.
- If your model uses burner tube or igniter brackets, remove the screws securing those brackets.
- Lift the main top from the front edge and raise it like a hood; support it so it does not drop.
What can stop the top from lifting
| What you see | Most common cause | What we do next |
|---|---|---|
| Top lifts slightly then binds | Hidden screws under burner heads | Recheck for screws at each burner |
| Top lifts but feels tethered | Igniter wiring harness clipped to the top | Free clips carefully; do not pull wires |
| Smell of gas after moving range | Gas line disturbed | Shut gas off and check joints with liquid leak detector |
Why it matters
Removing the top gives access to surface burner igniters, wiring, and the manifold area. Doing it carefully prevents stripped screws, damaged igniter leads, and gas leaks.
Parts that are commonly handled during this job
- Range surface burner head 316212400 (often removed for access and cleaning)
- Range screw 316240600 (common fastener used on panels and brackets)
Last updated: February 2026
What model is my Kenmore gas range?
Your Kenmore gas range model number is printed on the appliance’s identification plate. On model 79071462700, the plate is located on the right side of the oven front frame, inside the storage drawer or warmer drawer compartment; confirm the exact format in the 79071462700 owner's manual.
Where to look on the range
Check these common label locations (start with the drawer area first):
- Inside the storage drawer or warmer drawer opening, on the right side of the oven front frame
- Behind the lower panel or storage drawer area (you may need to pull the drawer out)
- Along the oven door jamb or front frame area when the oven door is open
- On the back of the range near the vent area
What the model number looks like
Kenmore range model numbers are typically a series of digits; for this family you may see a prefix like 790. followed by additional numbers.
| What to record | Why it matters | Example format |
|---|---|---|
| Model number | Ensures diagrams and parts match your exact range | 79071462700 (may appear as 790.XXXXXXX) |
| Serial number | Helps match production changes and date codes | Letters and numbers |
Tips to avoid ordering the wrong part
Use these quick checks before buying parts like an igniter, burner head, or control board:
- Copy the model number exactly as printed (include any dots or leading digits)
- Record the serial number too; it can matter for revisions
- Match the part description to your symptom (surface burner vs. oven burner)
- Compare your part visually to the diagram and mounting style
- Use the model number when searching parts to avoid “close match” results
Why it matters
Kenmore ranges often have multiple versions that look similar. Using the exact model number (and serial number) ensures you get the correct Kenmore gas range parts, correct wiring layout, and the right installation and safety instructions.
Last updated: February 2026
Why is my Kenmore gas oven clicking but not lighting?
If your Kenmore gas range model 79071462700 clicks but the oven will not light, the most common causes are a weak oven igniter that is not drawing enough current to open the oven gas valve, or a gas supply/regulator issue. Normal ignition includes a 30 to 60 second delay before the burner lights.
What “normal” ignition looks like
When you set BAKE, current flows to the igniter and it should glow; once it gets hot enough, the oven gas valve opens and the burner lights. A short delay is expected.
| What you observe | Most likely meaning | What to do next |
|---|---|---|
| Clicking, no flame after 60 seconds | Igniter weak or gas not reaching burner | Check gas supply and igniter performance |
| Igniter glows, then shuts off, no flame | Igniter not hot enough to open valve | Replace igniter (common fix) |
| No glow, no heat | Power/control issue | Check outlet, clock/time set, wiring |
Quick checks we recommend (safe, no disassembly)
- Confirm the range has electrical power (the oven ignition system needs power).
- Make sure the time of day is set; some models will not run the oven until the clock is set.
- Verify the gas supply is ON and the regulator valve is ON.
- Wait a full 60 seconds after turning the oven on; ignition is not instant.
- If the oven was recently cleaned, allow time for any moisture to dry out.
Parts that commonly fix “clicks but won’t light”
If power and gas supply are correct, these parts are frequent culprits on gas ovens:
- Oven temperature sensing issues can cause odd heating behavior; see frigidaire range oven temperature sensor 316490000.
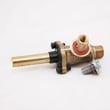
- The oven gas valve can fail to open even with a calling-for-heat signal; see range oven gas valve 316404901.
- If the oven lights but won’t hold temperature, the sensor is a top suspect.
Why it matters
A weak igniter can keep clicking without ever opening the gas valve, so the oven never lights even though the control is calling for heat. Also, the oven’s electric ignition system must not be operated during a power failure; reset controls to OFF and restore power first (details in the 79071462700 installation guide).
Last updated: February 2026