


How do I find the right GE part number?
For your GE dryer model NTX62E8ST0WW, the right part number comes from matching the model number to the exact part shown in the parts diagram and list. Once you confirm the symptom (won’t start, won’t heat, noisy, not drying), we use the matching component name and part ID to ensure fit and compatibility.
- Find the model tag and confirm it reads NTX62E8ST0WW (letter and number order matters).
- Identify the problem area (heat, drum turning, door/start, airflow).
- Match the part by name + part ID, not by looks alone.
- Compare your old part’s label numbers to the listing (when accessible).
- If multiple versions exist, match by dryer configuration and mounting style.
| Symptom | Likely part category | Example part for NTX62E8ST0WW |
|---|---|---|
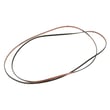
| Drum not turning, squealing | Belt or idler | GE dryer drum belt WE03X29897 |
| No heat or weak heat | Heater or thermostats | GE dryer heater assembly WE11X21156 |
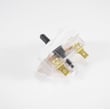
| Won’t start | Start/door circuit | Dryer push-to-start switch WE4M416 |
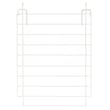
| Poor drying, lint issues | Lint screen/airflow | GE dryer lint screen WE03X23881 |
- Clean the lint screen and confirm strong airflow at the outside vent hood.
- Verify the door fully closes and the latch engages (a bad door switch can mimic bigger failures).
- For “no heat,” confirm the cycle and temperature settings are correct before replacing heating parts.
- For “won’t start,” confirm the dryer has power and the controls respond.
GE dryers often use similar-looking components across model families, but mounting points, wiring connectors, and kit revisions can differ. Matching by NTX62E8ST0WW plus the exact part ID reduces returns and gets your dryer running sooner.
For display or fault messages, we also use GE’s code lists to narrow the right component: GE gfd model series error codes.
Last updated: February 2026
How much does it cost to replace a heating element in a GE dryer?
For a GE NTX62E8ST0WW dryer, replacing the heating element typically costs about $100 to $350 total, depending on labor rates and whether you replace only the element or additional heat-related parts. The part cost alone is often the smaller portion of the bill.
- Heating element part: commonly $100 to $200+ for many electric dryers
- Labor: often 1 to 2 hours, depending on access and diagnosis time
- Service call/diagnostic fee: may be added if a technician visits
- Related parts: thermostats, wiring, or a heater assembly may be needed
- Vent cleaning: sometimes recommended if overheating or long dry times are involved
| Repair approach | What you replace | When it makes sense |
|---|---|---|
| Element-only repair | Dryer heating element WE11M10001 | Dryer runs but has no heat and the element tests open |
| Assembly-style repair | GE dryer heater assembly WE11X21156 | Heat system has multiple issues or you want a more complete swap |
| Overheat protection | Dryer high-limit thermostat WE04X26139 | Dryer overheats, shuts heat off, or repeatedly blows thermal protection |
- Confirm the dryer is electric heat related: a tripped breaker or poor power supply can mimic “no heat.”
- Check airflow first: a restricted vent can overheat the heater housing and damage the element.
- Test the element and thermostats: replace the failed component(s), not just the most common one.
- Consider age and condition: if multiple heat parts are failing, an assembly replacement can reduce repeat labor.
A failed heating element is a common cause of “runs but won’t heat,” but poor venting can cause repeat failures and higher repair costs. Fixing airflow issues at the same time helps protect the new element and improves drying performance.
Last updated: February 2026
What are common dryer part failures?
On the GE NTX62E8ST0WW dryer, the most common part failures usually fall into four areas: heat production, drum movement, airflow, and starting or control functions. These problems typically show up as no heat, no tumble, long dry times, or the dryer stopping mid-cycle.
- Dryer runs but won’t heat: failed heater, thermostat, or an overheat safety opening due to restricted venting
- Dryer won’t start: door switch, start switch, or timer/control issue
- Drum won’t turn (motor runs or hums): broken belt, seized idler, or drum support wear
- Squealing, scraping, thumping: worn drum glides, felt seal, or bearing components
- Long dry times / overheating: clogged lint screen, blocked exhaust duct, or lint buildup in the blower housing
The parts below are frequently involved in the symptoms above:
| Problem area | What fails most often | Example part for NTX62E8ST0WW |
|---|---|---|
| Drum rotation | Belt, idler pulley | GE dryer drum belt WE03X29897, dryer idler pulley WE03X31620 |
| Heating | Heating element or heater assembly | Dryer heating element WE11M10001, GE dryer heater assembly WE11X21156 |
| Safety/temperature | High-limit or safety thermostat | Dryer high-limit thermostat WE04X26139, dryer safety thermostat WE04X25194 |
| Starting | Door switch, push-to-start switch | Dryer door switch WE04X28977, dryer push-to-start switch WE4M416 |
- Clean the lint screen and confirm strong airflow at the outside vent hood
- Run a timed dry cycle; note whether the drum tumbles and whether heat is present
- Listen for a steady motor sound vs. a hum (often points to a stuck drum or belt/idler issue)
- Check the door closes firmly; a weak door switch can prevent starting
- If the dryer overheats or shuts off, inspect the vent path for kinks, crushing, or lint blockage
Many “failed part” symptoms are triggered by restricted airflow. Fixing venting and lint buildup first helps prevent repeat failures of heating components and thermostats, and it improves dry time and energy use.
For model-specific fault displays, we also use GE cleanspeak dryer error codes to match the code to the most likely circuit or component.
Last updated: February 2026
What is the life expectancy of a GE dryer?
A GE dryer like model NTX62E8ST0WW typically lasts 10 to 13 years with normal household use. Consistent airflow maintenance (lint screen and venting) and addressing wear parts early can push lifespan closer to the high end.
Most dryers fail early due to heat and airflow stress, not “age” alone. These factors have the biggest impact:
- Vent restriction (long runs, crushed flex duct, clogged exterior hood)
- Overloading or frequent heavy loads (towels, bedding)
- Heat cycling from poor airflow (overheating thermostats and heater)
- Worn drum support parts (belt, glides, idler) causing strain and noise
- Moisture and corrosion in laundry areas
Use this quick routine to keep your GE dryer running efficiently:
- Clean the lint screen every load; wash it with warm water occasionally to remove residue
- Check airflow at the outside vent; strong, steady flow matters
- Clean the vent duct at least yearly (more often with pets or long vent runs)
- Keep the dryer level to reduce drum and bearing wear
- Stop using the dryer if you smell burning or hear grinding; inspect before continued use
These parts commonly wear out before the dryer itself does:
| Symptom | Common wear item | Example part for NTX62E8ST0WW |
|---|---|---|
| Drum not turning, squealing | Drum belt or idler | GE dryer drum belt WE03X29897 |
| Thumping, scraping, poor drum support | Drum glides or bearing kit | Dryer drum bearing kit WE03X25314 |
| Long dry times, overheating | Lint screen or thermostats | GE dryer lint screen WE03X23881 |
A dryer that is clean, vented correctly, and not running overheated dries faster, uses less energy, and avoids expensive failures like heater damage or repeated thermostat trips.
Last updated: February 2026