Owner’s manual




How do I reset my LG dryer flow sensor?
On LG DLHC1455W, the “Flow Sense” alert clears after you restore proper airflow and then power-cycle the dryer. Clean the lint filter and airflow paths first, then unplug the dryer (or switch the breaker off) for 5 to 10 minutes and restart the cycle; the sensor rechecks airflow during operation.
Reset steps (in order)
- Turn the dryer off and remove all laundry.
- Clean the lint filter completely.
- Check and clean the air paths that commonly restrict airflow on ventless/heat pump dryers (lint buildup around grilles and internal passages).
- Unplug the dryer for 5 to 10 minutes (or turn the breaker off), then restore power.
- Run a timed cycle to confirm the alert stays off.
- If the alert returns, clean the moisture sensor surfaces inside the drum (buildup can affect sensor-based cycles).
What to clean on this model
Your DLHC1455W relies on steady airflow for efficient drying. The owner’s manual calls out routine cleaning that helps prevent airflow-related warnings.
| Area to check | What to do | How often |
|---|---|---|
| Lint filter | Remove lint and wash/dry if film is present | Every load |
| Cool air inlet grille | Vacuum to remove lint and dust | 3 to 4 times per year |
| Moisture sensor bars inside drum | Wipe with a dry acrylic sponge (no abrasives) | Regularly |
See the maintenance section in the DLHC1455W owner's manual for the exact locations and cleaning cautions.
If the dryer still pauses, runs long, or shows an error
Airflow and sensing issues can also show up as long dry times or cycle time changes on Sensor Dry cycles.
- Try a different cycle (some cycles use lower heat or different drying logic).
- Reduce load size and avoid overpacking.
- Confirm the door closes firmly; a failing door switch can interrupt operation (see dryer door switch EBF61496102 if the dryer acts like the door is opening).
- If an error code is displayed, match it to the code list and follow the recommended checks in LG hybrid dryer error codes.
Why it matters
Flow Sense is designed to protect performance and efficiency. When airflow is restricted, drying times increase, energy use goes up, and the dryer may stop to prevent overheating or poor drying results.
Last updated: February 2026
How long do LG heat pump dryers last?
Most LG heat pump dryers typically last 10 to 15 years with normal household use. For the LG DLHC1455W, lifespan depends most on airflow and routine cleaning; restricted airflow and heavy daily loads shorten life, while consistent maintenance helps the compressor, motor, and sensors run longer.
Typical lifespan and what affects it
- Usage frequency: multiple loads per day wears moving parts faster.
- Airflow and lint control: clogged lint paths increase run time and heat stress.
- Moisture management: keep the condenser area and drain path clear (heat pump models are sensitive to this).
- Electrical stability: power issues can stress the control board.
- Load habits: overloading strains the drum support and motor.
What we can confirm for DLHC1455W from the manual
Your DLHC1455W is designed with long-life core components; the warranty section in the DLHC1455W owner's manual lists extended parts coverage for key drive and heat pump components (parts-only after the first year).
Warranty coverage snapshot (from the manual)
| Component | Coverage length | Notes |
|---|---|---|
| Parts and labor | 1 year | Standard coverage period |
| Dryer drum | 3 years | Parts only |
| Dual inverter compressor | 10 years | Parts only |
| Inverter motor | 10 years | Parts only |
Maintenance that adds years (and saves drying time)
- Clean the lint filter every load.
- Periodically clean residue buildup; the manual notes airflow can drop if areas get clogged with fabric softener sheet residue.
- Keep the area around the dryer clean so intake airflow is not restricted.
- If cycles suddenly run longer, address airflow and sensor cleanliness before assuming a major failure.
Why it matters
Heat pump dryers are efficient, but they rely on steady airflow and clean heat-exchange surfaces. When airflow is restricted, the dryer runs longer, which increases wear on the compressor, motor, and electronic control board.
Last updated: February 2026
How to take the front off of a LG sensor dryer?
On the LG DLHC1455W dryer, the front panel comes off after you remove the mounting screws and release the panel from its top retaining tabs; support the panel as you pull it forward, then disconnect any wiring (such as the door switch harness) before lifting it away. For screw locations and panel handling details, use the DLHC1455W owner's manual.
Before you start (safety and prep)
- Unplug the dryer (or switch off the breaker) before removing any panels
- If the dryer is stacked, unstack it first; the front panel is awkward to handle
- Wear cut-resistant gloves; cabinet edges can be sharp
- Keep screws grouped by location so reassembly is straightforward
- Have a Phillips screwdriver ready (commonly required for LG cabinet screws)
Steps to remove the front panel
- Open the door and remove any screws that secure the front panel near the door opening (locations vary by revision).
- Remove the screws along the lower edge of the front panel (support the panel as the last screws come out).
- Pull the bottom of the front panel slightly forward.
- Lift the panel up to disengage it from the upper retaining tabs/clips.
- Disconnect the door switch wiring harness before fully separating the panel.
If the dryer will not start after reassembly
A loose or damaged door switch connection can prevent the dryer from running. Inspect the harness connection and the switch actuator alignment; replace the switch if it tests open when the door is closed.
| Symptom after reassembly | Most common cause | What to check first |
|---|---|---|
| Dryer will not start | Door switch circuit open | Door switch harness fully seated; switch mounting |
| Door will not latch smoothly | Front panel not seated | Top tabs engaged; panel flush to cabinet |
| Rattling/vibration | Missing/loose screws | Lower screws tightened evenly |
Parts that are commonly involved
- Dryer door switch EBF61496102 (if the harness is damaged or the switch fails)
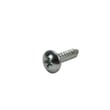
- Dryer screw 4000FD4191A (if cabinet screws are stripped or missing)
Why it matters
Removing the front panel correctly prevents broken retaining tabs, pinched wiring, and door alignment issues that can cause no-start problems or air leaks that increase dry time.
Last updated: February 2026
What is the most common problem with LG dryers?
The most common LG dryer problem is poor drying performance: the dryer does not heat, takes too long, or stops heating mid-cycle. On the LG DLHC1455W, the first checks are power supply, cycle selection (some cycles use little or no heat), and airflow and moisture-sensing conditions described in the DLHC1455W owner's manual.
Most common symptoms customers report
- Dryer runs but clothes stay damp (low or no heat)
- Drying time is much longer than normal
- Dryer starts, then stops or pauses unexpectedly
- Water leaks around the unit (hose or drain setup issue)
- Error codes or unusual beeping on the control panel
Quick checks that fix many “no heat” complaints
- Confirm power: A tripped breaker or blown fuse can leave the dryer running but not heating.
- Confirm the cycle uses heat: Some cycles default to unheated or air drying; switch to a heated cycle.
- Check for water handling issues (common on ventless/heat pump styles): Make sure the water container hose or optional drain hose is connected correctly.
- Clean moisture sensor area: Buildup can cause early shutoff or under-drying.
Common parts involved (when the issue is not settings or power)
| Symptom | Common cause | Example part for DLHC1455W |
|---|---|---|
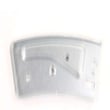
| Dryer will not start when door is closed | Door switch not closing electrically | Dryer door switch EBF61496102 |
| Erratic operation, dead panel, or repeated errors | Control not processing inputs correctly | Dryer electronic control board EBR89088904 |
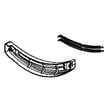
| Auto cycles end too soon or dry poorly | Moisture sensing area obstructed or damaged | Dryer moisture sensor grille MCK48435501 |
Why it matters
When an LG dryer “doesn’t heat,” the root cause is often something simple (power, cycle selection, airflow or moisture sensing). Fixing those first prevents unnecessary part replacement and gets drying performance back quickly.
Last updated: February 2026
Why is my LG dryer showing D?
On LG model DLHC1455W, a “D” message is typically tied to an airflow restriction warning (often shown as d80/d90/d95). The dryer can still run, but drying times increase and efficiency drops until you clear the lint and venting path; see the DLHC1455W owner's manual.
What “D” usually means (d80, d90, d95)
These codes indicate the dryer senses restricted airflow.
- d80: roughly 80% restriction
- d90: roughly 90% restriction
- d95: very severe restriction
- Expect longer dry times and higher energy use
- Clearing the restriction typically restores normal performance
What to check first (fast fixes)
- Clean the lint screen thoroughly; remove any fabric softener residue.
- Check the exhaust duct (if used) for kinks, crushed sections, or lint buildup.
- Inspect the outside vent hood for a stuck flap, lint mat, or bird nest.
- Reduce load size and avoid over-drying settings until airflow is restored.
- If the dryer is ventless/heat pump style, clean the areas your manual calls out for routine airflow maintenance.
Why it matters
Proper airflow is critical for efficient drying. LG notes that a lint filter clogged with lint or residue can reduce airflow enough to greatly increase drying time, even when the dryer otherwise seems to run normally.
Quick guide: symptoms vs. likely cause
| What you notice | Most likely cause | What to do |
|---|---|---|
| “D” or d80/d90/d95 shows up | Airflow restriction | Clean lint screen and vent path |
| Clothes take much longer to dry | Reduced airflow | Clear lint, check ducting and vent hood |
| Dryer runs but performance is poor | Restricted air movement | Restore airflow, then retest a Normal cycle |
When to look at a part
If the door is not closing consistently, the dryer may behave unpredictably during cycles. Check the door latch area and consider testing the dryer door switch EBF61496102 if the door switch is intermittent.
Last updated: February 2026