Owner’s manual


How to tell if a regulator is bad on a gas grill?
On the Kenmore 14616142210 gas grill, a failing regulator typically shows up as weak or uneven flames, a sudden drop in gas flow, trouble reaching cooking temperature, or repeated ignition problems. We also treat any gas odor or a loud rushing sound at the tank connection as a stop-use issue.
Quick signs the regulator is the problem
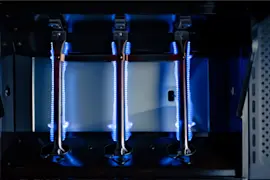
- Flames are low, weak, or uneven across burners.
- You get a sudden drop in gas flow (often after opening the tank valve quickly).
- The grill won’t heat up or takes much longer to preheat.
- You hear a rushing sound at the LP tank connection when opening the valve (turn gas off immediately).
- The regulator frosts during use (turn off the grill and LP cylinder valve immediately and do not use that cylinder).
What to check first (before replacing parts)
We see many “bad regulator” symptoms caused by connection or flow-safety issues at the LP tank.
- Turn all control knobs OFF.
- Confirm the regulator coupling nut is hand-tight and properly seated on the tank valve.
- Open the LP tank valve slowly.
- If flames are low: turn knobs off, wait 30 seconds, shut the LP tank valve, disconnect the regulator, reconnect, then perform a leak test.
For the exact connection and leak-test procedure for this model, use the 14616142210 owner's manual.
Leak test (soapy water) basics
Use a soapy solution on the connection points; bubbles indicate a leak.
- Test the tank valve to regulator connection
- Test the hose to regulator area
- Test any accessible fittings you disturbed
If you hear rushing gas when opening the tank valve, shut it off immediately and correct the connection before using the grill.
Normal vs. not normal (regulator noises and symptoms)
| What you notice | Usually means | What we recommend |
|---|---|---|
| Light humming or whistling | Often normal during operation | Keep using if flames are steady |
| Low flame after tank change | Excess-flow valve tripped | Reset by shutting off, reconnecting, and leak-testing |
| Regulator frosting | Cylinder problem | Stop use; close cylinder valve immediately |
Why it matters
A regulator controls gas pressure to the burners. When pressure is inconsistent, you can get poor heating, flare-ups, or unsafe leaks. Verifying the LP tank connection and performing a leak test helps you avoid replacing parts unnecessarily.
Last updated: January 2026
What is the average lifespan of a gas grill?
Most gas grills last 5 to 15 years; with consistent cleaning, safe storage, and timely replacement of wear parts, a Kenmore gas grill like model 14616142210 often stays reliable longer within that range. For model-specific care and safety practices, follow the 14616142210 owner's manual.
Typical lifespan ranges (what to expect)
- Budget grills: 2 to 5 years
- Mid-range grills: 5 to 10 years
- Heavier-duty grills (often stainless components): 10 to 15 years (sometimes longer with upkeep)
- High-use grills (frequent cooks, year-round exposure): trend toward the lower end of the range
| Grill situation | Typical outcome | What helps most |
|---|---|---|
| Stored outdoors, uncovered | Shorter lifespan | Covering and keeping it dry |
| Stored dry, cleaned regularly | Longer lifespan | Grease control and corrosion prevention |
| Hard to light or weak flame | Performance drops sooner | Cleaning burner/venturi area |
What shortens a gas grill’s life fastest
- Grease buildup leading to flare-ups and excess heat
- Corrosion from moisture, salt air, or leaving ash and grease in the firebox
- Clogged burner/venturi tubes (the manual warns spiders can nest and restrict gas flow)
- Running the grill with gas leaks or damaged hoses/regulator
- Storing with the LP cylinder connected in an unsafe location
How we recommend extending the life of model 14616142210
- Clean cooking grates and interior surfaces routinely; remove grease deposits
- Keep the grill in a dry location when possible; cover it if stored outdoors
- If the grill sits idle for a while, inspect and clean venturi burner tubes before the next use
- Leak-test connections after tank changes; stop using the grill if you see growing bubbles
- Replace small hardware as it wears (for example, cabinet and panel bumpers like the bumper 50300025)
Why it matters
A grill usually “fails” from preventable issues: restricted gas flow (including spider nests), grease-related overheating, and corrosion. Good maintenance protects burners, ignition components, and the firebox so you get safer starts and more even heat.
Last updated: January 2026
How do I find the model number on my 14616142210?
Your Kenmore gas grill’s model number is printed on the grill’s rating label. For model 14616142210, look for the rating label on the grill (the manual notes the serial number is on that same label); the model number is listed there.
Where to look on the grill
We recommend checking these common rating-label locations first:
- Inside the cart/cabinet area behind the front doors
- On a side panel of the cart near the LP tank area
- On the rear panel of the cart
- Under the control panel area (inside the cabinet)
- On the firebox exterior (behind or below the cookbox)
What you should see on the label
The label typically includes the model number, serial number, and safety information. Use this quick guide:
| Item on label | What it’s used for | Example for your grill |
|---|---|---|
| Model number | Ordering the correct Kenmore parts and matching diagrams | 14616142210 |
| Serial number | Identifying production run details | Unique to your grill |
| Fuel type info | Confirming LP vs natural gas setup | Listed on label |
Tips if the label is hard to read
Heat, grease, and weather can fade labels. These steps usually help:
- Wipe the area with a damp cloth and mild dish soap; dry fully
- Use a flashlight at an angle to make faint printing stand out
- Take a close-up photo and zoom in to read the characters
- Copy the number exactly (include all digits)
Why it matters
Using the exact model number (14616142210) ensures the parts list matches your grill’s specific cabinet panels, doors, and hardware so replacements fit correctly and assembly steps line up.
For diagrams and label references, use the 14616142210 owner's manual.
Last updated: March 2026