 Owner’s manual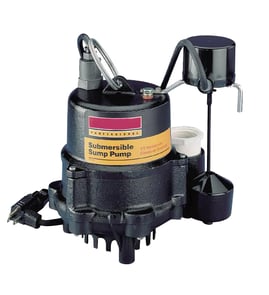

What are the 7 major parts of a water pump?
On the Simer 3420P lawn sprinkler pump, the major components you will see are the motor, pump body (housing), impeller, diffuser, priming plug, seals, and O-rings; together they create flow, build pressure, and keep the pump from leaking. For the exact parts breakdown, use the 3420P owner's manual.
The 7 major parts (mapped to your Simer 3420P)
- Motor: provides the power to spin the shaft and impeller.
- Pump body (housing/casing): contains the water path and supports internal parts.
- Impeller: the rotating wheel that moves water.
- Diffuser: helps convert impeller flow into usable pressure.
- Priming plug: opening used to fill the pump and suction line with water before starting.
- Shaft seal (mechanical seal): prevents water from leaking along the motor shaft.
- O-rings and gaskets: seal joints such as the diffuser and seal plate to prevent air and water leaks.
Quick “what it does” table
| Part | What it does | Common symptom if it fails |
|---|---|---|
| Impeller | Moves water | Low or no flow; may be plugged |
| Diffuser | Builds pressure | Weak pressure; poor performance |
| Shaft seal | Stops leaks at shaft | Water leaking near motor/shaft area |
| O-rings/gaskets | Seals housings and plates | Air leaks; pump loses prime |
Why these parts matter on a sprinkler pump
A lawn sprinkler pump like the Simer 3420P is sensitive to air leaks and loss of prime. Even if the motor runs, a small suction-side leak (often an O-ring, gasket, or fitting issue) can keep the pump from moving water.
Related tips from the manual (helps protect these parts)
- Never run the pump dry; fill the pump before starting to prevent overheating and seal damage.
- Keep the suction line airtight; seal threaded joints and eliminate air pockets.
- Protect the pump and piping from freezing; freezing can split pipe and damage the pump.
- Do not run the pump against a closed discharge; pressure can build dangerously.
Last updated: February 2026
What parts are connected to a water pump?
On the Simer 3420P lawn sprinkler pump, the main parts connected together are the motor section and the wet end (pump body) components that move and seal water, including the impeller, diffuser, and shaft seal. For the full exploded view and part list, use the owner's manual.
Key components you will typically see on the Simer 3420P
These are the core parts that physically connect to the pump body and work together to create flow and pressure:
- Motor: provides the rotation that drives the pump
- Impeller: the rotating wheel that actually moves water
- Diffuser: directs flow from the impeller to build pressure
- Pump body (front half): the housing that contains the water path
- Shaft seal: seals around the rotating shaft to prevent leaks
- O-rings and gaskets: seal stationary joints (diffuser O-ring, body O-ring)
- Priming plug and drain plug: used for priming and draining the pump
How these parts connect (simple flow and sealing map)
| Area | What’s connected | What it does |
|---|---|---|
| Drive side | Motor, seal plate | Supports the shaft and mounts the wet end |
| Wet end | Impeller, diffuser, pump body | Moves water and converts velocity to pressure |
| Sealing points | Shaft seal, O-rings, clamp | Prevents air leaks and water leaks |
| Service points | Priming plug, drain plug | Helps prime, drain, and troubleshoot |
Why it matters for troubleshooting
Knowing what’s connected to the water pump helps you pinpoint common sprinkler pump problems:
- Won’t prime or loses prime: air leaks at suction fittings, O-rings, or shaft seal
- Low flow: plugged impeller or restrictions in piping
- No water delivery: stuck check valve or foot valve, frozen pipes, low water level
- Leaks at the pump: worn shaft seal or damaged O-ring surfaces
Quick safety and setup reminders we follow
- Shut off power and let the motor cool about 20 minutes before handling.
- Release system pressure before loosening any plugs, clamps, or piping.
- Use Teflon tape or Teflon-based thread sealant on threaded connections; tighten hand-tight plus about 1-1/2 turns.
- Keep suction piping airtight; even small air leaks can prevent the pump from pulling water.
Last updated: February 2026
What parts do I need to replace a water pump?
For the Simer 3420P lawn sprinkler pump, the parts you typically replace are the sealing parts (shaft seal and O-rings) and, if worn or clogged, the impeller and diffuser. The 3420P manual also calls out a seal and gasket kit and an overhaul kit that bundle these common wear items; see the 3420P owner's manual.
Common replacement parts for a 3420P pump repair
Most “water pump replacement” jobs on this model are really a seal or rebuild, not a full pump swap. These are the parts most often involved:
- Shaft seal (stops water from leaking along the motor shaft)
- O-ring(s) and diffuser O-ring (prevents air and water leaks that cause loss of prime)
- Seal plate (replaced if warped, cracked, or badly corroded)
- Impeller (replace if plugged, damaged, or worn)
- Diffuser (replace if cracked or worn)
- Priming plug and drain plug (replace if stripped or leaking)
Kit options (from the manual)
| Repair goal | What you replace | Typical kit approach |
|---|---|---|
| Stop leaks, restore prime | O-rings and shaft seal | Seal and gasket kit |
| Full wet-end refresh | Seal and gasket items plus impeller and diffuser | Overhaul kit |
What else you usually need (not “parts”)
A good repair depends on installation details that prevent air leaks and overheating:
- Teflon tape or Teflon-based thread sealant for threaded connections
- Basic hand tools (screwdrivers, wrenches, nut drivers)
- A clean water source for priming
- Foot valve and strainer in good condition on the suction line (common cause of lost prime)
Why it matters
Air leaks or a leaking foot valve/check valve can make the pump lose prime and “fail to pump” even when the motor runs. Replacing the sealing parts and fixing suction-side leaks restores performance and prevents repeat issues.
Last updated: February 2026