Error Codes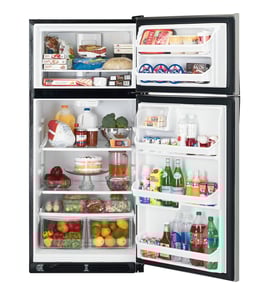




Are Amana refrigerators good quality?
Yes. Amana refrigerators like model ART318FFDS10 are a solid, good-quality choice when you want dependable cooling and simple features at a budget-friendly price; they typically deliver strong day-to-day reliability, but they are not built or equipped like premium, feature-heavy refrigerators.
We see Amana as a practical brand: fewer electronics, straightforward temperature control, and easy-to-service designs. That usually translates to fewer complicated failures and lower repair complexity.
Common strengths:
- Good value for the price compared with many premium brands
- Simple controls and fewer “smart” components to troubleshoot
- Spacious, usable storage for a top-mount layout
- Parts support for common wear items (fans, gaskets, sensors)
Common tradeoffs:
- More basic features (fewer specialty drawers and convenience options)
- Some interior components can feel lighter-duty (bins, drawers)
- Noise complaints often trace back to airflow parts (fan, blade) or leveling
Use this list to judge your specific refrigerator’s condition and expected performance:
- Doors close easily and seal tightly all the way around
- Cabinet is level; doors do not swing open on their own
- Freezer maintains consistent temps; fresh food section does not freeze items
- No heavy frost buildup on the freezer back wall
- Fan noise is steady, not rattling or scraping
If cooling is uneven, noisy, or moisture is building up, these parts are common contributors:
| Symptom | Often related to | Example part for ART318FFDS10 |
|---|---|---|
| Warm fridge, freezer OK | Airflow problem | Refrigerator evaporator fan motor WP2315539 |
| Rattling or ticking noise | Fan blade interference | Refrigerator evaporator fan blade WP2163777 |
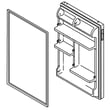
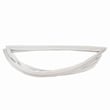
| Moisture, sweating, poor cooling | Door not sealing | Refrigerator door gasket (white) W10861499 |
| Temps swing up and down | Temperature sensing | Thermistor, refrigerator W11438736 |
A “good quality” refrigerator is really one that holds stable temperatures, seals well, and moves air correctly. On a top-mount like ART318FFDS10, airflow and door sealing have an outsized impact on food life, frost control, and energy use.
Last updated: February 2026
Can I replace fridge parts myself?
Yes. On an Amana ART318FFDS10 top-mount refrigerator, we can safely replace many “bolt-on” parts ourselves (gaskets, shelves, fan parts, switches) with basic tools. For sealed-system or refrigerant-related repairs, we use a qualified technician because specialized equipment and training are required.
Here’s a practical way to decide.
- Good DIY: door gaskets, shelves/bins, light components, simple switches, evaporator fan motor/blade
- Usually DIY with care: ice maker kit installs (if the refrigerator is ice-maker ready and water supply is available)
- Technician-only: compressor, refrigerant leaks, brazing/soldering, sealed-system restrictions, charging refrigerant
- Either way: control box or wiring issues (DIY only if you are comfortable using a multimeter and following safe electrical practices)
| Repair type | Typical tools | Risk level | Best choice |
|---|---|---|---|
| Door seal (gasket) | Nut driver/screwdriver, warm water | Low | DIY |
| Evaporator fan motor/blade | Screwdriver, nut driver | Medium | DIY if comfortable |
| Ice maker kit | Wrench, screwdriver | Medium | DIY if water line is accessible |
| Sealed system | Specialized HVAC tools | High | Technician |
- Unplug the refrigerator before removing panels or touching wiring.
- Protect floors and use gloves; sheet metal edges inside a refrigerator can be sharp.
- Keep track of screws and panel locations so airflow paths go back exactly as designed.
- If you smell a chemical odor or hear hissing, stop and schedule service.
- After any repair, confirm temperatures stabilize (about 0°F freezer, 37°F fresh food).
If you’re troubleshooting warm temperatures, noise, or poor airflow, these model-matched parts are common DIY replacements:
- Refrigerator evaporator fan motor WP2315539
- Refrigerator evaporator fan blade WP2163777
- Refrigerator door gasket (white) W10861499
DIY repairs on your ART318FFDS10 can restore airflow, improve temperature control, and reduce energy use. Choosing the right repair level also prevents repeat failures caused by misrouted panels, air leaks, or unsafe sealed-system work.
Last updated: February 2026
How do I find out what model fridge I have?
To find your refrigerator model number, we look for the rating label on the cabinet walls or door area, not on removable shelves or drawers. On an Amana top-mount like ART318FFDS10, the label is usually inside the fresh food section or freezer.
- Inside the refrigerator compartment on a side wall (upper area)
- Inside the refrigerator compartment on a side wall behind the crisper drawers
- On the ceiling of the fresh food compartment near the light
- Inside the freezer compartment on a side wall
- Along the door frame when the door is open
- Behind the lower front kickplate or toe grille
The tag typically lists a model number and serial number. For parts ordering and troubleshooting, we use the model number (for example, ART318FFDS10).
| What you see | What it means | What to write down |
|---|---|---|
| Model number | Exact version of the refrigerator | Full model (letters and numbers) |
| Serial number | Unique unit identifier | Full serial |
| Brand name | Manufacturer line | Amana |
- Copy the model number exactly; include all letters and numbers.
- Do not use a number from the ice maker, water filter, or a shelf bin; those are part numbers.
- If the label is hard to read, take a clear photo and zoom in.
We match parts and diagrams to the exact model number because small changes (door style, controls, gasket size, ice maker wiring) can change which parts fit your refrigerator.
If you are ordering a door seal, the model number helps us choose the correct gasket, such as the refrigerator door gasket (white) W10861499 when it applies.
Last updated: February 2026
How old is my Amana refrigerator by serial number?
For Amana refrigerator model ART318FFDS10, we date the unit by reading the serial number: the first 2 digits typically indicate the year it was built, and the next 2 digits typically indicate the production week (01 to 52). You can use that to calculate the refrigerator’s age.
Most Amana top-mount refrigerators place the model and serial tag in one of these spots:
- Inside the fresh food compartment on a side wall
- On the ceiling of the fresh food compartment near the light
- Behind the crisper drawers on the cabinet wall
- On the door frame when you open the refrigerator door
Use this quick method:
- Write down the first 4 digits of the serial number
- Digits 1 to 2 = year (for example, 19 = 2019)
- Digits 3 to 4 = week of the year (for example, 07 = 7th week)
- Convert the week to an approximate calendar date (early, mid, or late in that week)
If your serial number starts with 2008:
- 20 = 2020
- 08 = 8th week of 2020
- Built around late February 2020
| Serial starts with | Interprets as | Approx build timing |
|---|---|---|
| 1901 | Year 2019, week 1 | Early January 2019 |
| 2015 | Year 2020, week 15 | Mid-April 2020 |
| 2310 | Year 2023, week 10 | Early March 2023 |
Knowing the build date helps us match the right refrigerator parts (like a door gasket, thermistor, or evaporator fan motor) and decide whether a symptom is more likely wear-related (seal leaks, noisy fan, temperature swings) or a one-time issue.
- If the refrigerator is warm or noisy, check the evaporator fan area and consider refrigerator evaporator fan motor WP2315539
- If temperatures swing, a sensor issue can be involved; consider thermistor, refrigerator W11438736
- If doors do not seal well, inspect the gasket for gaps, tears, or hardening
Last updated: February 2026
How to remove drip pan from Amana refrigerator?
On the Amana ART318FFDS10 top-mount refrigerator, the drip pan (drain pan) is typically at the bottom near the rear by the compressor area. We remove it by unplugging the refrigerator, pulling it out carefully, then sliding the pan out to empty and clean it.
- Unplug the refrigerator to avoid electrical shock.
- Protect the floor with towels or a shallow tray; the pan can spill.
- Use work gloves; sheet-metal edges underneath can be sharp.
- Have mild dish soap and warm water ready (avoid harsh chemicals).
- Plan for help if the unit is tight in an alcove; refrigerators are heavy.
- Unplug the ART318FFDS10.
- Pull the refrigerator straight out from the wall a few inches to a foot.
- Look underneath at the back base area; the drip pan usually slides out from the rear.
- If a lower rear cover blocks access, remove the screws, set the panel aside, then locate the pan.
- Slide the pan out slowly, keeping it level.
- Empty, wash with warm soapy water, rinse, and dry completely.
- Slide the pan back in fully, reinstall the rear cover (if removed), then plug the refrigerator back in.
Common causes and what we do:
- Stuck from residue: Wiggle gently side-to-side while pulling.
- Blocked by the rear cover: Remove the cover screws and panel first.
- Cracked or warped pan: Replace the pan if it will not sit flat or leaks.
- Water keeps returning quickly: Check for a clogged defrost drain or excess frost.
If you are also seeing puddles, warm temperatures, or heavy frost, these parts are often involved:
| Symptom you notice | Common area to check | Example part for this model |
|---|---|---|
| Warm fridge/freezer, odd noises | Evaporator airflow | Refrigerator evaporator fan motor WP2315539 |
| Frost buildup, temperature swings | Temperature sensing | Thermistor, refrigerator W11438736 |
A clean, properly seated drip pan helps prevent odors, overflow onto the floor, and moisture-related issues around the compressor compartment.
Last updated: February 2026
What are the disadvantages of a top mount fridge?
A top-mount refrigerator like the Amana ART318FFDS10 is usually affordable and reliable, but its main disadvantages are less convenient fresh-food access (you bend more), fewer premium organization features, and fewer built-in dispenser options compared with many bottom-freezer designs.
- More bending for fresh food: the refrigerator section sits lower, so you reach down more often.
- Less “eye-level” organization: shelves and crisper drawers can feel harder to see and sort quickly.
- Fewer high-end features: many top-mount models skip external water and ice dispensers.
- Freezer access can be less ergonomic: bulky items may be awkward to lift in and out.
- Temperature swings from frequent freezer use: opening the top freezer often can introduce warm air that the unit must recover from.
| Layout | Main downside | Best for |
|---|---|---|
| Top-mount (ART318FFDS10 style) | Fresh-food items are lower, so you bend more | Value, simple storage, smaller kitchens |
| Bottom-freezer | Freezer items are lower, so you bend for frozen foods | People who use fresh food most |
| Side-by-side | Narrow compartments limit wide items (pizza boxes, platters) | Balanced fridge/freezer access |
- Put everyday items on the upper refrigerator shelves to minimize bending.
- Use bins to group snacks, deli items, and condiments so they are easy to grab.
- Keep airflow clear; do not pack food tight against vents.
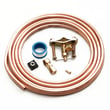
- If you want ice, consider adding an ice maker kit if your unit is set up for it (see whirlpool refrigerator ice maker kit W11729596).
Choosing a refrigerator layout affects comfort and how efficiently you use space. If you access fresh food many times a day, the “bend-to-reach” design is usually the biggest tradeoff with a top-mount refrigerator.
Last updated: February 2026
What is the life expectancy of a top freezer refrigerator?
A top-freezer (top-mount) refrigerator like Amana ART318FFDS10 typically lasts 10 to 15 years. With steady maintenance (clean airflow, good door sealing, correct temperatures), it’s common to reach the upper end of that range before major repairs become frequent.
- Condenser airflow and cleanliness (dust buildup makes the compressor work harder)
- Door gasket condition (warm air leaks cause longer run times)
- Temperature settings (too cold can increase run time and frost issues)
- Usage habits (frequent door openings, overpacking, hot food loads)
- Defrost and fan performance (poor circulation stresses the sealed system)
- Vacuum dust from the front grille or rear area every 6 to 12 months.
- Keep food from blocking vents; allow air to circulate in both compartments.
- Confirm temps: refrigerator about 37°F, freezer about 0°F.
- Inspect and clean the door seal; replace if torn, warped, or not sealing.
- Listen for the evaporator fan; a noisy or stopped fan should be addressed early.
| Symptom | Often fixable? | Common next step |
|---|---|---|
| Warm fridge, freezer OK | Yes | Check airflow and the evaporator fan |
| Frost buildup on back wall | Yes | Check defrost system and door sealing |
| Door won’t seal, moisture inside | Yes | Replace door gasket |
| Loud grinding from freezer area | Yes | Inspect fan motor and fan blade |
If you’re troubleshooting cooling or noise, the how to fix your evaporator cooling fan guide pairs well with checking the refrigerator evaporator fan motor WP2315539 and the refrigerator evaporator fan blade WP2163777 for wear or damage.
A top-freezer refrigerator’s simpler design usually means fewer expensive components to fail. Keeping airflow clear and seals tight reduces compressor run time, which is the biggest driver of long-term reliability and energy use.
Last updated: February 2026
Which is better, top mount or bottom mount refrigerator?
A top-mount refrigerator like Amana model ART318FFDS10 is typically the better pick if you want lower upfront cost, simpler design, and strong efficiency. A bottom-mount is typically better if you want everyday convenience because fresh food sits at eye level and you bend less.
| Feature | Top-mount (freezer on top) | Bottom-mount (freezer on bottom) |
|---|---|---|
| Fresh-food access | You bend more | You bend less |
| Freezer access | Easier | Harder (often drawers) |
| Typical price | Lower | Higher |
| Complexity | Simpler | More complex (drawers, rails) |
| Best for | Value, reliability | Convenience, organization |
- Choose top-mount if you want a dependable, budget-friendly refrigerator and you use the freezer often.
- Choose bottom-mount if you cook frequently and want the refrigerator section at a more comfortable height.
- If you have kids, a bottom-mount can make the fresh-food section easier for them to reach.
- If you store bulky frozen items, a top-mount freezer shelf layout can be easier to see and stack.
- If you want fewer moving parts to maintain, top-mount designs usually win.
“Better” depends on how you use your refrigerator every day. The layout affects comfort (bending and reaching), how well you can organize groceries, and long-term maintenance. For example, door sealing and airflow matter on both styles; if you ever notice warm temps or frost, issues can involve the evaporator fan or door gasket.
- Use how to use your refrigerator efficiently to reduce temperature swings and improve cooling performance.
- If you hear fan noise or have warm spots, how to fix your evaporator cooling fan helps you narrow down whether the fan motor or blade is the issue.
| Symptom | Common area to check | Example part for ART318FFDS10 |
|---|---|---|
| Warm refrigerator section | Evaporator airflow | Refrigerator evaporator fan motor WP2315539 |
| Frost buildup, poor airflow | Fan blade, airflow path | Refrigerator evaporator fan blade WP2163777 |
| Door not sealing, moisture | Door gasket | Refrigerator door gasket (white) W10861499 |
Last updated: February 2026
Why don't high end refrigerators have water dispensers?
Many high-end refrigerators skip built-in water dispensers to prioritize a cleaner built-in look, maximize usable interior space, and reduce leak and service risk from water lines and valves. For an Amana top-mount like model ART318FFDS10, a simpler water system also means fewer water-related parts to maintain.
- Design and fit: Built-in and panel-ready refrigerators often focus on a seamless door front with fewer cutouts.
- Reliability: Dispensers add components that can fail or leak (tubing, fittings, valves, switches).
- Temperature performance: Frequent door opening and dispenser cavities can add heat load and complicate insulation.
- Space tradeoff: Dispenser hardware can reduce door bin space and usable storage.
- Maintenance: Filters, lines, and ice and water components add routine upkeep.
Even when a refrigerator does not have a door dispenser, many households still get filtered water and ice using other setups.
| Option | What you get | Typical upkeep |
|---|---|---|
| Internal filter (model-dependent) | Filtered water for ice maker or internal dispenser | Replace filter on schedule |
| Inline filter | Filtered water feeding the refrigerator supply line | Replace inline filter periodically |
| No filter | Simplest plumbing | Use a pitcher or under-sink filter if desired |
On ART318FFDS10, water-related complaints usually come down to supply, freezing in the line, or ice maker fill problems.
- Confirm the shutoff valve is fully open and the supply line is not kinked.
- If you have an ice maker installed, verify the ice maker is turned on and the freezer is cold enough.
- If water flow is weak, address filtration and air in the line using how to replace the water filter in an Amana refrigerator.
- For recurring ice maker performance issues, review common refrigerator ice maker problems and solutions.
A dispenser is convenient, but it adds complexity. Fewer water-handling components generally means fewer leak points, fewer service calls, and more flexibility to choose the filtration method that fits your kitchen.
Last updated: February 2026