Owner’s manual

Can you use an 8 inch blade on a 10 inch table saw?
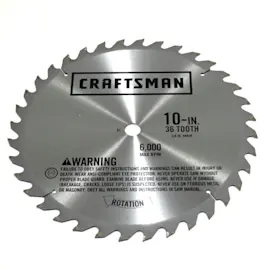
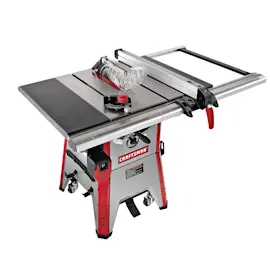
Yes. On a Craftsman 113298470 10 inch table saw, you can use an 8 inch blade as long as it fits the arbor and is rated for at least 3450 RPM; you also need the correct insert and guarding setup for the type of cut.
What to check before you install an 8 inch blade
- Arbor fit: The blade’s arbor hole must match your saw’s arbor size.
- Speed rating: The blade must be marked for 3450 RPM or higher (the manual warns against using cutting tools rated below 3450 RPM).
- Blade type and cut type: Use a standard blade for through-cuts; use a dado set only for non-through dado/rabbet work.
- Guarding and spreader alignment: Keep the blade guard, spreader, and anti-kickback pawls installed and working whenever possible.
- Insert compatibility: Never run the saw without the proper table insert installed.
8 inch blade vs 10 inch blade (what changes)
| Item | 8 inch blade | 10 inch blade (designed max) |
|---|---|---|
| Max cut depth | Less depth | More depth |
| Spreader proximity (ripping safety) | Farther from blade | Closest to blade (preferred) |
| Typical best use | Shallow cuts, some specialty setups | General ripping and crosscutting |
Dado note (common reason people ask about 8 inch)
Many 8 inch dado sets are used on 10 inch saws because dadoing is not a through-cut. When you switch to a dado or molding head:
- Use the correct insert for the dado width.
- Reinstall the blade guard immediately after finishing dadoing/molding/rabbeting.
- Keep blade exposure low; the manual calls for about 1/8 inch above the workpiece for many operations.
Why it matters
Using a smaller blade can reduce cutting capacity and can change how closely the spreader lines up behind the blade. For ripping, the manual emphasizes using the maximum diameter blade the saw was designed for because it keeps the spreader nearest the blade, which helps reduce kickback risk.
For blade installation direction, collar placement, and tightening the arbor nut securely, follow the steps in the owner's manual.
Last updated: February 2026
Are all table saw arbor nuts the same size?
No. Arbor nuts are not universal; the thread size and direction can vary by saw design. On the Craftsman 113298470 10-inch table saw, the key is installing and tightening the arbor nut correctly and using the proper arbor wrench procedure shown in the owner's manual.
What’s typically the same (and what isn’t)
Most 10-inch table saws use blades with a 5/8-inch arbor hole, but that does not guarantee the arbor nut is the same across brands or even across models.
- Blade arbor hole is often standardized (commonly 5/8 inch on many 10-inch saw blades)
- Arbor nut thread (diameter and pitch) can differ by manufacturer and model
- Thread direction can differ (some saws use left-hand threads)
- Washer/collar stack-up (arbor collars) can differ and affects fit
- Wrench size for the nut can differ
How to confirm the correct arbor nut for your saw
Use these checks on your Craftsman 113298470:
- Verify the exact model number on the ID plate (113298470).
- Compare the nut you have to the diagrams and instructions in the owner's manual.
- Confirm the blade and arbor collars are installed in the correct order and orientation.
- If the nut feels like it “won’t start,” stop and re-check thread direction and collar alignment.
Correct removal and tightening method (model-specific)
The manual’s safe method is to lock the blade with a wood block and use the arbor wrench:
| Task | What we do | Why it helps |
|---|---|---|
| Loosen arbor nut | Block wood against the front of the blade; pull wrench toward you | Prevents blade rotation and avoids slipping |
| Tighten arbor nut | Block wood against the rear of the blade; push wrench away from you | Seats the blade and collars securely |
Also keep the blade and collars clean and free of burrs; the manual notes the hollow side of the collar must face the blade.
Why it matters
Using the wrong arbor nut (or forcing the wrong thread) can damage the arbor threads, prevent the blade from clamping securely, and increase the risk of blade wobble or kickback.
Last updated: February 2026
How to reset overload on table saw?
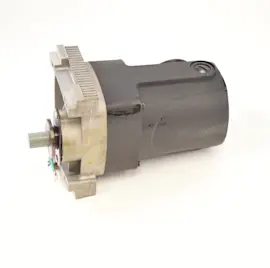
On the Craftsman 113298470 10-inch table saw, an overload trip usually means the motor overheated or stalled under load. Turn the saw OFF, unplug it, let the motor cool, then press the motor’s overload reset (typically on or near the motor housing) before restarting.
Safe reset steps (what we do)
- Push the switch lever IN to turn the saw OFF and remove the switch key.
- Unplug the power cord.
- Wait 10 to 20 minutes for the motor to cool.
- Locate the overload reset button on or near the motor; press it firmly until it clicks.
- Clear the cause of the stall (binding wood, dull blade, misaligned fence) before powering back on.
- Plug in, stand to the side of the blade, and let the blade reach full speed before cutting.
For switch operation and safety steps (including removing the key), follow the owner's manual.
Why the overload tripped (most common causes)
The manual’s motor troubleshooting points to overload and restricted cooling as top causes of overheating and stalling.
- Feeding stock too fast into the blade
- Blade is dull, dirty, or the wrong type for the cut
- Workpiece is pinching the blade (fence not parallel, warped lumber)
- Sawdust buildup restricting motor airflow
- Low voltage or undersized circuit/fuse for the motor load
Quick checks before you restart
| Check | What to look for | What to do |
|---|---|---|
| Motor cooling airflow | Sawdust packed around motor | Clean out sawdust and vents |
| Cutting load | Motor bogs down in the cut | Feed slower, use proper blade |
| Blade/fence alignment | Burning, binding, kickback tendency | Re-align fence and blade |
| Power supply | Lights dim, breaker trips | Use a proper circuit, avoid long/light cords |
Why it matters
Resetting the overload without fixing the cause usually leads to repeated trips, overheated windings, and unreliable starts. Correcting feed rate, alignment, and motor cooling keeps the 113298470 cutting safely and helps protect the motor and switch.
Last updated: February 2026
What not to do with a table saw?
For the Craftsman 113298470 10-inch table saw, do not cut freehand, do not reach over or behind the blade, and do not clear scraps with your hands while the blade is moving. Keep the guard and spreader in place for through-cuts and use push devices to keep hands away.
Top “don’ts” that prevent kickback and hand injuries
- Do not place fingers or hands in the path of the sawblade.
- Do not reach behind the blade to pull a workpiece through, support it, or remove cutoffs.
- Do not pick up small cut-off pieces from the table; push them off with a long stick.
- Do not turn the saw on until the table is cleared of tools, wood scraps, and loose pieces.
- Do not perform layout, assembly, or setup work on the table while the cutting tool is rotating.
- Do not use the rip fence for crosscutting, and do not use the miter gauge for ripping.
Use the right control method for the cut
The manual calls out that “freehand” cutting is unsafe. Use a guide every time.
| Operation | Use this | Do not use this |
|---|---|---|
| Ripping (with the grain) | Rip fence (locked) | Miter gauge as the primary guide |
| Crosscutting (across the grain) | Miter gauge (or a sled) | Rip fence as a length stop |
Guard, spreader, and “work helpers” (push stick, push block)
- Do not remove the blade guard assembly for normal through-sawing; keep the guard and spreader installed.
- If you remove the guard for dadoing, rabbeting, resawing, or molding, reinstall it immediately after that operation.
- Do not try to “save” a small offcut with your fingers; use a push stick or push block and keep your hands out of the blade path.
For model-specific safety notes and basic saw operations, follow the owner's manual.
Why it matters
Most table saw injuries happen during common cuts when a hand drifts into the blade path or when kickback launches the workpiece back toward the operator. Using the guard/spreader, correct guides (rip fence or miter gauge), and push devices reduces both risks.
Last updated: February 2026