Installation guide
 Owner’s manual






What two things should you not put in a microwave?
For your GE JVM1750SP2SS microwave/hood combo, the two biggest “never” items are metal (including foil) and sealed containers (including whole eggs and closed jars). Metal can cause arcing (sparks), and sealed items can build pressure and explode; both can damage the microwave and create a safety hazard. See the owner's manual for model-specific safety notes.
- Metal of any kind: foil touching the oven wall, twist ties, poultry pins, gold-rimmed dishes, or a metal shelf installed incorrectly can cause arcing.
- Sealed or pressure-building foods/containers: closed jars, sealed containers, and whole eggs (including “boiled eggs”) can burst from pressure.
- Recycled paper towels/napkins (can contain metal flecks that arc)
- Some foam trays and non-microwave plastics (can soften, char, or ignite)
- Empty containers (especially plastic) that can overheat
- Foods with skins (potatoes, hot dogs, apples, tomatoes) unless you pierce them to vent steam
| Item | OK to microwave? | Why |
|---|---|---|
| Plain glass/ceramic (no metallic trim) | Usually yes | Heats food evenly without arcing |
| Aluminum foil or metal trim | No | Can arc and spark |
| Closed jar or sealed container | No | Pressure can build and explode |
| Whole egg (in shell) | No | Can burst from internal pressure |
If you are unsure a dish is microwave-safe, use the manual’s simple test: microwave the empty dish next to a glass measuring cup with 1 cup of water for 1 minute on high. If the dish heats up, do not use it.
Arcing and pressure explosions are two of the fastest ways to damage components like the magnetron and door interlock system, and they can also create a fire risk. Using microwave-safe cookware and venting foods prevents most “instant” microwave problems.
Last updated: February 2026
How do I do a hard reset on my GE microwave?
To hard reset your GE JVM1750SP2SS microwave/hood combo, we unplug the microwave (or turn off the circuit breaker) for about 1 minute, then restore power and reset the clock. This power cycle clears many control glitches and restores normal operation.
- Press CLEAR/OFF to stop any cooking.
- Unplug the microwave from the outlet (or switch the microwave circuit breaker OFF).
- Wait 60 seconds.
- Plug it back in (or switch the breaker ON).
- Set the clock and test a simple heat cycle (for example, 1 cup of water for 1 minute).
- Make sure the 3-prong plug is fully seated in the wall outlet.
- Check the home fuse or circuit breaker if the microwave is completely dead.
- Open and close the door firmly; a door that is not fully latched can prevent starting.
- If you see sparking (arcing), press CLEAR/OFF and remove the cause (foil, metal, twist ties).
If you see “LOCKED” or an “L” on the display, the control lock is on. We unlock it by pressing and holding CLEAR/OFF for about 3 seconds (no unplugging needed). See the JVM1750SP2SS owner's manual for the Control Lock details.
A hard reset helps with temporary control issues. If the microwave still will not start or heats inconsistently after the reset, focus on common causes:
- Power supply problem (outlet, breaker, loose plug)
- Door not closing securely (latch or interlock issue)
- Failed door interlock switch or lever
- Internal thermal cut-off opening due to overheating
| Symptom | Most likely area to check | Example part on this model page |
|---|---|---|
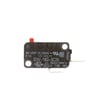
| Display works, won’t start | Door interlock system | Micro-switch WB24X830 |
| Starts then stops, dead after | Overheat protection | Therm-hood WB27X1127 |
Microwaves use safety interlocks and protective cut-offs to prevent operation with an unlatched door or overheating. A proper reset plus a quick door and power check solves many “won’t start” complaints without replacing parts.
Last updated: February 2026
What's the average lifespan of a GE microwave?
Most GE microwaves, including over-the-range models like GE JVM1750SP2SS, typically last about 7 to 10 years with normal household use. Heavy daily use, poor ventilation, and door-switch wear can shorten life; consistent cleaning and proper use help it reach the high end of that range.
A microwave’s life is usually limited by heat stress and high-voltage component wear (magnetron circuit), plus door-interlock and control issues.
Common factors that shorten lifespan:
- Running the microwave empty or with very small loads
- Grease buildup restricting airflow (especially in a microwave/hood combo)
- Slamming the door or forcing it closed (stresses latch and interlock switches)
- Frequent power surges or loose outlet connections
- Using metal or foil that causes arcing
Common factors that extend lifespan:
- Keeping the cavity, grille, and filters clean
- Using the vent fan when cooking on the range
- Closing the door gently so the latch aligns correctly
- Stopping use if you see arcing or smell burning
These symptoms often show up as the unit ages:
- Runs but does not heat (often in the high-voltage heating circuit)
- Intermittent operation when opening or closing the door (interlock/latch issues)
- Turntable stops rotating (motor or coupler)
- Interior or cooktop light stops working (bulb or socket)
| Symptom | Common area to check | Example part on this model |
|---|---|---|
| Starts then stops when door moves | Door interlock system | Micro-switch WB24X830 |
| Door won’t latch or feels loose | Latch/lever hardware | Microwave latch body WB06X10676 |
| Runs but no heat | Heating circuit diagnosis | Microwave magnetron WB27X11079 |
| Turntable not turning | Turntable drive | Microwave turntable motor WB26X10233 |
Knowing the typical 7 to 10 year lifespan helps you decide whether to troubleshoot and replace a wear part (like a door switch) or plan for replacement if a major heating component fails.
For model-specific safety, operating, and care guidance, follow the maintenance and use instructions in the owner's manual.
Last updated: February 2026
What are common problems with GE JVM1750SP2SS microwaves?
Common problems on the GE JVM1750SP2SS microwave/hood combo include no heat, dead display/no power, turntable not rotating, arcing (sparks) in the cavity, and vent fan or light issues. Many symptoms trace back to door interlock parts, turntable drive parts, or normal operating conditions explained in the owner's manual.
- Microwave runs but does not heat: often a high-voltage component issue (service-level repair).
- Microwave will not start: commonly a door interlock problem (switches, latch, or lever).
- Turntable not turning: failed turntable motor or coupler.
- Sparking/arcing inside: metal/foil contact, twist ties, gold-rimmed dishes, or other arcing causes listed in the manual.
- Moisture/steam around the door: typically normal during cooking and should dissipate after.
- Vent fan behavior seems odd: the vent fan can run while the microwave operates and may not shut off until cooking stops.
- Confirm the door closes firmly and the latch feels solid (no sagging or bounce).
- Remove any metal, foil, twist ties, or dishes with metallic trim.
- Wipe the cavity clean; stuck-on food can contribute to arcing.
- Try a simple reset: unplug for 2 minutes, then restore power.
- If you notice TV or radio interference, try a different circuit or move the device farther away (this is often normal).
Door interlock problems are among the most frequent causes of a microwave that will not run.
| Symptom | Common suspect | Example part for this model |
|---|---|---|
| Won’t start, acts like door is open | Door interlock switch | Micro-switch WB24X830 |
| Starts then stops when door is moved | Latch/lever not engaging switches | Microwave latch body WB06X10676 |
| Intermittent start, clicking near latch | Secondary interlock switch | Switch-micro WB24X829 |
A microwave that will not start is often a door-safety (interlock) issue, while arcing is usually a cookware or debris problem. Addressing the right category first prevents repeat failures and helps you avoid unsafe operation.
Last updated: February 2026