Owner’s manual
 Error Codes



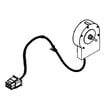
How to remove bottom grille on GE refrigerator?
On the GE GNE25JYKBFFS bottom-mount refrigerator, the bottom grille (base grille) typically comes off by releasing its retaining clips and pulling it forward; some versions also use a couple of screws. Removing it gives you access for cleaning the condenser area and checking for airflow issues.
Quick removal steps
- Unplug the refrigerator or switch off power at the breaker.
- Open both fresh food doors for better access.
- Look along the top edge of the grille for clip points; pull the grille straight out toward you.
- If your grille has screws, remove them with a Phillips screwdriver first, then pull the grille forward.
- If it feels stuck, work from one end to the other, releasing one clip at a time (do not twist hard).
- Set the grille aside on a towel to avoid scratching the finish.
Reinstalling the grille
To reinstall, align the tabs and clip points, then push the grille straight back until it snaps into place. If screws were used, reinstall them snugly (do not overtighten).
| Task | What to do | What to watch for |
|---|---|---|
| Remove grille | Release clips and pull forward | Pull straight out to avoid breaking tabs |
| Clean area | Vacuum dust from intake/condenser area | Keep the vacuum nozzle off wiring |
| Reinstall | Align, push until it clicks | Confirm it sits flush and does not rattle |
Why it matters
A dusty condenser area can reduce cooling performance and make the compressor run longer. Taking the bottom grille off periodically helps you keep airflow clear and can prevent warm temperatures in the refrigerator section.
Helpful references for this model
- Use the GNE25JYKBFFS owner’s manual for the exact grille attachment style and any model-specific cautions.
Last updated: January 2026
What is the life expectancy of a GE Monogram refrigerator?
A GE Monogram refrigerator typically lasts 15 to 20 years. Your GE GNE25JYKBFFS is not a Monogram model, but most premium GE refrigerators reach that same range when airflow is kept clear, temperatures stay stable, and wear items (like filters and door seals) are maintained per the GNE25JYKBFFS owner’s manual.
What affects refrigerator lifespan most
- Condenser coil cleanliness (dust buildup makes the compressor work harder)
- Door seal condition (warm air leaks cause longer run times)
- Stable temperatures (avoid frequent warm-ups from propped doors)
- Water filter changes (protects the water system and flow)
- Good ventilation around the cabinet (especially at the back and bottom)
Maintenance checklist we recommend
- Vacuum condenser area every 6 to 12 months (more often with pets).
- Confirm door gaskets seal all the way around; correct gaps and warping.
- Keep refrigerator at 37°F and freezer at 0°F (common targets for food safety and performance).
- Replace the water filter on schedule; use the correct filter for this model, such as the GE refrigerator water filter XWFE.
- Listen for new noises (fan, clicking, buzzing) and address them early.
Typical lifespan ranges (what to expect)
| Refrigerator type | Typical life expectancy |
|---|---|
| Standard refrigerator | 10 to 15 years |
| Premium built-in (like Monogram) | 15 to 20 years |
| Well-maintained premium unit | Up to 20 years |
Why it matters
A refrigerator that is running longer to hold temperature uses more energy and puts extra stress on the compressor, fans, and control board. Simple upkeep, especially coils, seals, and filter changes, is the most reliable way to reach the full 15 to 20 year lifespan.
Last updated: January 2026
What is the most common problem with a GE refrigerator?
The most common issue we see on GE refrigerators like model GNE25JYKBFFS is a cooling problem (fresh food too warm, freezer not holding temperature, or temperature swings). In many cases, the root cause is airflow or defrost related, but simple maintenance checks often fix it first.
Most common causes of cooling problems
- Dirty condenser coils restricting heat release
- Evaporator fan not moving cold air through the compartments
- Frost buildup from a defrost failure (heater, thermostat, sensor)
- Door gasket leaks letting warm, moist air in
- Temperature sensing or control issues (sensor or control board)
Quick checks we recommend first
- Confirm settings: refrigerator about 37°F, freezer about 0°F.
- Make sure vents are not blocked by food packages.
- Listen for fans: you should typically hear an evaporator fan running when the compressor is on.
- Check for heavy frost on the freezer back wall (a strong sign of a defrost problem).
- Clean condenser coils and verify the condenser fan runs when the compressor runs.
Parts that commonly relate to these symptoms
If your checks point to a specific system, these model-compatible parts are often involved:
| Symptom | Common system | Example part for GNE25JYKBFFS |
|---|---|---|
| Warm fridge, freezer OK | Airflow/evap fan | (Fan issues may require fan motor diagnosis) |
| Frost on freezer back wall | Defrost system | Refrigerator defrost heater WR51X10108 |
| Temps swing or read wrong | Temperature sensing | GE profile refrigerator temperature sensor WR55X10025 |
| Water/ice issues plus filter warnings | Water system | GE refrigerator water filter XWFE |
Why it matters
Cooling problems can spoil food quickly and also make the compressor run longer than normal. Catching airflow restrictions, frost buildup, or a failing sensor early helps prevent bigger, more expensive repairs.
Model-specific help
For control settings, diagnostic hints, and component locations on GNE25JYKBFFS, use the GNE25JYKBFFS owner's manual.
Last updated: January 2026
How to remove the bottom drawer of a GE refrigerator?
To remove the bottom freezer drawer on your GE GNE25JYKBFFS bottom-mount refrigerator, we typically pull the drawer fully open, lift the front slightly to release it from the slides, then lift and pull the drawer out evenly. Use the GNE25JYKBFFS owner's manual for the exact drawer and rail release points.
Quick steps (most GE bottom-mount drawers)
- Unplug the refrigerator or switch off power at the breaker if your hands will be near wiring or the ice maker.
- Pull the freezer drawer all the way open.
- Remove the upper basket (lift the front up, then pull it out) if your drawer has a two-level basket system.
- Lift the front of the lower drawer/bin to unhook it from the slide rails.
- Pull the drawer straight out while supporting both sides evenly.
- Set the drawer on a towel to protect the finish and prevent scratching.
What to check if it will not lift off the rails
If the drawer feels stuck, one of these is usually the cause:
| Symptom | Most common cause | What we do |
|---|---|---|
| Drawer opens but will not lift free | Basket or bin is still engaged in rear tabs | Remove the upper basket first, then try again |
| Drawer binds or tilts | One slide rail is ahead of the other | Push closed, then reopen while holding both sides level |
| Drawer comes off but will not reinstall smoothly | Rails not fully seated or not extended evenly | Extend both rails fully and align the drawer hooks |
Reinstalling the bottom drawer
- Extend both slide rails fully and evenly.
- Set the drawer onto the rails, engaging the rear hooks/tabs first.
- Lower the front until it clicks or seats into place.
- Slide the drawer in and out a few times to confirm smooth travel.
Why it matters
Removing the bottom drawer the right way prevents bent slide rails, cracked basket frames, and air leaks that can cause frost buildup and temperature swings in the freezer.
Last updated: January 2026