 Installation guide
 Owner’s manual




How to hard reset a KitchenAid microwave?
To hard reset your KitchenAid KMHS120ESS5 microwave/hood combo, unplug it (or switch the breaker off) for about 1 minute, then restore power and re-set the clock. If it still will not run, check Control Lock, the door closure, and the home circuit.
- Unplug the microwave from the outlet; if it is hardwired, turn the kitchen breaker OFF.
- Wait 60 seconds (this clears most temporary control glitches).
- Restore power.
- Set the clock and try a simple cook cycle.
- If the display is on but it will not start, open and close the door firmly, then try again.
From the KMHS120ESS5 troubleshooting guidance, these are the most common “no operation” causes to rule out:
- Household breaker or fuse: reset the breaker or replace the fuse.
- Door not fully latched: close the door firmly; if a door message appears, open and close the door, then start.
- Control settings: confirm Control Lock is off and the controls are set correctly.
- Heating test: heat 1 cup of cold water for 2 minutes on High to confirm heating performance.
If the microwave powers up but will not start consistently (especially when closing the door), the door interlock system is a common suspect.
| Symptom | What it often indicates | Example model-matched part |
|---|---|---|
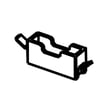
| No start, intermittent start | Door interlock switch not closing reliably | Microwave door interlock switch W10269458 |
| Dead display after a surge or slam-close | Internal fuse opened | Microwave fuse W11707984 |
A hard reset fixes control “lockups”, but it will not bypass safety circuits. If the door interlocks or fuse are failing, the microwave may appear to reset but still refuse to run to prevent unsafe operation.
For control features and lock settings specific to this model, follow the steps in the KMHS120ESS5 owner’s manual.
Last updated: January 2026
What is the disadvantage of a low profile microwave?
A low-profile microwave (like an over-the-range microwave/hood combo) trades interior space and easy access for a sleek fit; the biggest disadvantages are reduced capacity for tall or oversized dishes, more awkward loading due to mounting height, and ventilation that can be less effective than a dedicated range hood.
- Smaller usable cavity height: tall mugs, large bowls, and some covered dishes may not fit comfortably.
- Harder access: reaching hot food at chest or eye level can be awkward, especially for shorter users.
- Vent performance limits: it can move less air and capture less smoke/grease than a full-size hood, depending on ducting and fan design.
- More complex installation: mounting, vent routing, and electrical requirements can make install more involved.
- More heat exposure: removing hot liquids from a higher position increases spill and burn risk.
KitchenAid microwave/hood combos are intended for use above ranges up to 36 inches wide, so they are designed to fit the space, but the low-profile style still prioritizes clearance and appearance over maximum cooking capacity. For clearances, venting options, and placement requirements, follow the KMHS120ESS5 installation guide.
| Feature | Low-profile microwave/hood combo | Full-size over-the-range microwave | Dedicated range hood |
|---|---|---|---|
| Interior capacity | Lower | Higher | Not applicable |
| Ease of access | Lower (mounted high) | Lower (mounted high) | Not applicable |
| Ventilation capture | Medium | Medium | Highest |
| Install complexity | Medium to high | Medium | Medium |
Choosing low-profile is usually about fitting a tight cabinet layout and keeping sightlines open. If you frequently heat tall containers, use large cookware, or do heavy stovetop searing, the capacity and ventilation tradeoffs can affect daily convenience.
Last updated: January 2026
How do I find the model number on my KMHS120ESS5?
Your KitchenAid microwave/hood combo model KMHS120ESS5 has its model and serial number label on the front-facing area of the microwave oven opening, behind the door. Open the door and look around the frame (not inside the cooking cavity) for the rating label.
Check these common label spots behind the door:
- The front frame around the oven opening (left or right side)
- Along the top edge of the opening
- Along the bottom edge of the opening
- On a small sticker or metal plate facing outward when the door is open
If you do not see it right away, use a flashlight and look for a white or silver label with “Model” and “Serial.” The owner's manual also describes this location.
Most KitchenAid model/serial labels include:
- Model number (example: KMHS120ESS5)
- Serial number
- Electrical ratings (volts/amps)
- Certification markings
Using the full model number matters because small revisions can change parts like door switches, fuses, and filters.
- Copy the model number exactly as printed (letters and numbers)
- Write down the serial number too (helps with version and production date)
- Use the full model number when ordering parts such as the filter W10208631A or microwave fuse W11707984
The model number is how we match diagrams and manufacturer-approved replacement parts to your exact KitchenAid KMHS120ESS5 microwave/hood combo, so you avoid ordering a similar-looking part that does not fit.
Last updated: March 2026


