Owner’s manual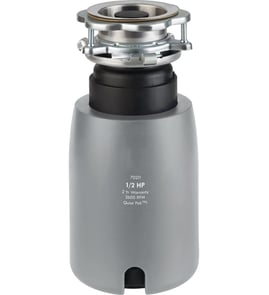
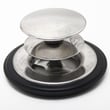
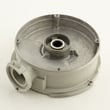
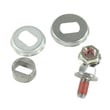

How to find the correct garbage disposal?
To find the correct garbage disposal, we match the disposer to your sink setup and how much food waste you grind. For Kenmore Elite model 175607930, use the owner's manual to confirm mounting style, electrical connection, and operating type (batch feed vs continuous feed) before you choose a replacement.
- Feed type: batch feed (stopper turns unit on) vs continuous feed (wall switch)
- Horsepower (HP): higher HP handles tougher, more frequent grinding
- Mounting compatibility: sink flange and mounting ring style must match or be replaced
- Electrical: hardwired vs plug-in cord; confirm power is off at breaker before inspecting
- Dishwasher inlet: needed if your dishwasher drains into the disposer
- Discharge outlet alignment: must line up with your drain trap/waste discharge tube
| Household use | Typical HP range | What it’s best for |
|---|---|---|
| Light use (1 to 2 people) | 1/3 HP | Small amounts of soft food scraps |
| Regular use (2 to 4 people) | 1/2 HP | Daily scraps, mixed foods |
| Medium-heavy use (3 to 5 people) | 5/8 to 3/4 HP | More volume, tougher scraps |
- Turn off power at the circuit breaker or fuse before touching the disposer
- Look under the sink for a dishwasher drain hose connected to the disposer
- Check whether the unit is activated by a stopper (batch feed) or a switch (continuous feed)
- Note the mounting ring style and how the disposer locks onto the sink flange
- If you are replacing an existing unit, follow the removal steps and safety notes in the owner's manual
A disposer that does not match your mounting, drain alignment, or feed type can leak, vibrate, or be difficult to install. Matching the sink flange and connection style first prevents most fit and performance problems.
Last updated: February 2026
Why don't plumbers like garbage disposals?
Plumbers often dislike garbage disposals because they increase the chances of drain clogs, jams, and leaks when they are used like a trash can. With the Kenmore Elite garbage disposal model 175607930, the best way to avoid those problems is to follow the do’s and don’ts in the owner's manual.
Most “plumbers hate disposals” complaints come from what gets put into the grind chamber and what ends up coating the drain line.
- Grease or fat: sticks to pipes and traps debris (a common cause of slow drains)
- Extremely fibrous foods (corn husks, artichokes): can tangle and contribute to blockages
- Large amounts of peels at once: can pack the chamber and drain line
- Hard non-food items (metal, glass, plastic): can damage the disposer and create leaks
- Improper clearing of jams: can lead to injury or broken internal components
The care guidance for this disposer is simple and effective when followed consistently.
- Run a moderate-to-strong flow of cold water before switching the disposer on
- Feed waste gradually; do not dump a large load all at once
- Keep water running for about 15 seconds after grinding to flush the drain line
- Avoid hot water while grinding (hot water can soften fats and spread grease through the line)
- Use ice, small bones, or fruit pits occasionally to help scour the grind chamber
| Put in the disposer (in small amounts) | Avoid putting in the disposer |
|---|---|
| Normal household food scraps | Grease, fat, and oily liquids |
| Citrus peels (for odor control) | Corn husks and very fibrous foods |
| Ice (for scouring) | Glass, metal, plastic, bottle caps |
| Small bones or fruit pits (occasional) | Caustic drain cleaners and chemicals |
When a disposer is overloaded or used for the wrong waste, the problem often shows up downstream as a slow kitchen sink, a clogged trap, or a blocked branch drain. Using cold water, flushing after grinding, and keeping grease out of the drain prevents most service calls.
Last updated: February 2026
What is the average lifespan of a garbage disposal?
Most garbage disposals last 10 to 12 years on average (with a typical overall range of 8 to 15 years). Your Kenmore Elite garbage disposal model 175607930 can reach the higher end of that range when it is used with plenty of cold water, kept clean, and protected from jams and grease buildup (see the owner's manual).
A disposal’s life depends more on what goes into it and how it is operated than on day-to-day run time.
- Longer life: consistent cold-water flushing, gradual feeding, routine cleaning
- Shorter life: grease and fat, fibrous foods (corn husks), hard non-food items (glass/metal), frequent jams
- Wear items: splash/anti-splash baffle can wear and should be replaced when worn
- Plumbing impact: poor habits can clog drain lines even if the disposer motor still runs
These habits match the operating and cleaning guidance in the Kenmore disposer documentation.
- Run a moderate to strong flow of cold water, then turn the disposer on
- Keep cold water running about 15 seconds after grinding to flush the drain line
- Grind ice occasionally to help scour the grind chamber
- Freshen odors by grinding citrus peels
- Avoid grease/fat and extremely fibrous foods (such as corn husks)
- Turn power off before clearing jams; use the self-service wrenchette or a wooden handle, not your hands
| If you notice this | What it usually means | What to do first |
|---|---|---|
| Frequent resets/jams | Overload, foreign object, worn internal components | Clear jam safely; review feeding habits |
| Persistent odor | Grease and food buildup | Clean baffle and upper grind chamber |
| Leaks under sink | Loose fittings or worn seals | Inspect connections; stop using until corrected |
| Loud grinding/metallic noise | Foreign object in grind chamber | Power off; remove with tongs/pliers |
A disposal near end-of-life can still run but cause slow drains, odors, leaks, and repeated trips of the reset. Following the cold-water flush and “don’t grind” rules helps protect both the disposer and your plumbing.
Last updated: February 2026
Do all garbage disposals use the same Allen wrench?
No. Garbage disposals do not all use the same Allen wrench size. Many units use a 1/4-inch hex (Allen) key, but some models use a different size or a built-in “wrenchette” style tool that engages the mounting lugs. For Kenmore Elite model 175607930, the owner's manual references using a “wrenchette (or screwdriver)” for certain steps.
Before you try to free a jam, turn the wall switch off and shut off power at the breaker.
- Check under the sink for the small factory tool (often called a wrenchette) that came with the disposer
- If your disposer has a hex socket on the bottom, try a 1/4-inch Allen wrench first (common size)
- If the 1/4-inch key feels loose or will not seat, stop and try the next size up or down
- Use a long wooden spoon handle to nudge the jam from above (never your hand)
- Use long-handled tongs or pliers to remove objects from the grind chamber
Use this as a practical starting point; the correct tool is the one that fully seats and turns the motor smoothly.
| What you see under the disposer | Most likely tool | What it tells you |
|---|---|---|
| Hex socket in the center | Allen wrench (often 1/4-inch) | You can manually rotate the motor from below |
| No hex socket, but mounting lugs | Wrenchette or screwdriver | You may turn the mounting ring or use the provided tool |
| Neither is accessible | Wooden handle from above | You are clearing the jam without bottom access |
Using the wrong size Allen wrench can round out the hex socket or slip suddenly, which makes a simple jam harder to fix and increases the chance of injury. Using the correct tool also helps you rotate the grind plate gradually instead of forcing it.
Last updated: February 2026
Is it cheaper to repair or replace a garbage disposal?
Repair is usually cheaper for a newer Kenmore Elite garbage disposal model 175607930 when the problem is minor (a jam, a reset trip, or a loose connection). Replacement is typically the better value when the unit is older (about 8 to 10 years) or has major issues like persistent leaks or repeated failures.
Use these checkpoints first; they match the most common real-world outcomes for disposals.
- Repair makes sense when: it is jammed, the reset tripped, it hums but will not spin, or the issue is a simple wiring or switch problem.
- Replace makes sense when: the housing is leaking, the unit is corroded, it repeatedly trips the reset, or it has frequent clogs despite proper use.
- Age matters: under ~8 years, repairs often pay off; over ~8 to 10 years, replacement usually wins.
- Leak rule: leaks from the disposer body or seals that keep returning usually point to replacement.
- Cost rule: if repair cost approaches half the price of a new disposal plus installation, replacement is typically the better value.
Actual pricing varies by region and access under the sink, but these ranges are a solid planning baseline.
| Option | Typical out-of-pocket range | Best for |
|---|---|---|
| DIY minor fix (jam clearing, reset, cleaning) | $0 to $30 | Jams, odors, simple clogs |
| Professional repair | $70 to $250 | Electrical checks, stubborn jams, minor leaks |
| Replacement installed | $250 to $600+ | Leaks, corrosion, repeated failures |
These steps align with safe-use guidance for disposals.
- Turn the wall switch off before touching anything under the sink.
- If it is jammed, use the self-service wrenchette or a long wooden spoon handle to free the grind plate.
- Press the reset button only after the jam is cleared.
- Run a strong flow of cold water during grinding and for at least 15 seconds after to flush the drain line.
- Avoid problem items that commonly cause damage or clogs: grease/fat, fibrous foods (corn husks), and hard non-food items.
For model-specific operating and safety details, follow the owner's manual.
A disposal that is leaking or repeatedly failing can lead to cabinet damage and recurring service calls. A quick jam-clear or reset is often a true one-time fix; a leaking or corroded unit usually is not.
Last updated: February 2026