Error Codes




How to force GE washer to drain and spin?
On the GE PFW950SPT0DS washer, we force a drain and spin by selecting the Drain & Spin cycle (or a spin-only cycle) and starting it; if the door will not lock or the tub will not drain, a drain-related fault or failed lock can prevent the cycle from running.
Quick steps to drain and spin
- Press Power to wake the washer.
- Remove some items if the load is very heavy or soaking wet.
- Select Drain & Spin (or Spin if your panel offers it).
- Choose a spin speed (start with Medium or High for normal loads).
- Press Start/Pause and let the cycle finish.
If Drain & Spin will not start
These are the most common reasons a front-load GE washer will refuse to drain and spin:
- Door not locking: the washer will not spin with an unlocked door.
- Not draining fast enough: a clog in the sump hose or pump area can stop the cycle.
- Control not responding: a power reset can clear a temporary control glitch.
Try this reset first
- Press Power to turn the washer off.
- Unplug for 2 minutes.
- Plug back in, select Drain & Spin, then press Start/Pause.
What to check (and which parts commonly fix it)
| Symptom | What it usually points to | Part that often resolves it |
|---|---|---|
| Door clicks but won’t lock; cycle won’t start | Failed lock mechanism | GE washer door lock WH01X29528 |
| Hums but won’t drain; water remains in tub | Drain pump issue or blockage | GE washer drain pump assembly WH11X39237 |
| Slow drain; intermittent drain errors | Restriction between tub and pump | Sump hose WH41X30355 |
Why it matters
Drain and spin is a safety-controlled cycle. If the washer cannot confirm the door is locked and the water level is dropping, it will stop to prevent leaks, overflow, or out-of-balance spinning.
Helpful troubleshooting reference
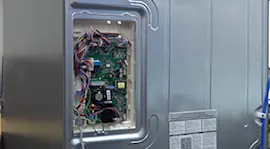
If your display shows an error code while trying to drain and spin, use our GE profile front load washer error codes guide to match the code to the most likely cause.
Last updated: February 2026
What is the most common problem with GE washers?
The most common GE washer problem we see is a drain issue: the washer will not drain, drains slowly, or stops mid-cycle because water cannot pump out. On the GE PFW950SPT0DS, this often traces to a restriction in the drain path or a failing drain component.
Most common symptoms (what you will notice)
- Water left in the tub at the end of the cycle
- Long drain times or the cycle pauses while trying to drain
- Wet clothes because the washer cannot reach full spin
- Intermittent stopping, especially during rinse or spin
- Unusual humming or buzzing during drain
Quick checks that fix many “won’t drain” complaints
- Unplug the washer for safety.
- Check the drain hose for kinks, crushing, or an overly deep standpipe insertion.
- Confirm the household drain is not slow or backing up.
- Run a Drain/Spin cycle with the tub empty.
- If the washer still will not drain, inspect the pump area and sump hose for debris.
Parts that commonly cause drain-related failures
If the basic checks do not help, these parts are frequent culprits on front-load designs:
| What’s failing | Typical clue | Example part for this model |
|---|---|---|
| Drain pump | Hums but no drain, or drains intermittently | GE washer drain pump assembly WH11X39237 |
| Sump hose (tub-to-pump) | Slow drain, debris repeatedly returns | Sump hose WH41X30355 |
| Main control (less common) | Pump never gets power, multiple odd behaviors | Washer electronic control board WH22X37840 |
Why it matters
A washer that cannot drain usually cannot spin properly. That leaves clothes wetter, increases cycle time, and can strain the drain pump and control system over time.
Helpful troubleshooting reference
If you are seeing an error code along with the drain problem, use GE profile front load washer error codes to match the code to the most likely cause and next steps.
Last updated: February 2026
Where to find model on GE washer?
On a GE washer like model PFW950SPT0DS, the model number label is typically on the door opening area (door jamb) or just inside the front opening; it can also be on the back of the control panel or on the cabinet near the bottom edge.
Fast ways to locate the model tag
- Open the washer door and check the door jamb and the front opening around the gasket area.
- Look behind the door on the inner frame where the door closes.
- Check the back of the control panel (rear top area).
- Inspect the left or right side of the cabinet near the bottom front.
- If the washer is in a tight closet, use a phone camera and flash to read the label.
What the label looks like and what to write down
Most GE labels include multiple identifiers. Record these exactly:
| What you see | Why we need it | Example format |
|---|---|---|
| Model number | Ensures parts fit your exact washer | PFW950SPT0DS |
| Serial number | Helps date the unit and match revisions | Letters and numbers |
| Electrical ratings | Useful for service checks | Volts/amps |
Why it matters
GE often uses similar-looking platforms across multiple washers, and small model-number differences can change the correct door lock, control board, or water valve. Using the exact model number helps us match the right replacement part the first time.
If you are already troubleshooting a “won’t start” or “door won’t lock” issue
A missing or unreadable model tag can slow down diagnosis. Common related parts on this model include the GE washer door lock WH01X29528 and the washer electronic control board WH22X37840.
Last updated: February 2026
Why is my GE front load washer leaking from the bottom?
A bottom leak on your GE PFW950SPT0DS front-load washer usually comes from a loose or split hose, a drain system leak, or a fill valve seep that runs down the cabinet and drips underneath. We focus first on hoses and clamps because they are the most common and fastest fixes.
Quick checks we recommend first
- Unplug the washer and turn off both water supply valves.
- Pull the washer forward and look for a trail: water marks often show the leak path.
- Run a short Rinse and Spin while watching with a flashlight (stop immediately if water spreads).
- Check the drain standpipe for overflow; a backup can look like a washer leak.
- Confirm the washer is level; excessive vibration can loosen connections over time.
Most common bottom-leak causes (and what to inspect)
| What you see | Most likely source | What to check |
|---|---|---|
| Water appears during fill | Inlet plumbing or valve | Hoses tight, screens clean, valve body not seeping |
| Water appears during drain | Sump or drain hose | Cracks, pinholes, loose clamps, rubbing marks |
| Slow drip after cycle | Residual water escaping | Hose connections, pump area, tub-to-hose joints |
1) Drain-side leaks (very common)
Inspect the sump-to-pump path and hose connections. A split sump hose or loose clamp can drip only when the pump runs. If the hose is damaged, replacing the hose is the reliable fix; if the clamp is weak or out of position, reseating it often stops the leak.
Helpful part to check: sump hose WH41X30355.
2) Fill-side leaks that run down to the base
A small seep at the inlet valve or dispenser feed can travel along the frame and drip from the bottom. Look for mineral tracks or wetness around the valve body and connected hoses.
Helpful part to check: GE washer water inlet valve WH23X29553.
3) Door area leaks that end up underneath
If the door boot or its clamps are loose, water can escape at the front and then run under the washer. Check the boot lip for tears and confirm clamps are seated evenly.
Helpful part to check: washer door boot spring clamp WH05X29663.
Why it matters
Even a small leak can damage the drive motor area, wiring, and flooring. Fixing a hose, clamp, or inlet valve seep early helps prevent bigger repairs like control or harness damage.
Last updated: February 2026