Error Codes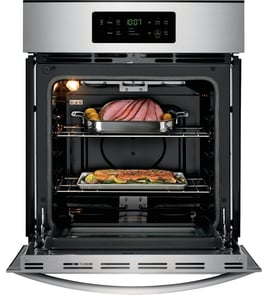




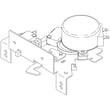
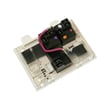
How to replace the control panel on a GE oven?
On a GE JTD5000SV2SS electric wall oven, replacing the control panel typically means shutting off power, removing the control panel mounting screws, transferring the wiring connectors to the new panel one at a time, then reassembling and restoring power to test. Use the correct replacement control panel for your exact model.
Before you start (safety and prep)
- Turn off power at the circuit breaker; wall ovens are hard-wired and can carry lethal voltage.
- Confirm the oven is cool; avoid working near hot surfaces.
- Protect the stainless finish with a towel or cardboard on the door and trim.
- Take a clear photo of the wire routing before disconnecting anything.
- Label connectors with tape if multiple plugs look similar.
Basic replacement steps (typical for GE wall ovens)
- Kill power at the breaker and verify the display is off.
- Access the control panel: open the oven door and remove the screws securing the control panel (often along the underside or inside the top trim area).
- Tilt and lift the panel: pull the bottom edge outward, then lift to release tabs (common mounting style).
- Transfer wiring: move connectors from the old panel to the new panel one at a time to avoid mix-ups.
- Reinstall the panel, tighten screws evenly, and restore power.
- Test: confirm the display responds and that Bake/Broil start normally.
Which part is the “control panel” on this model?
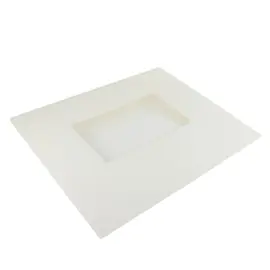
For model JTD5000SV2SS, the control panel is commonly the stainless front panel assembly. On this parts list, the matching item is the control panel-stainless WB27X48095.
| Symptom | More likely part | What to check first |
|---|---|---|
| Panel is physically damaged (dents, broken overlay) | Control panel | Visible damage, loose mounting tabs |
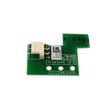
| Display/buttons act erratic but panel looks fine | Control board (behind panel) | Loose connectors, power reset |
| No response at all | Control board or wiring | Breaker, harness connections |
Why it matters
The control panel is the user interface for cooking modes and temperature settings. A miswired connector or pinched harness can cause dead keys, error behavior, or intermittent operation, so careful connector-by-connector transfer is the key to a clean repair.
Last updated: February 2026
What are the parts of an electric oven?
An electric wall oven like the GE JTD5000SV2SS is built around heating, temperature sensing, airflow cooling, and door components. The core parts include bake and broil elements, a temperature sensor, cooling fan system, oven racks, and door hardware that help the oven heat evenly and operate safely.
Main parts you will commonly find
- Bake system: bake element (often hidden under the oven floor) for most cooking
- Broil system: broil element at the top for high-heat browning
- Temperature sensing: sensor that tells the control how hot the oven is
- Airflow and cooling: cooling fan and related boards that protect electronics from heat
- Interior hardware: oven racks and rack supports
- Door system: door seal, door liner/window, and (on some models) a door lock assembly
- Lighting: light bulb or light assembly to illuminate the cavity
Examples of parts available for GE JTD5000SV2SS
| Oven function | Example part on this model | What it does |
|---|---|---|
| Temperature feedback | Wall oven temperature sensor WB21X10165 | Helps regulate oven temperature and prevent over/under-heating |
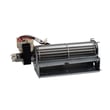
| Electronics cooling | Wall oven cooling fan WB26X35089 | Moves air to cool the control area during and after baking |
| Primary heating | Hidden bake element WB44X48678 | Provides bake heat (commonly concealed under the oven floor) |
| Door sealing | Wall oven door seal WB35X32825 | Helps keep heat inside the oven for stable temps |
Why it matters
Knowing the major oven parts helps you troubleshoot symptoms faster. For example, uneven baking often points to a heating or sensing issue, while a hot control panel area or loud airflow noise often points to the cooling fan system.
Quick troubleshooting clues (symptom to likely area)
- Oven not reaching set temperature: temperature sensor, bake element, control
- Food browns too fast on top: broil element stuck on, control issue
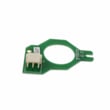
- Control area gets unusually hot: cooling fan, cooling fan sensor board
- Heat leaking around the door: door seal, door alignment, door liner
- Oven light out: bulb or light assembly
Last updated: February 2026
What does F9 mean on GE oven?
On a GE electric wall oven like model JTD5000SV2SS, an F9 error typically points to a door lock or door latch problem. The oven may think the latch is stuck, not moving to the correct position, or not being sensed correctly during self-clean or startup checks.
What you’ll usually notice with an F9 code
- The door stays locked after self-clean ends
- The door will not lock when self-clean starts
- The oven beeps and stops a cycle
- The display shows F9 and the oven may not heat
- The latch motor sound is missing or runs repeatedly
Quick checks we recommend first
- Cancel the cycle and let the oven cool completely.
- Power reset: turn the breaker off for 2 to 5 minutes, then back on.
- If the code appeared after self-clean, wait 30 to 60 minutes; some locks will not release until temperatures drop.
- Check for obstructions around the door and latch area (crumbs, foil, bent trim).
- If the door is unlocked, start a normal Bake cycle; if F9 returns quickly, focus on the latch circuit.
Parts commonly involved (and available for this model)
If the reset does not clear the code, the issue is usually in the lock mechanism or the wiring/control that monitors it.
| What can fail | What it affects | Part to consider |
|---|---|---|
| Door lock assembly | Lock motor and latch position | Wall oven door lock assembly WB10X28391 |
| Latch wiring/harness | Power and feedback signals to the lock | Main wire harness WB18X46483 |
| Control/relay board | Interprets latch switch signals and drives the lock | Wall oven relay control board WB27X33083 |
Why it matters
The door lock system is a safety feature. If the control cannot confirm the latch position, it may disable heating or stop self-clean to prevent the oven from operating in an unsafe state.
If you’re troubleshooting with a meter
Use safe electrical practices and shut off power at the breaker before accessing wiring. For help with electrical testing basics, use our how to use a multimeter to test electrical parts video.
Last updated: February 2026
How to replace GE oven temp sensor?
To replace the oven temperature sensor on your GE JTD5000SV2SS electric wall oven, we shut off power, remove the sensor’s mounting screws inside the oven, pull the sensor forward, disconnect the wire connector, then reconnect and reinstall the new sensor (restore power after reassembly).
Before you start (safety and prep)
- Turn off the oven’s circuit breaker (240V); confirm the display is off.
- Let the oven cool completely.
- Protect the oven cavity with a towel so screws do not scratch enamel.
- Have a Phillips or 1/4-inch nut driver ready (fastener type varies).
- If the connector slips back into the insulation, use a bent wire hook to retrieve it.
Replacement steps (typical for this model style)
- Remove the racks for working room.
- Locate the sensor probe on the rear oven wall (usually upper-left or upper-right).
- Remove the mounting screws holding the sensor flange.
- Gently pull the sensor straight toward you a few inches.
- Disconnect the wire harness by releasing the locking tab (do not pull on wires).
- Connect the new sensor, tuck the connector back through the opening, and reinstall screws.
- Restore power and test Bake; verify the oven heats normally.
Which part do I need?
For JTD5000SV2SS, the correct replacement is the wall oven temperature sensor WB21X10165.
| Symptom | Often points to | What to check first |
|---|---|---|
| Oven temperature is inaccurate | Temperature sensor drifting | Sensor connector fully seated, sensor not touching oven wall |
| Oven won’t heat or stops early | Sensor circuit issue | Harness damage, loose plug, then sensor |
| Error after preheat | Sensor reading out of range | Replace sensor if wiring is intact |
Why it matters
The temperature sensor tells the control board the actual oven temperature. If it reads wrong or opens electrically, the oven can underbake, overbake, or shut heating down to protect the appliance.
Helpful DIY tip
If you’re troubleshooting with a meter, use our how to use a multimeter to test electrical parts video to test safely before replacing parts.
Last updated: February 2026