




Do all GE microwaves use the same mounting bracket?
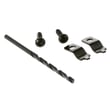
No. GE microwaves do not all use the same mounting bracket; bracket hole patterns, venting layouts, and cabinet cutout requirements vary by model line and generation. For a GE PT9800SH8SS wall oven/microwave combo, use the bracket and hardware specified for that exact unit to ensure proper support and alignment.
Why brackets are not universal
Even within GE and GE Profile, mounting systems change over time. A bracket that fits one microwave can be off by just enough to cause a poor fit, door alignment issues, or vibration.
Common differences include:
- Wall plate hole spacing and keyhole slots
- Top cabinet bolt locations
- Exhaust outlet position (rear vs top) and damper style
- Chassis depth and trim kit interface
- Weight rating and support points
Best practice when replacing a microwave
If you are replacing only the microwave portion of a combo unit, match parts to the exact model and installation design.
We recommend:
- Use the new bracket and fasteners that come with the replacement microwave (or the correct GE kit)
- Do not drill new holes in the chassis or cabinet to “make it fit”
- Confirm the cabinet opening and electrical supply match the replacement requirements
- Verify the unit sits level and the door closes smoothly before final tightening
Quick compatibility checklist
Use this table to decide whether reusing a bracket is realistic.
| Situation | Reuse existing bracket? | What to do |
|---|---|---|
| Same exact model number replacement | Sometimes | Compare wall plate and top bolt locations exactly |
| Same brand, different model line or year | No | Install the correct bracket kit for the new unit |
| Switching from countertop to built-in/trim | No | Use the specified built-in mounting system |
Why it matters
A mismatched bracket can leave the microwave unsupported or misaligned, which affects door sealing, noise, and long-term reliability. Using the correct mounting hardware protects the cabinet and keeps the unit secure.
If you are troubleshooting fitment issues after installation (overheating, fan running constantly, odd temperature behavior), checking related components like the wall oven cooling fan assembly WB26X31060 can also be part of a complete diagnosis.
Last updated: February 2026
What are common problems with GE profile microwaves?
Common problems with the microwave portion of your GE PT9800SH8SS wall oven/microwave combo include running but not heating, loud buzzing or humming, a dead display or unresponsive keypad, a turntable that will not rotate, and door-related issues that prevent operation. Many “no heat” and “won’t start” symptoms trace back to door interlocks or high-voltage components.
Most common symptoms and what they usually point to
- Runs but does not heat: high-voltage circuit issue (transformer, diode, capacitor, magnetron) or a door interlock problem
- Won’t start or stops when you close the door: door interlock switch or latch alignment issue
- Buttons do not respond / display acts erratic: control board or keypad interface problem
- Loud buzzing, arcing, or burning smell: high-voltage component failure or internal arcing (stop using immediately)
- Turntable not turning: tray/drive issue or a control problem
Parts that commonly relate to these problems on PT9800SH8SS
If your symptoms match, these model-specific parts are common suspects:
| Symptom | Part to check | Why it matters |
|---|---|---|
| Won’t start, intermittent running | Microwave door interlock switch WB24X25397 | A failed interlock can prevent the microwave from running safely and consistently |
| Won’t start, runs only with door pressure | Microwave door interlock switch WB24X10047 | Another interlock position can fail and mimic a “dead” microwave |
| Runs but no heat, loud hum | Microwave high-voltage transformer WB17X10030 | The transformer is a key part of the high-voltage heating circuit |
Quick checks we recommend before replacing parts
- Reset power: turn the breaker off for 1 minute, then back on
- Inspect the door: look for a loose latch, sagging door, or misalignment
- Listen for changes: a new loud hum or buzz often signals a high-voltage failure
- Stop if you smell burning or hear arcing: do not continue testing
- Confirm the issue is microwave-only: oven functions working normally helps narrow the diagnosis
Why it matters
Microwaves use a high-voltage heating circuit; when a door interlock or high-voltage component fails, the unit can run unsafely or fail to heat. Correct diagnosis helps you avoid replacing the wrong part and reduces repeat failures.
Last updated: February 2026
What's the average lifespan of a GE microwave?
Most GE microwaves average 8 years of service life. In real-world use, many units last 5 to 10 years, depending on cooking frequency, ventilation, and how well the door and interlock system stay aligned and clean.
Typical lifespan ranges
- Light use (reheating only): about 9 to 10 years
- Daily cooking/heavy use: about 5 to 7 years
- Well-maintained, moderate use: about 7 to 9 years
- Common failure window: years 5 to 10
What shortens microwave life fastest
- Slamming the door or pulling it open while running (stresses the latch and switches)
- Grease buildup around the door area and vents
- Running the microwave empty
- Blocked airflow in a built-in wall oven/microwave combo cabinet
- Frequent power surges or repeated breaker trips
Parts that often drive “replace vs repair” decisions
On the GE PT9800SH8SS wall oven/microwave combo, these are common microwave-related parts customers replace when symptoms point to door safety or basic operation issues:
| Symptom | Often-related part | Example for this model |
|---|---|---|
| Won’t start, starts then stops, or acts like the door is open | Door interlock switch | Microwave door interlock switch WB24X25397 |
| Intermittent running when closing the door, inconsistent door sensing | Door interlock switch | Microwave door interlock switch WB24X10047 |
| No heat (but light and fan run) | High-voltage component (diagnosis required) | Microwave high-voltage transformer WB17X10030 |
Why it matters
A microwave can seem “dead” even when the display works because the door interlock system is a safety circuit. Keeping the door closing smoothly and the latch area clean helps prevent nuisance no-start problems and extends overall life.
Last updated: February 2026