Owner’s manual
 Error Codes


How to remove bottom shelf LG refrigerator?
To remove the bottom refrigerator shelf on an LG LRFXC2416S, we lift the front edge of the glass shelf to unhook it from the rear supports, then pull the shelf straight out. Use extra care because the glass is heavy; follow the steps in the LRFXC2416S owner’s manual.
- Remove food and any bins/drawers that block the shelf from sliding out.
- With both hands, tilt up the front of the shelf.
- Lift straight up to disengage the shelf hooks from the side slots.
- Pull the shelf out of the refrigerator.
- If it feels stuck, re-check that the hooks are fully unseated before pulling harder.
Some LRFXC2416S configurations include a folding shelf. You can fold the front half back to create clearance, but removal is still the same basic process: front up, lift to unhook, then slide out.
| What you notice | Most likely cause | What we do next |
|---|---|---|
| Shelf won’t slide forward | A bin/drawer is in the way | Remove the crisper/deli drawer first, then retry |
| Shelf lifts but won’t unhook | Hooks still seated in the slots | Lift a bit higher while keeping the shelf level |
| Shelf feels wedged | Shelf is slightly twisted | Center it, lift evenly with two hands |
Removing the shelf the right way prevents cracked glass, broken shelf supports, and damage to the liner. It also makes cleaning spills and repositioning shelves much easier.
Last updated: January 2026
How often should you change the filter in an LG refrigerator?
For the LG LRFXC2416S refrigerator, we recommend replacing the refrigerator water filter about every 6 months, or sooner if the water flow slows down or the filter indicator light turns on. This keeps water tasting fresh and helps protect the dispenser and icemaker.
- Replace the water filter approximately every 6 months.
- Replace sooner if the dispenser output decreases.
- Replace when the “Replace Filter” indicator icon turns on.
- After replacement, flush water through the dispenser to clear air and loose carbon.
For the model-specific steps and indicator reset procedure, follow the instructions in the LRFXC2416S manual.
- Install the new filter and make sure it is fully seated/locked.
- Reset the filter indicator (typically by pressing and holding the Water Filter button for about 3 seconds).
- Flush the system by dispensing about 2.5 gallons of water; do it in short cycles (30 seconds on, 60 seconds off) to avoid overheating the dispenser.
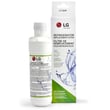
If you need a compatible replacement, use a model-matched filter such as the LG lt1000p refrigerator water filter ADQ74793501.
A fresh filter helps maintain water quality, reduces chlorine taste and odor, and can prevent slow dispensing that often shows up as the filter loads up with sediment over time.
| Situation | Replace the filter? |
|---|---|
| It has been ~6 months | Yes |
| Water dispenses slowly | Yes, replace now |
| Ice cubes are smaller than normal | Often yes |
| “Replace Filter” light/icon is on | Yes |
Last updated: January 2026
Why is my LG refrigerator leaking from the bottom?
On the LG LRFXC2416S, leaking from the bottom is most often caused by a defrost drain that’s clogged and overflowing into the fresh-food section or down into the base. Less commonly, a water supply leak (ice maker or inlet valve) can run down and appear as a bottom leak. For safety, unplug the refrigerator before inspecting.
- Look for a sheet of ice or standing water under the crisper drawers; that points to a defrost drain issue.
- Check the water filter area and tubing connections for drips.
- Pull the unit forward and inspect the floor behind it for water line leaks.
- If you have an ice maker, turn it off for 24 hours and see if the leak stops.
- Confirm doors close fully; warm air can increase frost and defrost water.
During automatic defrost, meltwater should flow through a drain and into an evaporator pan. If the drain is restricted, water can back up, leak into the cabinet, and run out at the bottom.
What to do:
- Remove items from the lower refrigerator section and check for ice buildup.
- Carefully melt ice with warm (not boiling) water and towels.
- Flush the drain with warm water until it flows freely.
- Review defrost and maintenance guidance in the LRFXC2416S manual.
If the refrigerator is connected to a household water line, a slow leak can travel along tubing and drip down near the front or bottom.
Common leak points include:
- Water inlet valve fittings
- Water reservoir or filter head connections
- Ice maker fill tube area
If you suspect the inlet valve is seeping or not closing fully, the compatible replacement is the refrigerator water inlet valve MJX64471402.
| What you see | Most likely cause | Where to check |
|---|---|---|
| Water under crispers, ice sheet on floor | Clogged defrost drain | Bottom of fresh-food compartment, drain trough |
| Water behind fridge, near wall | Supply line or connection leak | House shutoff, tubing, rear connections |
| Leak stops when ice maker is OFF | Ice maker or inlet valve issue | Ice maker fill area, valve, tubing |
A bottom leak can damage flooring and can also lead to ice buildup that blocks airflow, causing temperature swings in the refrigerator and freezer.
Last updated: January 2026
Why is my LG bottom freezer not working?
If your LG LRFXC2416S freezer (bottom drawer) isn’t freezing, the most common causes are Demo/Display Mode being on, airflow problems (fans, frost buildup, blocked vents), or a sealed-system issue such as a failed compressor. Start with the control settings and airflow checks before replacing parts.
- Confirm the display does not show OFF; on this model, OFF indicates Display Mode (cooling disabled).
- Verify temperature settings: freezer target is typically 0°F.
- Make sure freezer drawers and refrigerator doors close fully and seal tightly.
- Clear blocked air vents; overloaded drawers can restrict airflow.
- If the unit was recently moved, let it stand upright and then allow up to 24 hours to reach temperature.
For the exact button sequence to exit Display Mode and other model-specific steps, use the LRFXC2416S manual.
| What you notice | Most likely area | What to do next |
|---|---|---|
| Controls work, lights on, but no cooling and “OFF” shows | Demo/Display Mode | Turn off Display Mode per the manual |
| Freezer warm, fridge also warming, fans may run | Compressor or control issue | Check condenser area airflow; consider compressor diagnosis |
| Freezer frosts up, airflow weak, temps rise | Defrost system problem | Inspect for heavy frost; defrost sensor/heater may be involved |
| Freezer not cold enough, door doesn’t seal | Door gasket/closure | Inspect gasket for gaps, tears, or deformation |
If basic checks point to a component failure, these are common suspects for the LRFXC2416S platform:
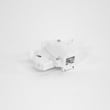
- Compressor TCA36811409 if the refrigerator runs but won’t cool at all (sealed-system diagnosis required)
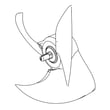
- LG refrigerator freezer evaporator fan motor assembly EAU65075301 if airflow is weak or you hear intermittent fan noise
- Refrigerator defrost sensor assembly 6615JB2005R if the evaporator area is packed with frost and airflow is blocked
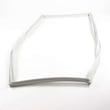
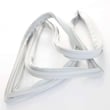
- LG refrigerator freezer door gasket MDS38201426 if the freezer drawer won’t seal and frost builds up
A bottom-mount freezer depends on steady airflow and correct control settings to move cold air where it’s needed. If airflow is blocked or cooling is disabled (Display Mode), temperatures rise quickly and food safety becomes a concern.
Last updated: January 2026