 Owner’s manual
 Error Codes



What does LC mean on a whirlpool washer?
On the Whirlpool WTW8127LC0 washer, “LC” typically indicates Control Lock is turned on, which disables the controls so cycles cannot be started or changed. You usually clear it by pressing and holding the Control Lock button (or the designated key combination) for about 3 seconds; see the exact button for your console in the WTW8127LC0 installation & care manual.
How to turn off LC (Control Lock) on WTW8127LC0
Try these steps in order:
- Look for a button or touchpad labeled Control Lock or a lock icon.
- Press and hold that control for about 3 seconds.
- Watch for the lock indicator light to turn off and the display to clear.
- If the washer is running, press START/PAUSE first, then try the lock again.
- If the panel is unresponsive, unplug the washer for 1 minute, plug it back in, then retry.
If LC keeps coming back
Control Lock can be turned on accidentally by leaning on the console or wiping it down.
Common causes and what to check:
- Stuck key or moisture on the console: dry the panel and try again.
- Lid not closing cleanly: inspect the lid strike and lock alignment.
- Intermittent lid lock operation: the lock may not be sensing correctly.
If you suspect a lid lock issue on this model, the compatible replacement is the lid lock-sol W11700916.
Quick reference: LC vs other lock-related messages
| Display/indicator | What it usually means | What you can do |
|---|---|---|
| LC | Control Lock is enabled | Hold Control Lock about 3 seconds |
| Lid lock light on | Lid is locked for safety | Wait for unlock after cycle or press PAUSE |
| Won’t start with lid closed | Lid lock/strike not engaging | Check lid strike/lock alignment |
Why it matters
Control Lock is a safety and convenience feature, but when it is on, the washer can look “dead” even though power is fine. Clearing LC restores normal operation and helps you avoid unnecessary part replacement.
Last updated: January 2026
What is the middle part of a washing machine called?
In a Whirlpool top-load washer like model WTW8127LC0, the “middle part” people point to is usually the wash action component: either an agitator (a tall center post) or an impeller/washplate (a low-profile plate at the bottom). Your exact configuration is best confirmed in the WTW8127LC0 washer installation & care manual.
What it’s called on this Whirlpool washer
Top-load washers typically use one of these designs:
- Agitator: a tall center post that moves back and forth to roll clothes through water and detergent.
- Impeller / washplate: a low-profile plate at the bottom of the basket that creates water currents to move clothes.
- Agitator auger (on some agitator models): the top “corkscrew” section that helps pull items downward.
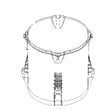
If you’re looking for a replacement for the center wash action piece on WTW8127LC0, a related component you may see listed is the washer agitator auger W11614636.
Quick comparison: agitator vs impeller
| Feature | Agitator | Impeller / washplate |
|---|---|---|
| Shape | Tall center post | Low plate at bottom |
| How it cleans | Mechanical rubbing and turnover | Water currents and load movement |
| Typical tradeoff | Strong turnover, can be rougher on fabrics | More capacity, often gentler |
Why it matters
Using the right term helps you match the correct Whirlpool parts and troubleshooting steps. For example, a “grinding” or “slipping” complaint might point you toward the washplate hardware, such as the washer washplate screw W10752187, rather than a lid lock or control issue.
Helpful tips when describing the “middle part”
- If it’s tall and vertical, call it an agitator.
- If it’s flat and at the bottom, call it an impeller/washplate.
- If only the top section seems stripped or loose, it may be the agitator auger.
- If the washer won’t start or stops, the issue may be unrelated (for example, lid lock).
Last updated: January 2026
How much does it cost to repair a Whirlpool washing machine?
For a Whirlpool washer like model WTW8127LC0, repair costs commonly land in the $100 to $300 range for many service calls, but can climb to $400+ when the fix involves major electrical or drive components. Your total depends on the failed part, labor rates, and whether diagnostics are billed separately.
What drives the price up or down
Typical cost factors include:
- Service call/diagnostic fee (often applied toward the repair)
- Labor time (simple access vs. full disassembly)
- Part type (hose vs. electronic control)
- Multiple symptoms (for example, no fill plus no drain)
- Age/condition of the washer and any prior repairs
For model-specific installation and care details that can prevent avoidable repairs (like leaks and vibration), use the WTW8127LC0 installation & care manual.
Common repairs and relative cost ranges
These are general ranges for Whirlpool top-load washers; your WTW8127LC0 may fall anywhere within them depending on diagnosis.
| Repair type | What you might notice | Typical total cost range |
|---|---|---|
| Hose or clamp issue | Leaks, siphoning, poor drain setup | $100 to $250 |
| Water inlet problem | Won’t fill, fills slowly, wrong temp | $150 to $350 |
| Lid lock/lid strike issue | Won’t start, lid won’t lock/unlock | $150 to $350 |
| Control or drive-related issue | Stops mid-cycle, won’t spin/agitate | $250 to $600+ |
If the washer won’t fill and testing points to the valve, the compatible replacement for this model is the washer water inlet valve W11220230.
When repair is usually worth it
We typically see repair make sense when:
- The washer is otherwise in good shape (no rusted cabinet or tub damage)
- The issue is isolated (one failed component)
- The repair is well under the cost of replacement
- You can prevent repeat failures (leveling, hose replacement, proper drain setup)
Why it matters
Getting a clear diagnosis first helps you avoid paying for the wrong part. On modern Whirlpool washers, symptoms like “won’t start” or “won’t spin” can be caused by a lid lock, a water fill issue, or an electronic control, and the price difference can be significant.
Last updated: January 2026
What is the most common problem with whirlpool washers?
Across Whirlpool washers, including model WTW8127LC0, the most common service complaint we see is a “won’t spin” or “won’t drain and spin” condition. On this model, it’s often tied to lid-lock sensing, drain setup, or load balance. For model-specific care and installation checks, use the WTW8127LC0 installation & care manual.
Quick checks we recommend first (WTW8127LC0)
- Confirm the lid closes fully and latches; a misaligned strike can prevent spinning.
- Run a RINSE & SPIN cycle with the tub empty to see if it drains and reaches spin.
- Check the drain hose installation; if it is pushed too far into the standpipe, siphoning can mimic a drain problem.
- Verify both water faucets are fully open; some cycles will not advance if fill is abnormal.
- Reduce load size and redistribute bulky items; out-of-balance loads can stop or limit spin.
Parts that commonly relate to “won’t spin” on this model
If your checks point to lid sensing or draining, these model-compatible parts are common suspects:
- Lid lock-sol W11700916 (locks the lid and confirms “lid closed” to the control)
- Washer lid strike W11457841 (the strike the lid lock grabs; if cracked or loose, the lock may not sense)
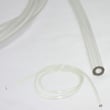
- Washer drain hose W11244231 (a damaged or restricted drain hose can contribute to drain and spin problems)
Symptom-to-cause guide
| What you notice | Most likely area to check | Example compatible part |
|---|---|---|
| Lid won’t lock or unlock; no spin | Lid lock or lid strike alignment | W11700916, W11457841 |
| Water left in tub; won’t reach spin | Drain hose routing or restriction | W11244231 |
| Stops during fill or fills slowly | Water supply or inlet valve screens | W11220230 |
Why it matters
A washer that can’t complete drain and spin leaves clothes soaking wet and can trigger repeated cycle stops. Catching simple issues early (lid strike alignment, drain hose setup, load balance) helps avoid unnecessary part replacement.
Last updated: January 2026


