 Installation guide
 Owner’s manual

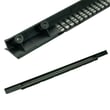
How to replace KitchenAid oven temperature sensor?
To replace the oven temperature sensor on KitchenAid model KEMS308SSS04, we disconnect power, access the sensor inside the lower oven cavity, unplug the sensor harness, and install the new sensor in the same position. Use the wiring and access details in the KEMS308SSS04 use & care manual.
- Phillips screwdriver or nut driver (varies by mounting screw)
- Work gloves
- Flashlight
- The correct replacement part: wall oven temperature sensor WPW10131825
- Shut off power at the breaker (built-in ovens are hardwired; do not rely on the control panel being off).
- Let the oven cool completely.
- Locate the sensor in the lower oven cavity (typically a thin metal probe mounted to the rear wall).
- Remove the mounting screws holding the sensor to the oven liner.
- Gently pull the sensor forward a few inches to expose the connector.
- Unplug the wire connector (do not pull on the wires).
- Connect the new sensor, tuck the connector back through the opening, and reinstall the screws.
- Restore power and test by preheating; confirm the oven reaches and holds set temperature.
- Confirm the issue is temperature-related (overheating, underheating, long preheat).
- Check for a loose or damaged connector at the sensor plug.
- If the display shows an error condition, power-cycle the unit once; if it returns, troubleshooting may be needed beyond the sensor.
| Symptom | More likely cause | What to try first |
|---|---|---|
| Oven is consistently off by a small amount | Control calibration | Adjust calibration per the KEMS308SSS04 use & care manual |
| Temps swing wildly or won’t regulate | Sensor or wiring | Inspect plug and replace sensor |
| Oven won’t heat properly at all | Not usually the sensor alone | Check other components in the parts list (elements, fuses, wiring) |
A failing temperature sensor can make the control “think” the oven is hotter or cooler than it really is. That leads to uneven baking, longer cook times, and temperature overshoot that can affect baking results.
Last updated: January 2026
What are the internal parts of a microwave oven?
A microwave oven like the upper unit in KitchenAid model KEMS308SSS04 uses a high-voltage power system to energize a magnetron, then routes microwave energy into the cooking cavity while safety interlocks and cooling airflow protect the user and components. For diagrams and feature locations, see the KEMS308SSS04 use & care manual.
- Magnetron: generates microwave energy for heating.
- High-voltage power section: converts household power to the high voltage the magnetron needs.
- Waveguide and waveguide cover: directs energy into the cavity and shields the opening from splatter.
- Cooling fan and air ducts: move air to keep the magnetron and electronics from overheating.
- Door interlock switches and latch system: prevents operation with the door open.
- Turntable system: rotates food for more even heating.
Some internal parts are serviceable and show up in the parts list for this model, such as:
| Internal part (example) | What it supports | Example part page for this model |
|---|---|---|
| Door safety switch | Confirms door is closed so the unit can run | Switch W10211972 |
| Waveguide cover | Protects the waveguide opening from food splatter | Cover W10915651 |
| Turntable drive motor | Turns the turntable during cooking | Microwave turntable motor W10911403 |
| Transformer | Part of the power system on some designs | Transformer W11238401 |
Knowing the internal parts helps you narrow symptoms. For example, a no-heat complaint often points toward the high-voltage system, while a no-run or intermittent run issue can involve the door interlock circuit.
- Disconnect power at the breaker before removing any panels.
- Do not attempt to access high-voltage components; they can retain a dangerous charge.
- If you suspect a door interlock or high-voltage issue, we recommend using a qualified technician.
Last updated: January 2026
How to reset KitchenAid microwave oven combo?
To reset the KitchenAid KEMS308SSS04 wall oven/microwave combo, we recommend doing a full power reset: turn the circuit breaker(s) OFF for 1 minute, then turn them back ON. After power is restored, start a bake cycle and watch for about 1 minute to confirm the issue does not return.
- Turn OFF the breaker(s) feeding the combo unit.
- Wait 60 seconds.
- Turn ON the breaker(s).
- If the display prompts for time (for example, “CLOCK ENTER TIME”), press START to allow operation.
- Start a BAKE cycle and monitor for 1 minute.
This model can lock the control panel. If keys do not respond, unlock Control Lock:
- Touch and hold START for about 5 seconds.
- Confirm the display shows the lock cleared.
For control features like Control Lock and display messages, see the KEMS308SSS04 use & care manual.
If the error or symptom returns right away after a power reset, focus on these common causes:
- A momentary power interruption (the reset usually clears this)
- A stuck key or control issue
- A door not fully closing (microwave interlock system)
- An internal electrical protection opening (fuse/thermal fuse)
| Symptom | What to check first | Next step |
|---|---|---|
| Display blank | Breaker fully ON | Power reset again (1 minute OFF) |
| Display shows “PF” | Power failure occurred | Set clock or press START to operate |
| Microwave will not start | Door closes firmly | Inspect interlock components |
If you suspect a door-interlock problem, the switch W10211972 is one of the interlock-related parts used on this model.
A proper power reset clears many temporary control faults and restores normal operation after a power glitch. Monitoring a short bake cycle helps confirm the lower oven control is stable before you rely on the unit for cooking.
Last updated: January 2026
Can you fix a KitchenAid microwave?
Yes, you can often fix the microwave portion of your KitchenAid KEMS308SSS04 wall oven/microwave combo when the problem is something simple (power, door closing, settings, or a failed safety switch). For heating or high-voltage issues, we recommend professional service.
- Verify the unit has power; check the breaker and that the display is on.
- Confirm the door closes firmly and latches; a misaligned door can prevent operation.
- Try a basic heat test: microwave 1 cup of water for 2 minutes; water should be hot.
- Cancel any active timer or locked controls; reset by turning power off for 1 minute.
- If the microwave stops when you open the door (and resumes when closed), the door switches are at least responding.
For model-specific operating checks and control behavior, use the KEMS308SSS04 use & care manual.
If the microwave runs but does not heat, or it is completely dead, the issue is often in a safety or power-protection component.
- Door won’t start or stops randomly: door interlock switch or interlock mechanism
- Completely dead (no display): fuse, fuse holder, thermal fuse, wiring
- Runs but no heat: inverter, transformer, thermostat (diagnosis required)
If you suspect a door-switch problem on this model, the compatible replacement is the switch W10211972.
| Symptom | What it often points to | Example compatible part for KEMS308SSS04 |
|---|---|---|
| Microwave won’t start, door feels “off” | Door interlock switch | Switch W10211972 |
| No power at all | Fuse or thermal fuse | Fuse (black) WP4375321 or wall oven thermal fuse WP8304452 |
| Turntable not rotating | Turntable motor | Microwave turntable motor W10911403 |
Microwave door interlocks and fuses are safety devices. Fixing the right component restores normal operation and helps prevent repeat failures from forcing the unit to shut down.
Last updated: January 2026




