


Can you actually bake in a toaster oven?
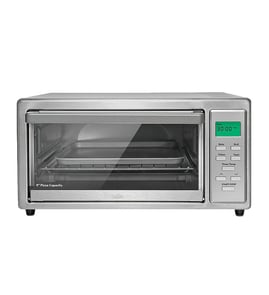
Yes, you can bake in the KitchenAid KCO211BM0 toaster oven; it works like a small conventional oven for items such as cookies, muffins, quick breads, and small casseroles. Because the cavity is compact and the heating elements are close, we recommend using the right-size pan and watching bake times closely.
What bakes well in a toaster oven
- Drop cookies, bar cookies, and small batches of biscuits
- Muffins and cupcakes (use a small muffin pan)
- Quick breads in mini loaf pans
- Single-serve casseroles or baked pasta
- Roasted vegetables (in a shallow pan)
Pan and rack setup tips (to prevent burning)
Using the correct rack position and cookware size helps avoid over-browning on top or scorching the bottom.
- Use smaller, lighter-colored metal pans when possible
- Keep food centered on the rack for more even heat
- Avoid oversized pans that block airflow
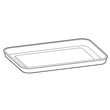
- Use the correct accessory for the job, such as the multipurpose pan W11401075
- For baking, place food on the rack rather than directly on the crumb tray
Quick accessory guide for KCO211BM0
| Accessory | Best use | Why it helps |
|---|---|---|
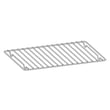
| Wire rack W11391018 | Most baking and toasting | Positions food for airflow and even heating |
| Multipurpose pan W11401075 | Baking, roasting, drips | Catches drips and supports small bakes |
| Crumb tray W11401081 | Crumb collection | Keeps the bottom clean and reduces smoke |
| Broil rack W11401087 | Broiling | Elevates food closer to top heat |
Time and temperature adjustments
Most toaster ovens bake a little faster than a full-size oven.
- Start checking doneness 3 to 5 minutes early
- If tops brown too fast, lower the rack position or reduce temperature by 25°F
- If bottoms brown too fast, use a pan on the rack (not directly under the elements)
Why it matters
Baking in a toaster oven saves time and energy for small portions, but the tighter space means heat is more intense. The right rack, pan, and placement help you get even results without burnt edges.
Last updated: January 2026
What cannot be cooked in a toaster oven?
Some foods and cookware should not go in a KitchenAid KCO211BM0 toaster oven because they either do not fit safely, cook unevenly, or create spill and grease hazards near the heating elements. We recommend sticking to small, shallow portions on the correct rack or pan for safer, more even results.
Foods and items to avoid
- Large roasts or oversized casseroles that crowd the cavity or touch heating elements
- Soupy or very liquid dishes (stews, big batches of chili) that can slosh and spill
- High-grease foods that splatter heavily (very fatty bacon loads, greasy sausages) unless you can contain drips
- Foods that need constant moisture (large pots of rice, long-simmer dishes) because toaster ovens dry food faster
- Tall items that sit too close to the top element (some artisan loaves, high domed bakes)
- Non-oven-safe containers (plastic, paper, foam, thin takeout trays)
Cookware rules that prevent damage and mess
Use bakeware that fits with clearance on all sides and stays stable when you slide it in and out.
| Use this | Avoid this | Why |
|---|---|---|
| Metal or oven-safe glass/ceramic that fits flat | Plastic, paper, foam, or warped pans | Melting, scorching, tipping |
| Shallow pans and small portions | Deep, sloshy dishes | Spill risk, uneven heating |
| Proper rack position and drip control | Food touching elements or dripping freely | Smoke, flare-ups, burnt spots |
Parts that help you cook safely in the KCO211BM0
Using the correct accessories helps control drips and keeps food positioned for even heat.
- Multipurpose pan W11401075: helps contain grease and drippings under foods like wings or sausages
- Crumb tray W11401081: catches crumbs and small debris that can smoke if left to build up
- Wire rack W11391018: supports food at the right height for baking and toasting
- Broil rack W11401087: elevates food for broiling while letting drippings fall into a pan
Why it matters
Toaster ovens heat with exposed elements in a compact space. Overfilling, using the wrong container, or letting grease drip freely increases smoke, scorching, and uneven cooking, and it can shorten the life of internal components.
Last updated: January 2026
What is the disadvantage of a toaster oven?
A toaster oven like the KitchenAid KCO211BM0 is convenient, but its main disadvantages are limited cooking space, more uneven browning than a full-size oven, and more frequent cleaning due to crumbs and grease collecting near the heating elements.
Common disadvantages (what you will notice day to day)
- Limited capacity and height: Large casseroles, tall roasts, and big pizzas often will not fit.
- Uneven cooking: Food can brown faster on the top or edges because the heating elements are close.
- More attention required: Small ovens can go from “done” to “overdone” quickly.
- Mess buildup: Crumbs and drips collect in tight spaces and can smoke if not cleaned.
- Not ideal for wet, bulky foods: Big pasta bakes, large covered dishes, and oversized sheet-pan meals are a poor match.
Cleaning and maintenance drawbacks (and how to reduce them)
Keeping the interior clean matters more with a toaster oven because crumbs and grease sit close to the heat source.
- Empty and wipe the crumb area after heavy use.
- Let the oven cool fully before cleaning.
- Use the correct pan size to reduce spills.
- Replace bent or damaged accessories that cause tipping or poor airflow.
Helpful model-matched parts:
| What it affects | Part to check/replace | Why it helps |
|---|---|---|
| Crumb control and smoke | Crumb tray W11401081 | Catches crumbs and drips so they do not burn on the oven floor |
| Airflow and even browning | Wire rack W11391018 | Keeps food positioned correctly for more consistent heating |
| Spill prevention | Multipurpose pan W11401075 | Helps contain grease and drips during roasting or reheating |
Why it matters
Most “toaster oven problems” are really capacity limits, heat being very close to the food, or buildup on the rack and crumb area. Keeping the rack and crumb tray in good shape helps reduce smoke, scorching, and uneven results.
Last updated: January 2026