 Error Codes




How do I find the right GE part number?
For your GE slide-in electric range model GRS600AV1WW, the right part number comes from matching the exact model number to the correct parts diagram, then confirming the part’s ID and description before ordering. This prevents mix-ups between similar-looking switches, elements, sensors, and door parts.
Step-by-step: how we recommend finding the correct part
- Confirm the model number is GRS600AV1WW (letter and number order matters).
- Use the model’s parts list and diagrams to locate the failed component by section (cooktop, oven, door, wiring).
- Match by part name + part ID, not by appearance alone.
- Compare your old part to the listing: terminals, mounting points, and any markings.
- If multiple versions exist, match by where it installs and what it controls (burner size, dual element, convection, etc.).
- When in doubt, verify with the wiring and symptoms before ordering.
Common examples on this model (what to match)
| What you’re fixing | What to match | Example part anchor |
|---|---|---|
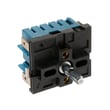
| Surface burner won’t heat or won’t regulate | Correct burner position and switch style | GE range surface element control switch WB24X25013 |
| Oven temperature is inaccurate | Sensor type and connector | Oven temp semsor WB17X47506 |
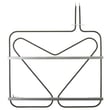
| Oven won’t bake but broil works | Hidden bake element style and mounting | Hidden bake element WB44X47327 |
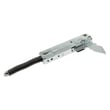
| Door won’t close right or feels loose | Hinge style and side | Hinge WB10X47305 |
Why it matters
GE ranges often use similar parts across multiple models, but small differences (wattage, dual-element compatibility, connector style, or mounting) can cause a part to fit incorrectly or not work. Matching the GRS600AV1WW diagram and the exact part ID keeps the repair accurate.
Helpful tip before ordering
If you are unsure whether the issue is the part or the wiring, use a meter to confirm power and continuity first; our guide how to use a multimeter to test electrical parts video helps you test safely and avoid replacing good parts.
Last updated: February 2026
How to replace the control panel on a GE oven?
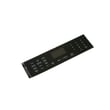
On the GE GRS600AV1WW slide-in electric range, replacing the control panel typically means shutting off power, removing the rear access cover, labeling and transferring wire connectors one at a time, then reinstalling the panel and testing all oven and surface functions.
Safety first (do this every time)
- Turn off the range at the circuit breaker (240V); confirm the cooktop and oven are fully dead.
- Let the oven cool completely.
- Pull the range forward carefully to avoid stressing the power cord.
- Use cut-resistant gloves; sheet metal edges behind the console are sharp.
- Take clear photos of every connector before you unplug anything.
Control panel replacement steps (typical GE range procedure)
- Disconnect power at the breaker.
- Access the back of the console: remove the screws holding the rear control-panel cover (usually across the top back edge).
- Support the panel: as you loosen screws, keep one hand on the panel so it does not drop or pinch wires.
- Label and move wires one at a time: transfer each harness/terminal from the old panel or control to the same location on the new part.
- Reinstall the panel: hook the top edge in place (if applicable), then swing the bottom in and tighten all screws.
- Restore power and test: verify bake, broil, convection (if equipped), oven light, and each surface element.
What part is usually involved?
“Control panel” can mean different parts. Use this quick guide to match the symptom to the most likely component.
| What is not working | Most likely part area | Example part for this model |
|---|---|---|
| Display/keys dead or erratic | Electronic control/overlay area | (varies by configuration) |
| Oven will not heat or temp is wildly off | Sensor circuit | Oven temp semsor WB17X47506 |
| Door-related functions act up (light, self-clean lock logic) | Door switch circuit | Range oven door switch WB24X27550 |
Common mistakes we see (and how to avoid them)
- Mixing up connectors: move one connector at a time and match your photos.
- Pinched harness: route wires exactly as found before tightening the cover.
- Loose terminal connections: push spade terminals fully onto tabs; a loose fit causes heat damage.
- Skipping a full function test: test every burner and oven mode before sliding the range back.
Why it matters
The control panel area carries line-voltage circuits and low-voltage control signals. Correct wire placement and secure connections prevent nuisance failures, overheating at terminals, and repeat repairs.
Last updated: February 2026
How to reset GE range?
To reset your GE GRS600AV1WW slide-in electric range, turn the range’s power OFF at the home circuit breaker (or remove the fuse) for 1 minute, then restore power. This power-cycle reset clears many control glitches and restores normal operation.
Reset steps (safe, standard method)
- Turn all surface burner knobs to OFF.
- Switch the range’s circuit breaker OFF (or remove the fuse).
- Wait 60 seconds.
- Switch the breaker ON (or reinstall the fuse).
- Set the clock, then test Bake and a surface element.
If it still will not respond
A reset fixes temporary electronic lockups; if the range stays dead or acts erratically, focus on power supply and common control-related parts.
- Confirm the breaker is a double-pole range breaker and is fully reset (OFF then ON).
- Check for a loose or burned power connection at the range’s terminal block; see terminal block WB18X47088.
- If the display works but oven temperature is inaccurate or the oven will not heat correctly, inspect the oven temperature sensor; see oven temp semsor WB17X47506.
- If the oven light or door-related functions act up, check the door switch; see range oven door switch WB24X27550.
- If a surface element stays on, will not heat, or heats intermittently, a control switch can be the cause; see GE range surface element control switch WB24X25013.
Quick symptom guide
| What you see after reset | Most likely area to check | Example part |
|---|---|---|
| Completely dead (no display, no heat) | Power connection at range | WB18X47088 |
| Oven heats wrong or not at all | Temperature sensing | WB17X47506 |
| Door functions inconsistent | Door switch circuit | WB24X27550 |
| Burner won’t regulate heat | Surface element control | WB24X25013 |
Why it matters
A 1-minute power reset is the fastest way to clear a stuck control state without replacing parts. If the problem returns, checking the power connection and the specific circuit (oven sensor, door switch, or burner control) helps you target the right repair.
Last updated: February 2026




