Installation guide
 Owner’s manual




How long should a microwave last?
Most microwave/hood combos like the Hotpoint RVM1435WH001 last 8 to 9 years. With light-to-moderate use and basic care (keeping vents clear, not running it empty, and using microwave-safe cookware), 7 to 10 years is the typical lifespan.
A microwave’s life is usually shortened by heat stress, door-switch wear, and poor airflow. These are the biggest factors we see:
- Daily run time (multiple long heating cycles per day wears components faster)
- Ventilation and grease buildup (restricted airflow raises internal temperatures)
- Door use and slamming (stresses interlock switches and latch parts)
- Power quality (surges can damage electronic components)
- Cleaning habits (food splatter and arcing damage the cavity and waveguide area)
For an over-the-range microwave, repairs are most practical when the issue is a common wear item (light, door switch, turntable drive) and the unit is not near end-of-life.
| Situation | Typical direction | Why |
|---|---|---|
| 0 to 5 years old | Repair | Plenty of remaining service life |
| 6 to 9 years old | Depends on repair cost | Balance cost vs remaining life |
| 10+ years old | Replace | Major repairs rarely pay off |
If your RVM1435WH001 is acting up, these parts are frequent culprits in microwave/hood combos:
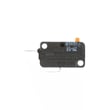
- Door won’t start or stops when closing: monitor switch WB24X830
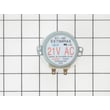
- Turntable not rotating: microwave turntable motor WB26X10038
- No heat (runs but doesn’t warm food): high-voltage components (diagnosis required)
- Hood light out: microwave light bulb WB36X10003
Knowing the expected lifespan helps you decide whether to invest in a repair or put that money toward a replacement. It also helps you plan maintenance that reduces overheating and prevents avoidable failures.
- Never run the microwave empty
- Use only microwave-safe dishes (avoid metallic trim)
- Keep the grease filters clean and airflow unobstructed
- Avoid heating liquids too long; let them stand briefly before moving
- Follow the care and operating guidance in the owner's manual
For replacement parts for Hotpoint RVM1435WH001, start with the parts list for your model, or search by model number on Sears PartsDirect.
Last updated: February 2026
How do I reset my microwave?
To reset your Hotpoint RVM1435WH001 microwave/hood combo, unplug it and plug it back in to clear a power surge or control glitch. If the display shows LOC, press and hold CLEAR/OFF for about 3 seconds to unlock the controls (this often feels like a “reset”). See the owner's manual for model-specific control features.
- Power reset: Unplug the microwave for 1 to 2 minutes, then plug it back in.
- Breaker reset (if hardwired or outlet is inaccessible): Turn the microwave circuit breaker OFF, wait 1 minute, then turn it ON.
- Clear the control panel: Press CLEAR/OFF once to stop a cycle and clear the display.
- Unlock the keypad: If LOC appears, press and hold CLEAR/OFF for about 3 seconds.
- After a surge: Unplug, then plug back in (the manual lists this as a fix for a power surge).
A reset helps with temporary glitches; if the oven still will not start, focus on power and door-interlock basics.
- Confirm the 3-prong plug is fully inserted into the wall outlet.
- Check the home fuse/circuit breaker.
- Open and close the door firmly; a misaligned latch can prevent starting.
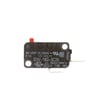
- If the control is acting erratically, inspect door-interlock components such as the monitor switch WB24X830 and the microwave door interlock switch lever WB06X10128.
| Symptom | What a reset can fix | What usually needs troubleshooting/parts |
|---|---|---|
| Blank display after flicker | Control glitch after power surge | Outlet, breaker, wiring issue |
| LOC on display | Unlock with CLEAR/OFF (3 sec) | Stuck keypad (less common) |
| Won’t start with door closed | Sometimes clears logic state | Door switch/lever alignment, interlock switch |
Microwaves use door interlock switches and control locks to prevent unsafe operation. Resetting power and unlocking LOC restores normal control operation without changing any cooking settings permanently.
You can order replacement parts for your RVM1435WH001 from the parts list for this model, or search by model number on Sears PartsDirect.
Last updated: February 2026
Is there a big difference between 900W and 1000W in a microwave?
Yes. A 1000W microwave cooks about 10% faster than a 900W unit, so you typically reduce cook time slightly for the same food. For the Hotpoint RVM1435WH001 specifically, the cooking output is listed as 950 watts, which sits between those two and performs very similarly with minor time adjustments (and good stirring or rotating).
Microwave wattage mainly affects speed and, indirectly, how forgiving cooking is for larger or denser foods.
- 1000W vs 900W: about 10% more power, so many foods finish sooner
- More power usually means less total time and fewer “cold spots” when you stir/rotate
- Lower power often needs slightly longer time and more mid-cycle stirring
- For reheating leftovers, the difference is noticeable but not dramatic
- For large portions (casseroles, thick soups), higher wattage tends to feel more consistent
If a recipe is written for 1000W and you are using 900W, add roughly 10% time. If you go the other direction, reduce time.
| Recipe written for | Your microwave | Time change to start with |
|---|---|---|
| 1000W | 900W | Add ~10% |
| 900W | 1000W | Subtract ~10% |
| 1000W | 950W (RVM1435WH001) | Add ~5% |
| 900W | 950W (RVM1435WH001) | Subtract ~5% |
Your RVM1435WH001 uses cycling power levels (for example, power level 7 runs about 70% of the time). That helps prevent overcooking edges while the center heats.
- Use High (power level 10) for quick boiling and most standard reheats
- Use medium power (around 5 to 7) for thicker foods to reduce splatter and hot edges
- Use lower power (around 3) for defrosting and gentle softening
- Stir, rotate, or turn food partway through for more even results
For the exact steps to change power levels on this model, follow the owner's manual.
Matching cook time and power level to your microwave’s wattage helps you avoid dried-out edges, cold centers, and boil-overs. With a 950W microwave like the RVM1435WH001, most 900W or 1000W directions work well with small time tweaks.
Last updated: February 2026
What are the disadvantages of a microwave oven combo?
A microwave/hood combo like the Hotpoint RVM1435WH001 saves space, but the tradeoffs are higher replacement cost, more complicated repairs, and less flexibility than separate appliances. Venting performance and cooking capacity can also be limited compared to a dedicated range hood and countertop microwave.
- One failure can affect everything: if the microwave stops heating or the vent fan quits, you lose a key kitchen function until it is repaired.
- More complex service: over-the-range units combine door interlocks, high-voltage heating parts, and a vent system in one chassis.
- Installation is harder: we recommend two people for safer mounting, and you should not lift by the door handle during installation (details in the installation guide).
- Venting tradeoffs: recirculation setups rely on filters and airflow paths; performance can be weaker than a dedicated hood in some kitchens.
- Size constraints: cabinet depth and mounting height can limit interior capacity and usability.
Microwave/hood combos pack several systems into a tight space. When a symptom shows up, troubleshooting often spans multiple assemblies.
| Symptom | Common system involved | Example part on this model |
|---|---|---|
| Runs but does not heat | High-voltage circuit | Microwave high-voltage capacitor WB27X10011 |
| Door won’t start unit or acts intermittent | Door interlock system | Monitor switch WB24X830 |
| Turntable not rotating | Drive motor/coupler | Microwave turntable motor WB26X10038 |
A combo unit is a great space-saver, but it is a single point of failure for both cooking and ventilation. Planning for installation effort, airflow needs, and repair complexity helps you decide whether a combo or separate microwave and hood fits your kitchen better.
- Avoid metal or foil contact that can cause arcing.
- Do not run the microwave empty for more than a minute or two.
- Keep the door seal area clean and use mild, non-abrasive cleaners.
For more safety and operating tips specific to RVM1435WH001, use the owner's manual. If you decide to repair or replace parts, you can order model-matched parts from the list for RVM1435WH001 or search by model on Sears PartsDirect.
Last updated: February 2026