
Is it better to have a jointer or a planer?
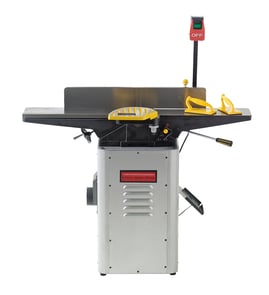
For most woodworkers, a planer is the better first buy because it makes boards uniformly thick for a wide range of projects; a jointer is the next step when you need reliably flat faces and square edges before planing. For your Craftsman 149236223 jointer/planer, the “better” choice depends on whether thicknessing or flattening is your main goal.
What each tool does (and what it does not)
- Planer: makes the top face parallel to the bottom face and brings stock to a consistent thickness.
- Jointer: makes one face flat and one edge square to that face (your reference surfaces).
- A planer does not flatten a twisted or bowed board by itself; it can copy the warp.
- A jointer does not make boards a consistent thickness; it creates a flat reference.
Which is “better” for your work
Choose a planer first when:
- You buy S4S or already-flat stock and mainly need thickness control.
- You build cabinets, shelves, or furniture parts where matching thickness matters.
- You want the most day-to-day utility for dimensioning lumber.
Choose a jointer first when:
- You regularly start with rough lumber that is cupped, bowed, or twisted.
- You need tight glue joints for panel glue-ups.
- You care about straight, square edges for joinery and clean assembly.
Quick comparison
| If your main problem is... | Better first tool | Why |
|---|---|---|
| Boards are different thicknesses | Planer | Thicknessing is its core job |
| Boards are warped or twisted | Jointer | Creates a true flat reference face |
| Glue joints don’t close tightly | Jointer | Straightens edges for seam-free glue-ups |
| You want one machine to do both | Jointer/planer combo | Saves space; changes between functions |
Why it matters
Flat reference surfaces come first in accurate woodworking. A jointer creates that reference; a planer makes the opposite face parallel and brings the board to final thickness. When you match the tool to your lumber and project style, you get safer cuts, better joinery, and less waste.
Parts and support
If you are maintaining your Craftsman 149236223 jointer/planer (belts, knives, guards, switches, or dust collection pieces), we recommend looking up your model to match parts correctly on Sears PartsDirect.
Last updated: February 2026
What sizes do jointers come in?
Jointers are sized by their maximum cutting width (the widest board they can joint in one pass). Common sizes are 4-inch to 6-inch for compact benchtop units, 8-inch for a versatile shop upgrade, and 10-inch to 12-inch (and wider) for larger shops. For Craftsman model 149236223, use the model number when shopping to match the correct diagrams and replacements on Sears PartsDirect.
Common jointer sizes and what they’re best for
- 4-inch to 6-inch: Small projects, tight shop space, narrower stock.
- 8-inch: Furniture builds and mixed-width lumber; fewer workarounds.
- 10-inch to 12-inch: Wide boards; fewer glue-ups and less ripping.
- 16-inch and wider: Production work and frequent wide stock.
Quick comparison
| Jointer size | Typical user | Typical tradeoff |
|---|---|---|
| 4-inch to 6-inch | DIY, small shops | More steps for wide boards |
| 8-inch | Serious hobbyist | Higher cost, larger footprint |
| 10-inch to 12-inch | Dedicated shop | More space, power, dust control |
| 16-inch+ | Production | Highest cost and space needs |
How we recommend choosing a size
- Buy for your most common board width, not the occasional maximum.
- Plan for flattening: wider jointers reduce ripping and re-gluing.
- Check table length: longer beds help straighten longer boards.
- Match your planer workflow: joint one face and one edge, then plane to thickness.
- Allow clearance: you need infeed and outfeed space plus dust collection.
Why it matters
Choosing the right jointer width and bed length reduces extra handling and helps you get flatter, straighter stock with fewer workarounds, especially on hardwoods.
Last updated: February 2026
Why do Americans call a planer a jointer?
In American woodworking, a jointer and a planer are different tools, not interchangeable names. A jointer flattens one face and squares one edge for glue-ups; a planer (thickness planer) makes the opposite face parallel and brings boards to a consistent thickness. For Craftsman model 149236223 (a jointer/planer), the combined name reflects that both functions can be done on one machine.
Jointer vs planer: what each tool actually does
- Jointer: creates a flat reference face and a straight, square edge.
- Planer (thickness planer): makes the second face parallel to the first and reduces thickness.
- Typical workflow: joint one face, joint one edge, then plane to final thickness.
- Why the confusion happens: some combo machines are labeled “jointer/planer,” and people shorten the name.
Why the jointer is called a “jointer”
The term comes from the jointer’s job: preparing edges that will be joined edge-to-edge (panel glue-ups). Historically, the name also connects to the long hand plane used for the same purpose (often called a “jointer plane”).
Quick comparison table
| Task | Best tool | Result you’re aiming for |
|---|---|---|
| Flatten one face | Jointer | One truly flat reference face |
| Straighten/square one edge | Jointer | Edge ready for joining |
| Make faces parallel | Planer | Opposite face parallel |
| Final thickness sizing | Planer | Consistent thickness |
Why it matters
Using the right tool in the right order prevents twist, taper, and glue-line gaps. If you try to “flatten” a warped board only with a planer, you often end up with a board that is thinner but still not truly flat.
Parts and support for your combo machine
For Craftsman 149236223 jointer/planer parts and diagrams, we recommend starting with the model parts list, then using Sears PartsDirect to search by model number when you need additional repair help or replacement components.
Last updated: February 2026