
Get free shipping on your order, with any water filter subscription. Find my filter

Open Hamburger Menu
Sears Parts Direct
Tips to find your model number

Hydro-Gear 311-3500 transaxle Parts

Here are the diagrams and repair parts for Hydro-Gear 311-3500 transaxle, as well as links to manuals and error code tables, if available.

Hydro-Gear 311-3500 transaxle
By Schematic
By Part
SELECT DIAGRAM
?

This is the number corresponding to the part on the diagram / schematic

Browse Parts for 311-3500 Riding Mowers & Tractors

  • Lawn Tractor Transaxle Sealant for Hydro-Gear 311-3500 - Part 178322

    Hydro-gear transaxle diagram

  • Lawn & Garden Equipment Screw for Hydro-Gear 311-3500 - Part 583031901

    Hydro-gear transaxle diagram

    Screw O-ring

    Part #169548

    Replaced by #583031901

    Info Icon
    Manufacturer substitution
    This part replaces 169548. Substitute parts can look different from the original.
    In Stock
    $14.83
    Minus Item
    Qty
    Plus Item
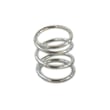
  • Spring for Hydro-Gear 311-3500 - Part 583135901

    Hydro-gear transaxle diagram

    Spring.neutr

    Part #184702

    Replaced by #583135901

    Info Icon
    Manufacturer substitution
    This part replaces 184702. Substitute parts can look different from the original.
    In Stock
    $25.60
    Minus Item
    Qty
    Plus Item
  • Lawn Tractor Ball Bearing for Hydro-Gear 311-3500 - Part 583031301

    Hydro-gear transaxle diagram

    Ball Bearing

    Part #169535

    Replaced by #583031301

    Info Icon
    Manufacturer substitution
    This part replaces 169535. Substitute parts can look different from the original.
    In Stock
    $124.12
    Minus Item
    Qty
    Plus Item
  • Plug.9005200 for Hydro-Gear 311-3500 - Part 582976201

    Hydro-gear transaxle diagram

    Plug

    Part #150800

    Replaced by #582976201

    Info Icon
    Manufacturer substitution
    This part replaces 150800. Substitute parts can look different from the original.
    In Stock
    $14.83
    Minus Item
    Qty
    Plus Item
  • Lawn Tractor Transaxle Lip Seal for Hydro-Gear 311-3500 - Part 583000201

    Hydro-gear transaxle diagram

    Seal.1" (507

    Part #161157

    Replaced by #583000201

    Info Icon
    Manufacturer substitution
    This part replaces 161157. Substitute parts can look different from the original.
    In Stock
    $32.71
    15% OFF Phone Price : $38.71Info Icon
    Minus Item
    Qty
    Plus Item
  • Lawn Tractor Brake Compression Spring for Hydro-Gear 311-3500 - Part 583001401

    Hydro-gear transaxle diagram

    Compression

    Part #170417

    Replaced by #583001401

    Info Icon
    Manufacturer substitution
    This part replaces 170417. Substitute parts can look different from the original.
    This item is not returnable
    In Stock
    $25.60
    Minus Item
    Qty
    Plus Item
  • Stud Bolt for Hydro-Gear 311-3500 - Part 50284

    Hydro-gear transaxle diagram

    Friction Stud

    Part #170421

    Replaced by #50284

    Info Icon
    Manufacturer substitution
    This part replaces 170421. Substitute parts can look different from the original.
    In Stock
    $30.57
    Minus Item
    Qty
    Plus Item
  • O-ring.2.864 for Hydro-Gear 311-3500 - Part 583031601

    Hydro-gear transaxle diagram

    Washer

    Part #169545

    Replaced by #583031601

    Info Icon
    Manufacturer substitution
    This part replaces 169545. Substitute parts can look different from the original.
    In Stock
    $40.03
    Minus Item
    Qty
    Plus Item
  • Lawn Mower Retainer Ring for Hydro-Gear 311-3500 - Part 583031501

    Hydro-gear transaxle diagram

    Lawn Mower Retainer Ring

    Part #169539

    Replaced by #583031501

    Info Icon
    Manufacturer substitution
    This part replaces 169539. Substitute parts can look different from the original.
    In Stock
    $47.24
    Minus Item
    Qty
    Plus Item

Hydro-Gear Transaxle 311-3500 FAQs

Hydro-Gear transaxles are typically filled to a measured oil level, not a fixed “quarts” amount. For your Hydro-Gear 311-3500 transaxle, we recommend setting the fluid so it matches the correct level specification for the exact transaxle family and housing style, then rechecking after purging air.

How to check the oil level correctly

Use a clean, repeatable method so you do not overfill (foaming) or underfill (pump cavitation).

  • Park on a flat surface and let the unit cool
  • Clean around the fill/vent area before opening it
  • Remove the fill plug or vent cap and use a clean dipstick or depth gauge
  • Measure from the top of the housing down to the oil surface (the common service method)
  • Reinstall the plug, run the drive briefly, then recheck and top off if needed

Typical oil level targets (common Hydro-Gear service spec)

Many Hydro-Gear integrated hydrostatic transaxles use a “distance from the top of the housing” oil level spec. A common reference range used on similar Hydro-Gear units is:

Transaxle family example Typical oil level from top of housing
310-0500 style 1.25 to 2.00 in (31.75 to 50.8 mm)
310-0750 style 1.00 to 1.75 in (25.4 to 44.45 mm)

Why it matters

Correct oil level protects the hydrostatic pump and motor from aeration and overheating, keeps the charge circuit stable, and helps maintain consistent forward and reverse drive performance.

Parts that often get replaced during a service

If you are servicing leaks or resealing the case, these parts on our list are commonly involved:

Last updated: February 2026

The model number for your Hydro-Gear transaxle is usually on an ID tag or stamped plate attached to the transaxle housing; on many riding mowers it is easiest to see from the rear of the machine near the axle area. Confirm the exact number before ordering parts like the filter 51315.

Where to look on a Hydro-Gear transaxle

Check these common locations first:

  • On top of the transaxle case, near the fan or input pulley
  • On the rear face of the case, near the axle shafts
  • On the side of the case near the brake arm or linkage
  • Stamped into the housing near a mounting boss (may be faint under dirt)

What the tag typically shows

Most Hydro-Gear tags include more than one identifier. Use the full model number when searching parts.

Label item What it means What to record
Model The transaxle model (example: 311-3500) Record exactly as printed
Serial Unique unit identifier Helpful for service history
Spec/Build code Production variation Useful if parts differ by build

Tips to read the tag accurately

  • Clean the area with a rag and mild degreaser; avoid scraping off printed ink.
  • Take a clear photo, then zoom in to confirm every digit.
  • Match characters carefully (for example, 0 vs O, 1 vs I).
  • If the mower has a separate tractor model number, do not use that in place of the transaxle model.

Why it matters

Hydro-Gear transaxles can look similar across mower brands, but seals, filters, and internal drivetrain parts vary by model and build. Using the correct model number helps ensure the parts diagram and items you order fit your exact unit.

Last updated: March 2026

A Hydro-Gear 311-3500 transaxle typically lasts 7 to 10 years in normal residential mowing use when the drive system is kept clean, the cooling fan stays intact, and leaks are addressed quickly with the correct sealing materials such as lawn tractor transaxle sealant 178322.

What most affects transaxle life

  • Heat buildup from grass and debris packed around the case and fan
  • Low or contaminated oil from leaks or water intrusion
  • Worn drive belt or idlers that cause slipping and excess heat
  • Overloading (towing heavy loads, steep hills, constant high-speed starts)
  • Long storage without use, leading to seal drying and corrosion

Signs the transaxle is nearing end of life

  • Loss of drive when hot, then partial recovery after cooling
  • Whining or grinding noises that increase with speed
  • Jerky acceleration or inconsistent ground speed
  • Visible oil seepage around axle seals or case halves
  • Brake linkage issues that do not improve after adjustment

Maintenance that extends lifespan

Task How often Why it helps
Clear debris from fan and case Every mow Reduces heat stress
Inspect for leaks Monthly Prevents low oil damage
Check belt condition and tension Seasonally Prevents slip and overheating
Keep linkage moving freely Seasonally Reduces strain on internal components

Why it matters

The transaxle is the core of the mower drivetrain; when it overheats or runs low on oil, internal wear accelerates quickly. Catching leaks and cooling issues early is the difference between a long service life and a premature failure.

Last updated: March 2026

Most common symptoms to help you fix your washers

Choose a symptom to see related washer repairs.

Main causes: clogged drain hose, house drain clogged, bad drain pump, water-level pressure switch failure, bad control b…

Main causes: broken lid switch or lid lock, bad pressure switch, broken shifter assembly, faulty control system…

Main causes: worn agitator dogs, bad clutch, broken motor coupler, shifter assembly failure, broken door lock, suspensio…

Main causes: water heater failure, bad water temperature switch, faulty control board, bad water valve, faulty water tem…

Main causes: lack of electrical power, wiring failure, bad power cord, electronic control board failure, bad user interf…

Main causes: no water supply, bad water valves, water-level pressure switch failure, control system failure, bad door lo…

Main causes: unbalanced load, loose spanner nut, worn drive block, broken shock absorber or suspension spring, debris in…

Main causes: leaky water inlet valve, faulty water-level pressure switch, bad electronic control board…

Main causes: bad lid switch or door lock, bad timer or electronic control board, wiring failure, bad water inlet valve a…

Effective articles & videos to help repair your washers

Use the advice and tips in these articles and videos to get the most out of your washer.

How auto-load sensing washers work (and when they don't)

How auto-load sensing washers work (and when they don't)

Your washer barely fills or seems stuck in sensing mode? Find out how auto-load sensing and Precise Fill features work, …

How to remove the main control board and user interface from a Maytag Epic Z front-load washer

How to remove the main control board and user interface from a Maytag Epic Z front-load washer

Get step-by-step instructions for removing the main electronic control board and the control panel from a Maytage Epic Z…

Using a wiring schematic to trace a current video

Using a wiring schematic to trace a current video

Find out what’s wrong with your appliance by following a circuit.…

Parts & More

Central Air Conditioner
Cooktop
Dryer
Freestanding Freezer
Gas Range
Grass Catcher Attachment
Lawn Edger
Microwave
Parts
Refrigerator
Riding Mowers & Tractors
Tiller
Top-Mount Refrigerator
Treadmill
Wet/Dry Vacuum