Owner’s manual
 Error Codes


How to clean coils on Kenmore upright freezer?
For Kenmore upright freezer model 25328052800, clean the condenser coils by unplugging the freezer, accessing the coil area (often behind a lower rear or front panel), then brushing and vacuuming off dust so airflow stays strong and cooling stays efficient. Use the 25328052800 owner's manual for the correct access points.
Steps to clean the condenser coils
- Unplug the freezer to prevent electrical shock.
- Pull the freezer away from the wall to create working space.
- Remove the lower access panel or rear cover (location varies by setup).
- Use a coil brush to loosen dust, then vacuum it up (a crevice tool helps).
- Wipe the surrounding floor area so dust does not get pulled back in.
- Reinstall the panel, plug the unit back in, and confirm it starts cooling.
What to avoid
- Do not use water or spray cleaners on or near electrical components.
- Do not bend or crush the coil fins or tubing.
- Do not run the freezer with the access panel left off longer than necessary.
Quick checklist (before and after)
| Check | Before cleaning | After cleaning |
|---|---|---|
| Freezer unplugged | Yes | Plug in only when finished |
| Coil area accessible | Panel removed | Panel reinstalled |
| Dust removed | Heavy buildup possible | Coils visibly clear |
| Airflow/heat release | Restricted | Improved |
Why it matters
Dirty condenser coils make the compressor work harder, which can cause warmer temperatures, longer run times, and higher energy use. Keeping coils clean helps your Kenmore 25328052800 maintain stable freezing performance.
Last updated: February 2026
What causes an upright freezer to stop freezing?
An upright freezer like Kenmore model 25328052800 usually stops freezing because cold air is not circulating, the temperature control is set incorrectly, the door is not sealing, or the defrost system is iced up. We start with power, settings, airflow, and frost checks using the 25328052800 owner's manual.
Quick checks we recommend first
- Confirm the power cord is fully seated and the outlet has power.
- Verify the temperature control is not set too warm; allow several hours for temperatures to stabilize after changes.
- Make sure the door closes and seals; a misaligned door can cause cooling and frost problems.
- Look for heavy frost (about 1/4 to 1/2 inch); excessive frost can block airflow and reduce cooling.
- Improve airflow around the cabinet; the exterior can run hot while the compressor transfers heat.
Most common causes and what you will notice
| What’s happening | Typical symptom | What to check next |
|---|---|---|
| Door seal leak | Frost buildup, longer run times, warm temps | Inspect and clean the gasket; replace if torn or warped with freezer door gasket 5304507199 |
| Defrost system problem | Frost blanket on back wall, weak airflow | Test defrost components such as freezer defrost heater 216730700 and chest freezer defrost thermostat 297216600 |
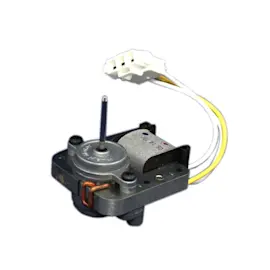
| Evaporator fan issue | Little or no air movement, uneven temps | Check the fan motor and blade: motor 297309000, blade 5308000010 |
| Control/sensor issue | Temps drift, erratic operation | Check freezer temperature sensor 297018400 and freezer electronic control board 297370602 |
Why it matters
When warm, moist air leaks in or frost builds up, the freezer has to run longer to maintain temperature. That can lead to poor freezing performance, higher energy use, and faster ice accumulation.
If you need to defrost to restore cooling
Follow the defrost steps in the 25328052800 owner's manual. Key points we follow:
- Unplug the freezer before defrosting.
- Remove food and leave the door open.
- Defrost and clean once frost reaches about 1/4 to 1/2 inch.
Last updated: February 2026
What is the life of an upright freezer?
A Kenmore upright freezer like model 25328052800 typically lasts about 15 to 20 years with normal use and basic care. Keeping the door sealing well, maintaining airflow around the cabinet, and preventing heavy frost buildup are the biggest factors that extend service life.
Typical lifespan and what affects it
Most upright freezers fall into a similar life range, but real-world lifespan depends on operating conditions and maintenance.
- Room temperature and ventilation: Hotter spaces and tight clearances make the compressor work harder.
- Door seal condition: A leaking gasket causes longer run times, frost, and temperature swings.
- Defrost and cleaning habits: Heavy frost reduces efficiency and stresses the cooling system.
- Leveling: If the freezer is not level, the door can misalign and not seal correctly.
- Usage patterns: Frequent door openings and overloading slow airflow and increase run time.
For model-specific care and setup details (including leveling guidance and defrosting cautions), follow the 25328052800 owner's manual.
Quick “life extension” checklist
- Set the temperature to the recommended setting and avoid frequent adjustments.
- Keep the freezer level so the door closes and seals properly.
- Leave enough space around the cabinet for air circulation.
- Defrost and clean when frost reaches roughly 1/4 to 1/2 inch on non-frost-free operation.
- Inspect the door gasket for gaps, tears, or areas that do not grip paper firmly.
Common “end-of-life” symptoms vs. fixable issues
| Symptom | Often fixable? | Common next step |
|---|---|---|
| Heavy frost, warm temps, fan noise changes | Yes | Check defrost system and airflow |
| Door not closing, moisture around door | Yes | Inspect/replace gasket and level unit |
| Compressor runs constantly, poor cooling | Sometimes | Check airflow, seals, controls; then sealed system |
| No cooling and compressor will not start | Sometimes | Check start components and controls |
Why it matters
A freezer that is level, well-ventilated, and sealing tightly runs fewer hours per day. That reduces compressor wear, helps food stay at a stable temperature, and lowers energy use over the life of the appliance.
Last updated: February 2026
Where is the model number on a Kenmore upright freezer?
On the Kenmore upright freezer model 25328052800, the model and serial number plate is typically on the upper left wall inside the freezer compartment. This is the primary location we use for upright models; confirm the exact spot in the 25328052800 owner's manual.
Where to look first (fastest checks)
- Open the freezer door and look on the upper left interior wall.
- Check for a model and serial number plate (often a small label or metal plate).
- Wipe away light frost or residue so the numbers are readable.
- Write down both the model number and serial number before ordering parts.
Other common label locations (if you do not see it inside)
If the plate is missing, painted over, or hard to spot, these are common alternate locations on upright freezers:
- Along an inside side wall near the front opening
- On the ceiling area inside the cabinet (some upright designs)
- Behind or near the base/kick plate area
- On the back exterior panel
Why the model number matters
We use the model number to match the correct Kenmore freezer parts and diagrams. Even small design changes can affect fit and wiring, especially for items like a door gasket, temperature sensor, or electronic control.
| What to record | Example format | Why we need it |
|---|---|---|
| Model number | 253.XXXXXXXX | Identifies the exact freezer design |
| Serial number | Letters and numbers | Helps confirm production series |
Tip for ordering the right part
Once you have the model number, match parts by description and ID. For example, if you are fixing air leaks around the door, the freezer door gasket 5304507199 is a common wear item for this model.
Last updated: February 2026
Why is my upright freezer leaking water on the floor?
Water on the floor around your Kenmore upright freezer model 25328052800 almost always comes from defrost water not draining correctly (a clogged or frozen drain path) or from warm, humid air leaking past the door seal and turning into excess moisture. Use the defrost drain procedure in the 25328052800 owner's manual to drain and clear water safely.
Most common causes (and what to check first)
- Drain plug left out or drain left open after defrosting; warm air enters and creates heavy moisture.
- Ice or debris blocking the internal drain opening; meltwater backs up and spills.
- External drain tube not positioned into a pan or floor drain during manual defrost.
- Door not sealing because the cabinet is out of level or the gasket is damaged.
- Door opened frequently in hot, humid weather; moisture load increases.
Quick fix checklist (15 to 30 minutes)
- Unplug the freezer.
- Remove the internal drain plug on the freezer floor and check for ice buildup.
- Flush the drain opening with warm water (a turkey baster works well) until it flows freely.
- If your unit has a base panel, remove it and confirm the drain tube is clear and aimed into a shallow pan.
- Reinstall the drain plug firmly when finished.
Leveling and door seal checks
The manual notes that if the freezer is not level, the door can misalign and not seal properly, which leads to moisture problems.
- Confirm all bottom corners sit firmly on the floor.
- Adjust the front leveling feet so the door closes easily when left halfway open.
- Inspect the gasket for gaps, tears, or hardened sections.
| Symptom | Most likely issue | Best next step |
|---|---|---|
| Water appears after defrosting | Drain left open or pan overflow | Reinstall drain plug; use a larger pan |
| Water appears during normal use | Drain iced/clogged | Warm-water flush; clear tube |
| Moisture/frost near door | Poor seal or not level | Level cabinet; inspect gasket |
Parts that commonly relate to leaks
If you find air leaks or moisture around the door, replacing the gasket often fixes the root cause: freezer door gasket 5304507199. If you find a cracked or loose drain line under the cabinet, the drain tube is the typical replacement: drain hose 5304512272.
Why it matters
Standing water can refreeze into ice, restrict airflow, and increase frost buildup. Fixing the drain and door seal helps the freezer hold temperature, reduces compressor run time, and prevents repeat puddles.
Last updated: February 2026