Installation guide
 Owner’s manual



Do built-in microwaves need to be vented?
Built-in microwaves like the Viking VMOS200SS do not vent to the outside like a range hood, but they do need ventilation space for cooling airflow. The key requirement is to keep the unit’s air vents clear and follow the cabinet and trim-kit clearances in the VMOS200SS installation guide.
Most built-in microwaves are designed to recirculate air for cooling; they rely on internal fans and cabinet clearances, not ductwork.
- Follow the trim kit and cabinet cutout requirements in the VMOS200SS installation guide.
- Keep the rear and other ventilation openings unobstructed (do not pack insulation around the unit).
- Maintain the minimum clearance around the microwave for air circulation (many units call for about 2 inches on the sides, top, and rear).
- Avoid installing where heat and steam are generated (for example, next to or above a conventional range).
- After convection or broil-type cooking, allow the cooling fan cycle to finish; it can run for several minutes.
| Item | Built-in microwave (typical) | Range hood / OTR microwave (typical) |
|---|---|---|
| Needs outside duct | No | Sometimes |
| Needs airflow clearance | Yes | Yes |
| Vents must be blocked | Never | Never |
| Common risk if airflow is restricted | Overheating, shutdowns, poor performance | Overheating, poor capture |
Proper airflow prevents overheating, nuisance shutoffs, and premature wear on components like the fan motor and high-voltage system. It also helps the microwave maintain consistent cooking performance.
Last updated: February 2026
How much does it cost to get a built-in microwave installed?
Built-in microwave installation typically costs $200 to $600 for labor, plus any cabinet or electrical work needed; for the Viking VMOS200SS, the total often increases if a trim kit, cutout changes, or a dedicated grounded outlet is required. Use the VMOS200SS installation guide to confirm cutout and electrical requirements before you schedule service.
- New install vs. replacement: Replacing an existing built-in unit in the same opening costs less than creating a new cutout.
- Cabinet or wall cutout work: Modifying width, height, or depth adds carpentry time.
- Electrical readiness: A properly installed, grounded receptacle is required; adding or relocating an outlet increases cost.
- Trim kit and fitment: Built-in installs commonly use a trim kit; incorrect sizing can add rework.
- Access and removal: Tight cabinetry, heavy doors, or difficult fasteners can increase labor.
| Scenario | Typical labor range | Notes |
|---|---|---|
| Like-for-like replacement in an existing cutout | $200 to $400 | Fastest when the opening and power are already correct |
| New built-in cutout and trim kit install | $350 to $600 | More measuring, mounting, and alignment |
| Electrical outlet added or moved (if needed) | $150 to $500 | Varies by distance, wall access, and local code |
- Confirm the microwave location is appropriate; avoid areas with heat and steam sources.
- Verify you have a grounded outlet and correct power supply.
- Measure the cabinet opening and compare to the trim kit cutout specs.
- Remove the turntable before moving the unit.
- Keep the documentation available for the installer; see the VMOS200SS owner’s manual for placement and safety guidance.
A built-in microwave install is as much about safe ventilation, correct clearances, and proper grounding as it is about mounting. Getting the cutout and electrical right helps prevent nuisance shutdowns, door fit issues, and repeat service calls.
Last updated: February 2026
What are the disadvantages of an inbuilt microwave?
Built-in microwaves like the Viking VMOS200SS look seamless, but they can be harder to access for cleaning and service, and they require correct cabinet cutout, ventilation, and grounding. If the unit is mounted high, everyday wiping and safe lifting of hot dishes can also be less convenient.
- Harder cleaning access: A built-in unit often sits higher and tighter in cabinetry, so the door, control panel, and trim can be harder to reach.
- More involved installation: It must be installed exactly as specified, including proper grounding and not blocking openings or vents.
- Service complexity: Removal from the cabinet can add time and cost for diagnosis or repair.
- Less flexibility later: Changing styles or replacing with a different size can require cabinet modifications.
- Heat and airflow considerations: Convection-capable units can run hot during convection, automatic mix, or broil modes; airflow around the unit matters.
Use these practical checks to avoid the most common frustrations:
- Confirm the cabinet cutout and mounting method in the VMOS200SS installation guide.
- Keep vents and openings clear; do not cover or block openings.
- Wipe the door sealing surfaces regularly so residue does not build up.
- Avoid slamming or leaning on the door; the door must close properly for safe operation.
- Use a sturdy step stool if the microwave is mounted high and you cannot reach it comfortably.
| Feature | Built-in microwave | Countertop microwave |
|---|---|---|
| Cleaning access | Often tighter, higher reach | Usually easiest access |
| Install effort | Higher (cabinet fit, grounding, airflow) | Low (plug in) |
| Service access | May require removal from cabinet | Typically simple to move |
| Kitchen flexibility | Lower once installed | High |
Built-in microwaves rely on correct installation and a door that seals and latches properly. Keeping sealing surfaces clean and ensuring the unit is mounted per the VMOS200SS owner’s manual helps prevent performance issues and reduces the chance of unsafe operation.
Last updated: February 2026
Are built-in microwaves worth it?
Built-in microwaves are worth it when you want a cleaner, integrated look and more usable counter space; for a Viking VMOS200SS, the biggest “value” comes from installing it correctly with the right clearances and trim kit so it vents properly and fits your cabinet cutout. See the VMOS200SS installation guide.
- You want to free up counter space in a smaller kitchen.
- You prefer a flush, built-in appearance that matches other wall appliances.
- You are already doing cabinetry work, so cutout and trim kit installation is planned.
- You want a dedicated location that keeps the microwave stable and level.
- You plan to pair it with a compatible built-in oven (where allowed by the manufacturer).
For the VMOS200SS, installation details matter more than the microwave itself. Use these checks:
- Cutout and trim kit compatibility: Built-in installs typically require a specific trim kit and a cabinet opening sized to that kit.
- Ventilation clearance: Many microwaves need space around the sides, top, and rear for airflow.
- Location restrictions: Do not install in problem locations (for example, over a sink) and avoid areas exposed to heat and steam.
- Electrical supply: Built-ins still need the correct outlet and circuit.
| Option | Best for | Typical tradeoffs |
|---|---|---|
| Countertop microwave | Lowest cost, easiest replacement | Uses counter space, less “built-in” look |
| Built-in microwave with trim kit | Remodels, integrated design | Cabinet work, trim kit cost, harder swap |
A built-in microwave only feels “worth it” when it is installed to spec. Proper cutout sizing, airflow clearance, and correct trim kit selection help prevent nuisance issues like poor ventilation, fit problems, and door alignment concerns.
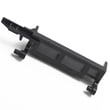
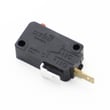
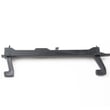
If the door does not close or start reliably after installation, these door-safety parts are common suspects:
- Microwave door interlock switch PM100019
- Microwave door latch PM120001
- Microwave door interlock switch lever PM120006
Last updated: February 2026