


How to reset Amana central air conditioner?
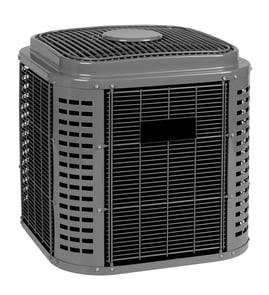
For the Amana RCB36B2A central air conditioner (outdoor condensing unit), a “reset” is typically a safe power-cycle: shut off power at the thermostat and the outdoor disconnect or breaker, wait a few minutes, then restore power and let the system’s built-in time delay restart the compressor.
Safe reset steps (power-cycle)
- Set the thermostat to OFF.
- Turn OFF the indoor air handler/furnace switch (if accessible).
- Turn OFF power to the outdoor unit at the disconnect near the condenser.
- Turn OFF the HVAC breaker(s) at the main electrical panel.
- Wait 5 minutes (10 minutes if the system was short-cycling).
- Turn power back ON in reverse order: breaker(s), outdoor disconnect, indoor switch.
- Set thermostat to COOL and wait 5 to 10 minutes for the compressor to start (many systems have an anti-short-cycle delay).
Before you reset: quick checks that prevent repeat trips
- Replace or clean the air filter (a clogged filter can cause icing and shutdowns).
- Make sure the outdoor coil is clear of leaves and lint; keep about 24 inches of clearance.
- Confirm the thermostat batteries (if used) are good and settings are correct.
- Look for a tripped breaker or blown disconnect fuses.
- Check the condensate drain and float switch (if your system has one) for a water backup.
What “reset” means for this model
RCB36B2A is the outdoor condensing unit; it does not use the same button-based reset sequence found on some Amana PTAC room units. For central air, the reliable reset is restoring clean, stable power and allowing the control’s built-in delay to protect the compressor.
If it still will not run
| What you see | Most likely cause | What to do next |
|---|---|---|
| Outdoor fan runs, no cooling | Compressor not starting, capacitor/contactor issue | Have a technician test electrical components |
| Breaker trips again quickly | Short, grounded compressor, seized fan motor | Leave power off and schedule service |
| Unit starts then stops in minutes | Dirty coil, airflow problem, low refrigerant | Check filter and airflow; service may be needed |
Why it matters
Resetting the right way protects the compressor from short-cycling and helps you avoid repeated breaker trips, nuisance shutdowns, and preventable wear on electrical parts.
For electrical troubleshooting basics, we recommend how to use a multimeter to test electrical parts video.
Last updated: February 2026
Why is my Amana AC unit not kicking on?
If your Amana central air conditioner model RCB36B2A is not kicking on, the most common causes are a loss of power (tripped breaker or blown disconnect fuses), a thermostat call issue, or a failed outdoor-unit start component (contactor or capacitor). Start with power and thermostat checks before moving to electrical testing.
Quick checks we recommend first
- Set the thermostat to Cool and lower the setpoint at least 5°F below room temperature.
- Check the indoor furnace/air handler switch and breaker (the outdoor unit will not run if the indoor control power is off).
- Check the outdoor disconnect near the condenser; make sure it is fully seated and fuses are good (if fused).
- Wait 5 minutes after changing thermostat settings; many systems have a built-in anti-short-cycle delay.
- Replace a clogged return air filter; severe airflow restriction can contribute to shutdowns and icing.
What to test next (electrical and control)
High voltage is present in a condensing unit. If you are not comfortable testing live circuits, use a qualified technician.
- Contactor: When the thermostat calls for cooling, the contactor should pull in. If it chatters, hums, or will not pull in, the coil may not be getting 24 VAC or the contactor may be failing.
- Capacitor: A weak capacitor can prevent the compressor or fan motor from starting (you may hear humming, then it shuts off).
- Low-voltage signal: Confirm 24 VAC is reaching the outdoor unit (often at the contactor coil) when cooling is requested.
| Symptom | Most likely area | What it usually means |
|---|---|---|
| Nothing runs outside (no fan, no compressor) | Power, disconnect, contactor coil circuit | No line voltage or no 24 VAC call |
| Fan runs but no cooling | Compressor start circuit, capacitor, refrigerant issue | Compressor not starting or not pumping |
| Hums then stops | Capacitor, compressor, voltage drop | Hard start condition or failed start component |
Why it matters
A “no start” condition is often a simple power or control issue, but repeated hard-start attempts can damage the compressor. Fast diagnosis protects major components and helps restore cooling sooner.
Parts and repair prep
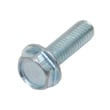
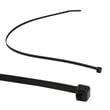
When you open the electrical compartment, keep wiring secured and reinstalled exactly as found. If you need replacement fasteners or a cable tie while reassembling, we list common hardware used on this model such as the tie WPW10339879 and screw WP90767.
Last updated: February 2026
What AC parts are most commonly replaced?
For the Amana RCB36B2A central air conditioner (remote condensing unit), the most commonly replaced items are electrical start/run components, fan-related parts, and service hardware used during repairs. On this model page, the specific replacement parts currently listed are small fasteners and a cable tie, such as the screw WP90767.
Most common AC parts that get replaced (typical)
These are the parts we see replaced most often on central air conditioners due to wear, heat, vibration, or electrical stress:
- Capacitor (start/run capacitor)
- Contactor (compressor and condenser fan switching relay)
- Condenser fan motor and fan blade
- Compressor (less frequent, but a major repair)
- Indoor evaporator coil (system component, not part of the outdoor condensing unit)
- Fuses and disconnect-related electrical parts (site-specific)
What we can confirm for Amana RCB36B2A from the parts list
The parts shown for this model page are service hardware that commonly gets replaced when panels are removed or wiring is secured during a repair:
- Screw: screw WP90767
- Screw: screw WP489349
- Cable tie: tie WPW10339879
- Keps nut: keps nut WP488130
Quick guide: symptoms and the part that often fixes it
| Symptom | Commonly involved part | What you typically notice |
|---|---|---|
| Outdoor unit hums but fan will not start | Capacitor | Fan needs a push to start, or trips breaker |
| Outdoor unit will not run at all | Contactor, capacitor, fuses | No condenser operation, thermostat calling |
| Loud rattling or vibration | Fan blade, mounting hardware | Noise at startup or high speed |
| Runs but cools poorly | Coil, refrigerant circuit, airflow issues | Long run times, warm supply air |
Why it matters
Replacing the right component quickly protects the compressor and helps prevent repeat failures. Even small items like correct screws, keps nuts, and cable ties matter because loose panels and unsecured wiring can cause vibration damage and electrical shorts.
Last updated: February 2026
What is the error code BR on an AC unit?
On many Amana room and packaged terminal air conditioners, the BR (sometimes shown as Br) error indicates brownout protection: the unit detected low incoming voltage and shut down to protect the compressor and electronics. On an Amana RCB36B2A central air conditioner setup, treat BR as a low-voltage or power-quality issue and correct the electrical supply before restarting.
What to check first (safe, high-impact steps)
- Reset the system at the breaker (turn off, wait 2 to 5 minutes, then turn on).
- Confirm the outdoor disconnect is fully seated and not heat-damaged.
- Check for a tripped breaker, loose lug, or burned wire at the disconnect or panel.
- If you have a thermostat, confirm it is calling for cooling and has stable power.
- If the code returns quickly, stop cycling power and move to voltage checks.
Voltage and control-circuit checks (what BR usually points to)
Brownout protection is triggered by voltage dropping below a safe threshold. Common causes include utility brownouts, undersized wiring, failing breakers, loose connections, or a weak transformer feeding the 24-volt control circuit.
| What you observe | Most likely cause | What to do next |
|---|---|---|
| BR appears during peak heat hours | Utility voltage sag | Wait for power to stabilize; then restart |
| BR appears when compressor tries to start | Loose connection, weak breaker, failing capacitor, or hard-start issue | Have electrical and start components checked |
| BR appears after storms or service work | Miswired or loose disconnect/panel connection | Inspect and tighten connections (power off) |
Why it matters
Low voltage can overheat the compressor and damage contactors and control boards. Fixing the supply issue first prevents repeat shutdowns and expensive component failures.
Parts that may help during a repair
If you are securing wiring or reattaching panels after diagnosing a power issue, these common hardware items for this model can be useful:
- Tie WPW10339879 (cable management)
- Screw WP90767 (panel or bracket fastening)
- Keps nut WP488130 (fastener with captive washer)
For electrical testing basics, use our guide: how to use a multimeter to test electrical parts video.
Last updated: February 2026
What is the code A2 on Amana AC unit?
On an Amana central air conditioner condensing unit like model RCB36B2A, an A2 code typically points to a control or sensor-related fault (often tied to temperature/thermistor input or the control board logic). The most reliable next step is a safe power reset and then checking low-voltage wiring and connections.
What to do first (safe reset and quick checks)
- Turn the thermostat OFF.
- Shut OFF power at the outdoor disconnect and the breaker for 5 minutes.
- Restore power, then call for cooling and watch for the code returning.
- Inspect the low-voltage wiring at the outdoor unit for loose, pinched, or rubbed-through insulation.
- If you see damaged conductors, repair the wiring correctly before running the system (see how to repair broken or damaged wires video).
Common causes of an A2-style fault on outdoor AC equipment
In the field, A2-type faults are most often triggered by one of these conditions:
- Loose or corroded control connections (especially at the contactor/control terminals)
- Damaged thermostat cable between the air handler/furnace and the outdoor unit
- A failing sensor input (if your system uses a thermistor or ambient sensor)
- Control board logic fault after a power event
- Intermittent short to ground in low-voltage wiring
Parts on this page that can help with wiring and securing connections
These parts are not “A2 code fixes” by themselves, but they are commonly used when correcting wiring issues or re-securing harnesses after service:
| Part | What it’s used for | When it helps |
|---|---|---|
| Tie WPW10339879 | Securing wires away from sharp edges and hot/moving parts | After rerouting or repairing low-voltage wiring |
| Screw WP90767 | Reattaching panels or securing brackets | When a panel/cover was removed for inspection |
| Keps nut WP488130 | Fastening components with vibration resistance | When hardware is missing or won’t stay tight |
Why it matters
An A2 code that keeps returning usually means the outdoor unit is seeing an abnormal sensor/control signal. If you keep running the system with a wiring short or unstable control input, you can get repeated shutdowns and intermittent cooling.
Last updated: February 2026