



Is 4.5 cu ft a large washer?
Yes. A 4.5 cu. ft. washer is considered large capacity for most households; it typically handles bigger mixed loads and many bulky items with fewer cycles. For your GE PFW950SPT3DS washer, that size is in the high-capacity range.
What 4.5 cu. ft. means in real use
A 4.5 cu. ft. drum is designed to reduce the number of loads you run each week while still giving clothes room to tumble and rinse.
- Fits larger everyday loads (family laundry, towels, jeans) without overpacking
- Better for bulky items (comforters, blankets, jackets) when loaded loosely
- Helps reduce cycle count compared to smaller 3.5 to 4.2 cu. ft. washers
- Still requires proper loading; overfilling can cause poor cleaning and vibration
Quick capacity guide
| Washer capacity | Common label | Best for |
|---|---|---|
| 3.0 to 4.4 cu. ft. | Standard | Singles, couples, lighter weekly laundry |
| 4.5 to 4.9 cu. ft. | Large | Families, frequent laundry, bulky items |
| 5.0+ cu. ft. | Extra-large | Very large households, heavy bedding loads |
Tips to get the best results from a large-capacity washer
Even with a large drum, performance depends on loading and balance.
- Load loosely; keep items below the top of the drum so they can tumble
- Mix item sizes (small and large) to improve balance during spin
- Use the right cycle for bulky items to prevent out-of-balance stops
- If the washer shakes or bangs, check suspension components such as the suspension spring WH03X29511
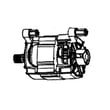
- If the washer will not drain after a heavy load, inspect the drain path and consider the GE washer drain pump assembly WH11X39237
Why it matters
Choosing a large-capacity washer like the GE PFW950SPT3DS helps you wash more per cycle, but leaving enough space for agitation and rinsing is what keeps cleaning performance high and helps prevent vibration, leaks, and premature wear.
Last updated: February 2026
Where to find model on GE washer?
On a GE washer like model PFW950SPT3DS, the model/serial tag is typically on the cabinet opening around the door area (door jamb) or just inside the front opening. We use that exact model number to match the correct parts and diagrams for your washer.
Common places to check on PFW950SPT3DS
- Open the door and look along the door opening/door jamb (left or right side)
- Check behind the door on the inner frame area
- Look along the front cabinet edge near the opening
- If you do not see it there, check the rear panel area for a rating label
What the label looks like
Most GE front-load washer tags include:
- Model number (example: PFW950SPT3DS)
- Serial number
- Electrical rating information
Why it matters
The model number is the fastest way to avoid ordering the wrong part. Even small model changes can affect fit and wiring, especially for control and door-lock components.
Parts that commonly require an exact model match
| Symptom or need | Part that often matches by model | Example for PFW950SPT3DS |
|---|---|---|
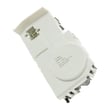
| Door will not lock or start | Door lock | GE washer door lock WH01X29528 |
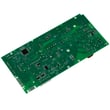
| No power, dead display, odd behavior | Electronic control board | GE washer electronic control board WH22X37840 |
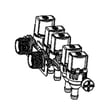
| Will not fill or fills slowly | Water inlet valve | GE washer water inlet valve WH23X29553 |
Quick tip before you write it down
- Copy the model number exactly, including all letters and numbers
- Take a clear photo of the tag; it helps when selecting parts like a door latch, control panel, or main harness
Last updated: February 2026
What is the most common problem with GE washers?
For GE washers (including model PFW950SPT3DS), the most common service issues we see are drain and spin problems. These usually trace back to a restriction in the drain path, a failing drain pump, or a door lock or control issue that prevents the washer from safely entering high-speed spin.
Most common symptoms (and what they usually point to)
- Washer won’t drain or leaves water in the tub: drain pump or drain path restriction
- Washer won’t spin or stops before spin: door lock or control not confirming a safe lock
- Long cycle times or repeated attempts to drain: partial blockage or weak pump
- Door won’t unlock after a cycle: door lock or latch mechanism issue
- Shaking or banging during spin: suspension or balance sensing issue
Quick checks we recommend first
- Power reset: unplug for 2 minutes, then retry a Drain/Spin cycle.
- Check the drain hose: look for kinks, crushing, or a clogged standpipe.
- Listen during drain: a loud hum with little water movement often indicates a struggling pump.
- Confirm the door is latching firmly: a weak latch can prevent spin.
- Reduce load size and redistribute items: heavy, single-item loads can trigger out-of-balance protection.
Parts that commonly solve drain/spin complaints on PFW950SPT3DS
| Symptom | Common part involved | What it does |
|---|---|---|
| Won’t drain / drains slowly | GE washer drain pump assembly WH11X39237 | Pumps water out of the tub |
| Won’t start spin / door errors | GE washer door lock WH01X29528 | Confirms the door is locked for spin |
| Random stopping / no response | GE washer electronic control board WH22X37840 | Controls cycle logic and outputs |
Why it matters
Drain and spin problems are “gateway” failures: if the washer cannot drain fully or confirm a locked door, it will often pause, stop, or refuse to spin to prevent leaks and reduce safety risks. Fixing the root cause early also helps prevent odor, standing water, and repeat cycle failures.
Helpful troubleshooting resource
If you’re seeing a code on the display, match it to GE front-load guidance in our GE front load washer error codes reference to narrow the failure to the drain system, door lock, or control.
Last updated: February 2026
Where is the filter on my GE Deep Fill washing machine?
On the GE PFW950SPT3DS washer, the “filter” most owners mean is the drain pump clean-out (coin trap) located at the very bottom front of the washer behind the small access panel. Place a towel or shallow pan under it before opening because water will drain out.
How to find and clean the drain pump filter (coin trap)
- Unplug the washer for safety.
- Look at the lower front of the cabinet; open the small access door/panel.
- Put a towel and a low pan under the opening.
- Slowly loosen the pump filter cap to let water drain in a controlled way.
- Remove lint, coins, hair pins, and debris; rinse the cap and check the O-ring.
- Reinstall the cap snugly (hand-tight), close the panel, then run a quick rinse/drain to check for leaks.
If your washer is not draining or smells musty
A clogged pump filter can cause slow drain, standing water, or odor. If cleaning the trap does not help, the issue is often in the drain path or pump.
| Symptom | Most common cause | What we check next |
|---|---|---|
| Won’t drain / water left in tub | Coin trap clogged | Kinked drain hose, blocked standpipe |
| Loud buzzing during drain | Debris in pump impeller | Pump damage, loose items in trap |
| Leaks after cleaning | Cap not seated, O-ring dirty | Re-seat cap, clean sealing surface |
Parts that commonly relate to draining issues
If the trap is clean but draining problems continue, these model-matched parts are the next most common fixes:
- GE washer drain pump assembly WH11X39237 (pump not running, noisy, or not moving water)
- Sump hose WH41X30355 (blockage or leak between tub and pump)
- GE washer electronic control board WH22X37840 (pump not getting power when it should)
Why it matters
Keeping the pump filter clean helps your GE front load washer drain correctly, prevents small clogs from damaging the pump, and reduces odor caused by trapped water and debris.
Last updated: February 2026
How do I find the right GE part number?
For your GE washer model PFW950SPT3DS, the right part number comes from matching the model number first, then confirming the part by name and location in the washer (door area, fill system, drain system, controls). This prevents ordering a look-alike part that will not fit or connect correctly.
Step-by-step: the fastest way to get the correct part
- Confirm the model number is exactly PFW950SPT3DS (letters and numbers must match).
- Identify the symptom and the system involved (won’t drain, won’t fill, won’t lock, dead display).
- Match the part by function and description, then verify the part ID on the listing.
- If multiple versions exist, compare connectors, mounting points, and any included hardware.
- When replacing an electrical part, unplug the washer first and take a photo of wire locations.
Common “right part” examples for this model
Use these as reference points when you already know what failed:
| Washer problem | Part type to check | Example part for PFW950SPT3DS |
|---|---|---|
| Door won’t lock or won’t start | Door lock or latch | GE washer door lock WH01X29528 |
| Washer won’t fill or fills slowly | Water inlet valve | GE washer water inlet valve WH23X29553 |
| No drain, water left in tub | Drain pump | GE washer drain pump assembly WH11X39237 |
| Dead controls or erratic operation | Main control board | GE washer electronic control board WH22X37840 |
Why it matters
GE often uses similar-looking parts across multiple washer platforms. Matching by PFW950SPT3DS plus the exact part ID helps ensure proper fit, correct wiring connections, and reliable operation after the repair.
Helpful related troubleshooting
If you’re chasing a fault code or control issue, use GE profile front load washer error codes to narrow the failure to the door lock, drain, fill, or control system before ordering parts.
Last updated: February 2026
Can you use any detergent in GE Smart dispense?
Yes. In a GE washer like model PFW950SPT3DS, SmartDispense is designed to work with liquid HE (high-efficiency) detergent (and typically liquid fabric softener), but you may need to adjust the concentration or dose settings because detergents vary in strength and thickness.
What to use (and what to avoid)
Use products that flow and measure consistently through the automatic dispenser.
- Use liquid HE detergent (standard or concentrated)
- Use liquid fabric softener if your washer has a softener reservoir
- Avoid powder detergent in SmartDispense reservoirs (powder can clump)
- Avoid single-dose packs in the SmartDispense tank (use them in the drum instead)
- Avoid bleach in the detergent reservoir unless the reservoir is specifically labeled for it
Quick setup checklist for best results
If you see over-sudsing, poor rinsing, or detergent left in the dispenser, adjust the dose.
- Confirm the detergent is labeled HE
- Set the correct concentration level (standard vs concentrated)
- Start with the lowest dose and increase only if needed
- If detergent is very thick, warm it to room temperature before filling
- Clean the dispenser area regularly to prevent buildup
Common symptoms and what they usually mean
| Symptom | Most common cause | Best next step |
|---|---|---|
| Too many suds | Dose too high or non-HE detergent | Lower SmartDispense dose; switch to HE liquid |
| Clothes feel stiff | Too much detergent or softener | Reduce dose; run an extra rinse |
| Detergent not dispensing | Clogged dispenser path | Clean dispenser; check for kinks in hoses |
| Door won’t start/locks oddly | Door lock issue (not detergent) | Check the GE washer door lock WH01X29528 |
Why it matters
SmartDispense meters detergent automatically; using the wrong type (or the wrong concentration setting) can cause oversudsing, poor rinsing, odors, and extra wear on components like the drain system.
For related troubleshooting, we use the GE profile front load washer error codes guide to match symptoms to likely causes.
Last updated: February 2026
Why is my GE front load washer leaking from the bottom?
A bottom leak on your GE PFW950SPT3DS front-load washer almost always comes from a drain or fill water path, or from the tub-to-pump area. We focus first on hoses, the drain pump circuit, and the door boot sealing surfaces because those are the most common sources.
Quick checks (fastest way to narrow it down)
- Unplug the washer; shut off both water supply valves.
- Pull the washer forward and look for the drip trail (front-left, front-right, or center).
- Run a Rinse/Drain and Spin with the front panel area visible (use a flashlight).
- Check if the leak happens during fill, wash/tumble, or drain/spin.
- Look for oversudsing foam; too much HE detergent can push water out of vents and seams.
Most common causes of a bottom leak on this model
1) Drain-side leak (often shows up during drain or spin)
Typical sources:
- Loose, split, or rubbed-through sump hose: sump hose WH41X30355
- Drain pump housing or seal leak: GE washer drain pump assembly WH11X39237
- Crack or pinhole in a drain hose (external hose to the standpipe)
2) Fill-side leak (often shows up during fill or early wash)
Typical sources:
- Water inlet valve seep or cracked valve body: GE washer water inlet valve WH23X29553
- Dispenser fill hose leak or clamp issue: dispenser fill hose WH01X29652
- Supply hoses at the wall or washer connection (rubber washers worn)
3) Door boot or clamp leak (often shows up during tumble)
Typical sources:
- Tear, pinhole, or debris at the door boot sealing lip: washer door boot WH05X29514
- Outer clamp not seated evenly: washer door boot spring clamp WH05X29663
Symptom-to-cause guide
| When it leaks | Most likely area | What we usually find |
|---|---|---|
| During fill | Inlet/dispenser | Drip at valve, dispenser hose, or supply connection |
| During tumble | Door area | Boot tear, debris on seal, clamp shifted |
| During drain/spin | Bottom center/back | Sump hose seep, pump leak, hose rubbed through |
Why it matters
A small bottom leak can quickly damage the drain pump, wiring, and flooring. Fixing the source early also prevents repeated out-of-balance spin issues caused by water getting into places it should not.
Helpful DIY reference
If you suspect a control-related issue (for example, the washer overfills or runs the pump unexpectedly), use how to remove a GE front load washer control panel and control board to understand safe access steps before testing components.
Last updated: February 2026
How to get mold out of GE front load washer?
For the GE PFW950SPT3DS front-load washer, we remove mold by cleaning the door boot, detergent dispenser, and drain system, then running a hot cleaning cycle. This stops odors and prevents mold from returning by removing trapped moisture, detergent residue, and biofilm.
Step-by-step mold removal (safe and effective)
- Unplug the washer.
- Pull back the door gasket folds and wipe all surfaces with hot, soapy water; then dry completely.
- Clean the detergent drawer and housing; scrub slime and rinse.
- Run a hot cycle with a washer cleaner or a measured amount of white vinegar; then run a rinse cycle.
- Leave the door and dispenser slightly open after cleaning so the tub can dry.
Focus areas that usually hide mold
| Area | What to look for | What to do |
|---|---|---|
| Door gasket (boot) | Black spots in folds, musty smell | Wipe, scrub folds, dry thoroughly |
| Dispenser drawer | Slime, standing water | Remove, wash, clean the cavity |
| Drain path | Odor, slow draining | Check for clogs and standing water |
When cleaning is not enough (parts that commonly cause repeat mold)
If the gasket is stained, torn, or won’t come clean, replacement is the long-term fix. If you also have standing water or recurring odor, a drain restriction can keep the tub wet.
- Washer door boot WH05X29514 (torn, warped, or permanently stained gasket)
- GE washer drain pump assembly WH11X39237 (slow drain, water left in tub)
- Sump hose WH41X30355 (debris buildup restricting drain flow)
Why it matters
Mold in a front-load washer usually starts when moisture stays trapped in the door seal and detergent residue feeds growth. Cleaning the gasket folds and improving drying habits prevents repeat odor and protects clothing from musty smells.
Prevention checklist (use every week)
- Wipe the door gasket dry after the last load.
- Leave the door ajar between loads.
- Use HE detergent and avoid overfilling.
- Remove wet laundry promptly.
- Run a monthly hot cleaning cycle.
For additional GE front-load troubleshooting patterns (including odor-related symptoms tied to drain or control issues), use our GE front load washer error codes reference.
Last updated: February 2026


