Installation guide
 Owner’s manual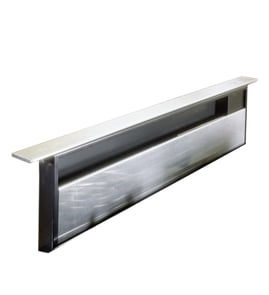



Does a downdraft need to vent outside?
Yes. For the GE ZVB36SH1SS downdraft vent system, the intended setup is ducted venting to the outdoors; that delivers the strongest removal of smoke, grease, and odors. The installation instructions specify that the ductwork must vent outside and must not terminate in enclosed spaces like an attic or crawl space.
What the installation requirements say (ZVB36SH1SS)
Per the ZVB36SH1SS installation guide, we recommend planning your duct run to the outdoors before you set the vent in the countertop cutout.
Key requirements called out for this model:
- Ductwork must vent to the outside (never into a crawl space, attic, or other enclosed space).
- Use the shortest and straightest duct run possible.
- Maximum permissible duct run is 150 ft equivalent length.
- Designed for 3-1/4 in. x 10 in. ductwork; it can be transitioned to 6 in. round.
- Do not use flexible plastic ducting.
Venting options and planning tips
Even when you are venting outdoors, this GE downdraft gives you flexibility in how you route the duct.
Common discharge directions:
- Down (as shipped)
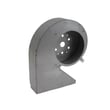
- Left (blower rotated)
- Right (blower rotated)
| Item | Typical best practice | Why |
|---|---|---|
| Duct type | Smooth metal duct | Better airflow, less noise |
| Duct length | Short, straight run | Stronger capture and fewer restrictions |
| Termination | Wall cap or roof cap with damper | Helps prevent backdrafts |
Why it matters
Downdraft systems rely on airflow to capture cooking byproducts at the cooktop surface. Venting outdoors prevents grease and moisture from building up inside cabinets and avoids pushing odors back into the kitchen.
When to consider remote blower accessories
If your layout requires moving the blower/motor assembly, the installation guide lists optional remote accessories such as JXRB67 (indoor remote location) and JXBC67 (outdoor cover for remote installation).
Last updated: February 2026
What is downdraft ventilation?
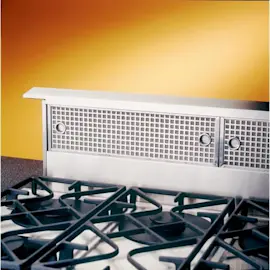
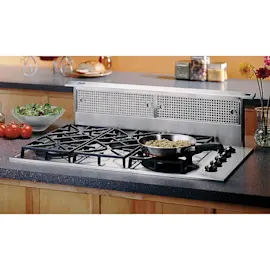
Downdraft ventilation pulls cooking smoke, steam, grease, and odors downward at the cooktop surface and exhausts them through ductwork, instead of using an overhead hood. On the GE ZVB36SH1SS downdraft vent system, the vent raises for use and lowers when you are done, with the fan shutting off automatically when lowered.
How a downdraft vent works in everyday use
A downdraft vent is designed to capture contaminants close to where they are created, then move them through a blower and discharge outlet to your home ducting.
- The vent rises and lowers using a dedicated raise/lower switch
- Fan speed is typically controlled from LO to HI
- The fan can stay on while you lower the vent; it turns off automatically when the vent lowers
- Discharge direction can be configured down (as supplied) or rotated for left or right discharge
- Common duct sizes include 3-1/4" x 10" (with the option to transition to 6" round)
Venting and installation basics (what to plan for)
For the ZVB36 (36-inch) platform, planning the duct route and cabinet space is a big part of getting good performance. We recommend following the clearances, cutout guidance, and venting limits in the ZVB36SH1SS installation guide.
| Topic | What to expect | Why it matters |
|---|---|---|
| Ducting type | Use metal ducting; avoid flexible plastic ducting | Helps airflow and safety |
| Equivalent duct length | Up to 150 ft maximum equivalent length | Longer runs reduce performance |
| Discharge direction | Down, left, or right | Helps align to existing ductwork |
| Remote blower options | Optional kits can relocate blower/motor | Can reduce cabinet interference |
Why it matters
Downdraft ventilation is a practical choice when an overhead hood is not possible (for example, an island cooktop or a design where you want a clear sightline). Understanding airflow, duct length, and discharge direction helps you get better smoke and odor capture.
Last updated: February 2026
How much does downdraft ventilation cost?
A GE downdraft vent system like model ZVB36SH1SS typically costs about $900 to $2,000 for the unit itself, with total installed cost often higher depending on ductwork length, venting route, and electrical work. For planning details, use the ZVB36SH1SS installation guide.
What changes the total cost most
Installed cost varies mainly with how hard it is to vent outdoors and meet clearance and electrical requirements.
- Ductwork complexity: longer runs and more elbows increase labor and materials
- Venting path: roof cap vs wall cap, and how accessible the route is
- Duct type and size: these systems are designed for 3-1/4" x 10" ductwork and can transition to 6" round
- Electrical work: adding or relocating a 120V outlet within reach of the power cord
- Cabinet/counter modifications: cutouts, reinforcement, and finishing trim
- Optional accessories: for example, remote blower kits (when applicable)
Typical cost breakdown (planning ranges)
| Cost item | Typical range | Notes |
|---|---|---|
| Downdraft vent unit | $900 to $2,000 | Model, finish (stainless/black/white), features |
| Ductwork parts | $50 to $400+ | Depends on fittings, transitions, wall/roof cap |
| Installation labor | $300 to $1,200+ | Increases with difficult routing and cabinetry work |
| Electrical work | $150 to $500+ | Outlet placement and circuit needs |
Installation details that affect pricing for ZVB36SH1SS
These requirements from the installation instructions often drive labor time and materials:
- Vent outdoors only (never into an attic, crawl space, or enclosed area)
- Use the shortest, straightest duct run possible
- Maximum permissible equivalent duct length: 150 ft
- If flexible metal duct is used, equivalent length values are doubled
- Do not use flexible plastic ducting
Why it matters
A realistic budget prevents under-sizing the ductwork or taking shortcuts that reduce airflow, increase noise, and hurt smoke and odor capture. Planning the duct route and outlet location up front is the fastest way to control total cost.
Last updated: February 2026
Can you install a downdraft vent behind a range?
Installing a downdraft vent behind a range is not a practical setup for the GE ZVB36SH1SS downdraft vent system because the range oven and cabinet layout typically block the downdraft plenum and required clearances. This configuration usually leads to poor capture and difficult, non-standard installation.
What works better for ZVB36SH1SS installations
We see the best results when the downdraft is installed as designed: in a countertop cutout with proper cabinet depth, a planned switch location, and ducting routed to the outside per the installation requirements in the ZVB36SH1SS installation guide.
Common acceptable planning elements include:
- A deep, flat countertop surface (rolled edges and backsplashes can interfere)
- A base cabinet deep enough for the cooktop burner box and the downdraft vent body
- A separate raise/lower switch installed outside the cutout area
- A receptacle located on a side wall inside the cabinet (not on the back wall)
- Ductwork routed outdoors (never into an enclosed space)
Venting and cabinet constraints to consider
Downdraft systems need a clear path for the plenum and blower discharge. The ZVB36SH1SS is designed around specific ducting and placement rules.
| Item to plan | What’s typical for this model’s install requirements |
|---|---|
| Duct type | 3-1/4" x 10" ductwork (can transition to 6" round) |
| Discharge direction | Down as shipped; can be changed left or right before dropping into the cutout |
| Duct termination | Must vent to the outside |
| Duct length | Maximum permissible equivalent length is 150 ft |
Why it matters
A range places a large oven cavity and structural framing directly where a downdraft plenum and duct transition normally sit. Even if you can physically squeeze components in, airflow capture and service access are usually compromised, which defeats the purpose of adding ventilation.
Last updated: February 2026