
How to change string on electric trimmer?
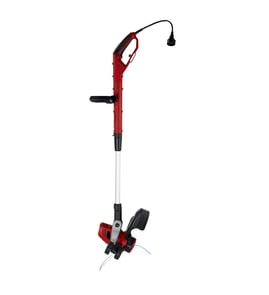
To change the string on your Weed Eater RT112 electric line trimmer, remove the spool cap, take out the spool, wind on new trimmer line in the correct direction, then reinstall the spool and snap the cap back on so it locks securely.
Steps to replace the trimmer line
- Unplug the trimmer (or remove the battery if your version uses one) and let the head stop completely.
- Press the spool cap tabs (or release the retainer) and lift off the cap.
- Pull the spool out and note how the old line is routed through the eyelets.
- Wind new line onto the spool in the direction shown on the spool (most spools have an arrow).
- Feed the line ends through the eyelets, seat the spool fully, then snap the cap back on.
Line size and winding tips
Using the right diameter line and winding it neatly prevents jams and poor feeding.
- Use the same diameter line that was on the spool originally.
- Keep tension on the line while winding so it lays evenly.
- Do not overfill the spool; leave a little room below the rim.
- If the line keeps tangling, rewind it tighter and in even layers.
| Symptom | Most common cause | Quick fix |
|---|---|---|
| Line will not feed | Line crossed or overfilled | Rewind neatly; do not overfill |
| Line breaks too fast | Line too thin or brittle | Replace with correct diameter line |
| Head will not snap closed | Spool not seated or clip damaged | Reseat spool; inspect retainer |
Parts that commonly affect the spool staying together
If the cap will not stay on or the spool keeps popping loose, the retainer hardware is usually the issue.
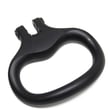
- Check the line trimmer spool retainer clip 530401957 for cracks, wear, or a weak snap fit.
- If your head uses a wing nut style fastener, inspect the wing nut 530091373 for stripped threads or looseness.
Why it matters
A properly loaded spool feeds line smoothly, cuts consistently, and reduces vibration that can damage the trimmer head and spool retainer parts.
Last updated: February 2026
Which is better, a 20 volt or 40 volt trimmer?
A 40-volt trimmer is better when you need more cutting power and longer runtime for thicker weeds or larger yards; a 20-volt trimmer is better for lighter trimming because it’s typically lighter, easier to handle, and less expensive. For a Weed Eater RT112, the “better” choice depends on how heavy your trimming is.
Quick comparison: 20V vs 40V
| Feature | 20V trimmer | 40V trimmer |
|---|---|---|
| Best for | Light edging, small yards | Thicker growth, larger yards |
| Power | Moderate | Higher |
| Runtime | Shorter | Longer |
| Weight | Lighter | Heavier |
| Typical cost | Lower | Higher |
How to choose for your yard
- Choose 20V if you trim weekly, mostly grass, and want less arm fatigue.
- Choose 40V if you often cut tall grass, dense weeds, or you want fewer battery swaps.
- If you already own a battery platform, staying in that system usually saves money.
- If you need more “punch,” stepping up in voltage is often more noticeable than changing line brand.
- For corded electric trimmers, voltage is not the spec that matters most; look at motor amps and cutting swath.
Why it matters
Voltage is a practical shortcut for understanding how hard the tool can work before bogging down. More power and runtime help prevent stalling, reduce repeated passes, and can improve cut quality in heavy growth.
Keeping your RT112 cutting well (regardless of voltage)
Even with plenty of power, feed issues or a loose head can make trimming feel weak. These RT112 parts are common fixes:
- Replace a worn or missing line trimmer spool retainer clip 530401957 if the spool will not stay secured.
- Check the wing nut 530091373 if a guard or attachment is not tightening properly.
- Use the correct line diameter for the head; oversized line can reduce performance.
- Clean grass buildup around the head to prevent drag and overheating.
Last updated: February 2026
Why do landscapers take the guard off string trimmers?
Some landscapers remove the guard on a string trimmer to improve visibility and maneuverability while edging and to run longer line for faster cutting. On a Weed Eater RT112, the guard is a key safety feature; removing it increases the risk of injury and debris throw.
What changes when the guard is removed
- More line exposure: the trimmer can swing a longer line, which can increase cut width.
- Better sightline: easier to see the edge and trim closer to fences, curbs, and beds.
- Easier access in tight spots: less plastic in the way around posts and corners.
- More debris and kickback: rocks, sticks, and wire can eject farther and faster.
- More wear risk: longer line can load the motor more and increase vibration.
Safety and damage risks to consider
Removing the guard changes how the tool controls line length and how it shields you from thrown objects.
| With guard installed | With guard removed |
|---|---|
| Helps limit debris throw | More debris and higher injury risk |
| Helps control effective line length | Easier to overextend line and overload the head |
| More consistent trimming near the ground | More chance of scalping turf and striking hard objects |
If your goal is better cutting, try these safer fixes first
- Replace missing or loose spool hardware so the head stays secure (see line trimmer spool retainer clip 530401957).
- Make sure the spool is seated correctly and the line is routed evenly.
- Use the correct line diameter for your head; thicker line can bog the motor.
- Trim with the tip of the line, not the full length, to reduce load.
- Keep the head height consistent to avoid striking concrete and rocks.
Why it matters
The guard is designed to reduce thrown-object injuries and help keep the trimmer operating within a safe load range. For an electric trimmer like the RT112, controlling line length and impact forces also helps protect the head components and motor.
Last updated: February 2026