
How often should you change your edger blade?
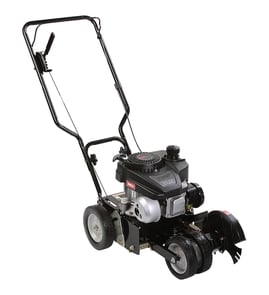
For your Craftsman 536870542 9-inch edger/trimmer, we replace the edger blade when it is worn down enough that it no longer cuts a clean edge, typically after a season of regular use. A practical rule is to replace a 9-inch blade once its diameter is down to about 7-1/4 inches.
Quick signs it is time to replace the blade
- The edger starts bouncing or vibrating more than normal
- You have to push harder to keep it cutting
- The edge looks ragged or the trench is too shallow
- The blade is visibly chipped, bent, or cracked
- The blade diameter is near 7-1/4 inches (for a 9-inch blade)
What affects blade life
Blade replacement timing depends more on conditions than the calendar:
| Condition | What it does to the blade | What you will notice |
|---|---|---|
| Sandy soil | Accelerates wear | Blade gets smaller quickly |
| Hitting concrete/rocks | Chips or bends the edge | Vibration, uneven cut |
| Frequent edging | Normal wear | Gradual loss of cutting quality |
| Wet, packed soil | Increases load | Slower cutting, more effort |
Replace vs. sharpen
Sharpening helps when the blade is dull but still full-size and straight. Replace the blade when it is undersized, damaged, or will not hold an edge.
Basic safety steps before servicing
- Shut the engine off and let all moving parts stop
- Disconnect the spark plug wire to prevent accidental starting
- Wear gloves and eye protection
- Block the edger so it cannot tip while you work
Why it matters
A worn blade makes the edger work harder, which can reduce cut quality and put extra strain on the drive system (including the belt). If your edger is not driving the blade consistently, inspect the v-belt 32668MA while you are checking the blade.
Last updated: February 2026
What size blade is a Craftsman 536870542 edger?
The Craftsman 536870542 is a 9-inch edger/trimmer; it uses a 9-inch edger blade. When you’re shopping, match the blade by diameter (9 in.), center hole pattern, and thickness so it fits the blade shaft and guard correctly.
How to confirm you have the right 9-inch blade
Even with the correct diameter, mounting details must match.
- Measure the blade diameter across the widest point: 9 inches
- Check the center hole shape and size (round vs. slotted)
- Compare blade thickness to your old blade
- Verify the blade clears the guard and doesn’t rub when spun by hand
- Inspect the blade hardware; replace worn fasteners so the blade stays tight
Parts that commonly get replaced with the blade
If the blade loosens, wobbles, or won’t stay aligned, the issue is often the mounting hardware or drive components.
| What you notice | Common cause | What to check/replace |
|---|---|---|
| Blade won’t stay tight | Worn threads or locking hardware | Lock nut 7090266YP, nut 46023MA |
| Blade wobbles | Bent shaft or missing washer | Shaft 48697MA, washer 783000MA |
| Blade stops under load | Belt slipping or stretched | V-belt 32668MA |
Why it matters
Using the correct 9-inch blade size and matching mounting hardware helps the edger cut cleanly, reduces vibration, and prevents premature wear on the shaft, belt, and fasteners.
Last updated: February 2026
Is an edger blade reverse thread?
Most Craftsman edgers, including the Craftsman 536870542 9" edger/trimmer, use a standard right-hand thread on the blade fastener: you loosen it by turning counterclockwise and tighten it by turning clockwise. If the nut seems to tighten while you try to remove it, the blade is usually spinning with the shaft.
How to tell which way your blade fastener loosens
Use these quick checks before forcing it:
- Lock the blade from turning (wear gloves) and try loosening the nut counterclockwise.
- Look for a stamped arrow or “LOOSEN” marking on the blade washer or guard (if present).
- Check whether you are turning the nut (fastener) and not the entire blade/shaft together.
- If the nut is a lock nut, expect higher resistance and a “sticky” feel.
Safe removal steps (what we recommend)
- Disconnect the spark plug wire so the engine cannot start.
- Wedge a block of wood against the blade to keep it from rotating.
- Turn the nut counterclockwise to loosen.
- Remove the blade hardware in order (nut, washer, blade washer, blade), then reinstall in the same order.
Common hardware you may see on this model includes a blade washer and nut such as the washer blade 22265MA and nut 46023MA.
Quick direction guide
| Task | Typical direction (right-hand thread) | What it means |
|---|---|---|
| Loosen blade nut | Counterclockwise | “Lefty loosey” |
| Tighten blade nut | Clockwise | “Righty tighty” |
Why it matters
Turning the wrong direction can round the nut, damage the shaft threads, or distort the blade washer stack-up. Holding the blade still and removing the nut in the correct direction prevents damage and keeps the blade centered when you reinstall it.
Last updated: February 2026