




What is the disadvantage of a wall oven?
A wall oven setup (including the Jenn-Air JMW2427IL03 wall oven/microwave combo) typically costs more than a freestanding range, takes more effort to install and service, and usually requires a separate cooktop. The built-in design can also make repairs more involved.
Common disadvantages to plan for
- Higher total cost: the appliance plus cabinetry work, electrical changes, and installation.
- More complex service access: built-in units can require partial removal from the cabinet for some repairs.
- Separate cooktop required: you are buying and fitting two appliances instead of one.
- Layout constraints: cabinet cutout size and venting clearances limit replacement options later.
- Ergonomics vary: a higher install is great for visibility, but can be awkward for shorter users lifting heavy roasts.
What this means for repairs and parts
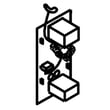
Because a wall oven/microwave combo is integrated into cabinetry, even simple symptoms can take longer to diagnose and fix. For example, if the microwave side will not start, a door safety switch such as the switch W10211972 is a common item to check, but access may require removing trim or panels.
Quick comparison: wall oven vs. freestanding range
| Feature | Wall oven/microwave combo | Freestanding range |
|---|---|---|
| Upfront cost | Higher | Lower |
| Installation | Cabinet cutout, dedicated wiring, fitment | Typically simpler hookup |
| Service access | Often harder (built-in) | Usually easier |
| Flexibility later | More limited by cutout size | More flexible |
Why it matters
Planning for installation complexity and future service access helps avoid surprises. If you expect to stay in the home a long time, choosing a common cutout size and keeping the unit serviceable can reduce downtime and labor costs.
Last updated: January 2026
How long do Jenn-Air wall ovens last?
Most Jenn-Air wall ovens typically last about 15 years with normal use and basic maintenance. For the Jenn-Air JMW2427IL03 wall oven/microwave combo, keeping airflow clear and replacing worn heating or safety parts on time helps you reach (and often exceed) that lifespan.
Typical lifespan and what affects it
A wall oven’s life depends more on heat stress and ventilation than on the calendar.
- Cooking frequency (daily baking vs. occasional use)
- High-heat cycles (self-cleaning and long roasts add heat stress)
- Ventilation and cooling fan performance
- Power quality (surges can damage an electronic control board)
- Door seal and latch condition (heat leaks shorten component life)
Common wear items that can shorten oven life
If the oven struggles to heat, trips off, or runs hot, these parts are often involved:
- Range bake element W11545804
- Range high-limit thermostat WP4449751
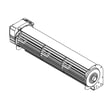
- Assembly, cooling fan W11344874
- Electronic control board WPW10260060
Quick symptom-to-part guide
| Symptom | What it often points to | Example part for JMW2427IL03 |
|---|---|---|
| Oven not heating or heats unevenly | Failed heating element | Range bake element |
| Oven shuts down or overheats | Safety thermostat opening | High-limit thermostat |
| Loud fan, poor cooling, hot cabinet | Cooling airflow problem | Cooling fan assembly |
| Dead display, erratic temps, random beeps | Control or power issue | Electronic control board |
Why it matters
A wall oven/microwave combo is built into cabinetry, so excess heat and poor airflow can damage wiring, controls, and surrounding trim. Staying ahead of heating and cooling issues helps protect the appliance and keeps cooking performance consistent.
Last updated: January 2026
Where is the model number on a Jenn-Air wall oven?
On a Jenn-Air wall oven (including the JMW2427IL03 wall oven/microwave combo), the model number is usually printed on a rating label around the oven door opening. Check the frame area you can see when the oven door is open; the label is commonly on the left or right side trim.
Most common places to check
Look in these spots first (in order):
- Door jamb or front frame behind the oven door (left or right side)
- Along the bottom edge of the oven opening (front frame)
- On the side trim just inside the opening (visible only with the door open)
- On the microwave section frame (if the combo has separate doors)
- On the back of the unit (usually only visible after removal from the cabinet)
What the label looks like (and what to copy)
The rating label typically includes several identifiers. For parts lookup, we recommend copying these exactly:
| Label item | Example | Why it matters |
|---|---|---|
| Model number | JMW2427IL03 | Ensures parts fit your exact configuration |
| Serial number | (varies) | Helps identify production run details |
| Electrical ratings | (volts/amps) | Confirms correct power requirements |
Tips to find it fast
These steps help you spot the tag without missing it:
- Use a flashlight and look along the vertical frame where the door gasket seals
- Wipe grease or cleaner residue off the frame; labels can blend into stainless trim
- Take a photo, then zoom in to read small print
- Write the model number exactly as shown (letters and numbers, no spaces)
Why it matters
Jenn-Air wall oven/microwave combos can share similar styling across model families, but parts like an electronic control board, door latch, or bake element can vary by revision. Using the exact model number (JMW2427IL03) prevents ordering the wrong component.
If you are already troubleshooting a door-related issue while checking the label area, common related parts include the switch W10211972 (microwave door interlock switch) and the door latch W10883049 (oven door latch).
Last updated: January 2026
How to reset Jenn-Air wall oven?
To reset your Jenn-Air wall oven/microwave combo model JMW2427IL03, turn OFF the circuit breaker(s) for 1 minute, then turn them back ON. After power is restored, start a Bake cycle and watch the display for about 1 minute to confirm the error does not return.
Quick reset steps
- Turn the oven OFF at the home electrical panel (circuit breaker(s)).
- Wait 60 seconds.
- Turn the breaker(s) ON.
- Start a Bake cycle.
- Monitor operation for 1 minute.
If the error code comes back
A reset clears many temporary control glitches, but repeated errors usually point to a heat-sensing, airflow, or control issue.
- If the oven will not start or the display is unresponsive, check the household breaker is fully reset (OFF then ON).
- If the oven heats erratically or shuts down, a failed safety thermostat can interrupt power to protect the unit; see range high-limit thermostat WP4449751.
- If the display behaves normally but functions do not respond, a control failure is common; see electronic control board WPW10260060.
- If the unit overheats around the cabinet or runs loud after cooking, cooling airflow problems can trigger faults; inspect the cooling fan area and consider assembly, cooling fan W11344874.
What the reset does (and does not do)
| Action | What it affects | What it will not fix |
|---|---|---|
| Power-cycle at breaker | Clears temporary control logic faults | Failed parts (thermostat, fan, control board) |
| Start a Bake test | Confirms basic heating and control response | Underlying intermittent wiring issues |
Why it matters
Resetting the oven the right way helps you quickly separate a one-time control hiccup from a repeatable failure. That saves time before ordering parts like a thermostat, cooling fan, or electronic control.
Last updated: January 2026

