 Installation guide
 Owner’s manual






What's the average lifespan of a GE microwave?
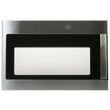
A GE microwave typically lasts about 8 years. For an over-the-range model like GE JVM6175SK5SS, most owners see 5 to 10 years depending on daily run time, ventilation (hood fan use), and how well the cavity and door seals are kept clean; check the JVM6175SK5SS owner’s manual for care and cleaning guidance.
Typical lifespan ranges
Most microwaves fall into these real-world ranges:
- Light use (few minutes/day): 9 to 12 years
- Average use (10 to 20 minutes/day): 6 to 10 years
- Heavy use (multiple long cycles/day): 4 to 7 years
- Over-the-range units: often trend toward the middle of the range because heat, grease, and vibration add wear
What shortens microwave life fastest
These are the most common life-reducers we see in microwave/hood combos:
- Running the microwave empty (can damage internal components)
- Grease buildup restricting airflow through the vent system
- Slamming the door or operating with a misaligned latch
- Repeated power interruptions or using an overloaded circuit
- Heating very dense foods in long cycles without pauses (extra heat stress)
Quick “is it worth fixing?” guide
Use this as a practical rule of thumb for JVM6175SK5SS repairs.
| If your microwave is… | Usually worth repairing when… | Usually time to replace when… |
|---|---|---|
| Not powering on | It is a simple electrical failure like a blown microwave fuse WB27X25389 | It repeatedly blows fuses or has multiple electrical symptoms |
| Running but not heating | The issue is isolated and the unit is mid-life | The unit is near end-of-life and needs major high-voltage parts |
| Noisy or vibrating | A fan or turntable-related issue is found | Multiple mechanical issues stack up |
Why it matters
A microwave that is near end-of-life often shows intermittent symptoms first (random shutoffs, weak heating, door-related issues). Catching problems early and keeping airflow paths clean helps prevent heat damage to controls, wiring, and safety interlocks.
For heating problems specifically, use why is my microwave not heating to narrow down the most common causes.
Last updated: February 2026
Do all GE microwaves use the same bracket?
No. GE over-the-range microwaves do not all use the same mounting bracket; bracket shape, hole locations, and vent cutouts vary by model and installation style. For GE model JVM6175SK5SS, we recommend installing it using the bracket and templates specified in the JVM6175SK5SS installation guide for a secure fit.
What to do when replacing a GE over-the-range microwave
- Match by exact model number (JVM6175SK5SS), not just brand.
- Use the mounting plate and top cabinet template that are intended for the unit.
- Confirm you can fasten the mounting plate into at least one wall stud; toggle bolts are used where there is no stud.
- Verify your venting plan (recirculating vs. outside vent) before drilling any holes.
- Check cabinet depth; some installs with deeper cabinets require an additional kit.
Quick compatibility checklist
| Item to compare | Why it matters | What to use for JVM6175SK5SS |
|---|---|---|
| Wall mounting plate hole pattern | Misaligned holes cause weak mounting | The template and plate layout in the install instructions |
| Exhaust outlet location | Wrong cutout can block airflow or leak grease-laden air | The rear wall template dimensions |
| Cabinet depth | Deeper cabinets can change clearances | Follow the cabinet-depth guidance in the install instructions |
| Range/cooktop width | Over-the-range units are designed for standard widths | Install over cooking equipment 36 inches wide or less |
Why it matters
The mounting bracket is a structural support point for the microwave/hood combo. Using the wrong bracket can prevent proper stud anchoring, misalign the exhaust adaptor, and create unsafe clearances above the cooking surface.
Related parts that are not “the bracket”
If the door is not closing correctly after an install or move, the issue is often the latch or interlock system, not the wall bracket. These model-matched parts are common fixes:
Last updated: February 2026
What are common problems with GE profile microwaves?
Common problems we see on GE over-the-range microwaves like model JVM6175SK5SS include the oven not starting, not heating, the turntable not rotating, door-latch or interlock issues, control lock or keypad problems, and vent or cooktop light complaints. Many issues trace back to power, door closure, or a failed safety switch or fuse.
Quick checks you can do first
- Confirm the outlet has power; reset the breaker if needed.
- Unplug the microwave for 60 seconds, then plug it back in (power surge reset).
- Open and close the door firmly; a door that is not fully latched can prevent starting.
- If you see LOCKED on the display, press and hold SET CLOCK for about 3 seconds to unlock.
- Make sure the turntable and support are seated correctly before using microwave mode.
Most common symptoms and likely causes
| Symptom | Common cause | What usually fixes it |
|---|---|---|
| Won’t start | Door not closed, power issue | Reseat plug, reset breaker, close door securely (see JVM6175SK5SS owner’s manual) |
| Runs but doesn’t heat | High-voltage component failure | Professional service recommended; internal HV parts can retain dangerous charge |
| Blows fuse / goes dead | Shorted component or door switch issue | Test/replace fuse and diagnose root cause (see how to replace a microwave fuse) |
| Turntable not spinning | Tray/support not seated, drive issue | Re-seat parts; inspect drive components like microwave turntable shaft WB06X10873 |
| Door won’t latch or acts “finicky” | Worn latch or interlock switch | Inspect latch and switches such as microwave door interlock switch WB24X25397 |
Parts that commonly fail on this model family
These are frequent culprits when symptoms match:
- Microwave primary interlock switch WB24X10047 (no-start, intermittent running)
- Microwave door interlock switch WB24X25397 (no-start, blowing fuse)
- Microwave fuse WB27X25389 or fuse asm WB27X35672 (dead unit)
- Microwave charcoal filter WB02X35687 (poor recirculating vent performance; replace about every 6 months depending on use)
Why it matters
Microwave door interlock circuits and fuses are safety devices. If the door does not close correctly or a switch is failing, the microwave may not run, may stop mid-cycle, or may blow a fuse to prevent unsafe operation.
Last updated: February 2026
How do I do a hard reset on my GE microwave?
To hard reset your GE JVM6175SK5SS microwave/hood combo, we recommend doing a full power reset: unplug the microwave (or switch the breaker off) for about 1 to 2 minutes, then restore power and reset the clock. This clears many control glitches after a power surge.
Hard reset steps (power reset)
- Turn the microwave off and stop any cooking cycle.
- Unplug the power cord from the outlet (or turn the circuit breaker off).
- Wait 1 to 2 minutes.
- Plug it back in (or turn the breaker on).
- Set the time of day using the clock feature in your JVM6175SK5SS owner’s manual.
Soft reset options (no power needed)
These do not clear all stored settings, but they fix many “stuck keypad” situations.
- Press Cancel/Off to stop cooking and clear the display.
- If LOCKED shows, press and hold Set Clock for about 3 seconds to unlock the controls.
- If the display is off, press and hold Display On/Off for about 3 seconds to turn the clock display back on.
If the microwave still will not start after a reset
Use this quick check list before replacing parts:
- Confirm the outlet has power and the plug is fully seated.
- Open and close the door firmly; a door that is not fully latched can prevent starting.
- If the unit is completely dead, a blown internal fuse is a common cause; see how to replace a microwave fuse.
Common symptoms and what they usually point to
| Symptom | Most common cause | What to do next |
|---|---|---|
| Display works, won’t start | Door not closing or interlock issue | Inspect door latches and switches |
| Completely dead | Power issue or blown fuse | Check breaker/outlet, then test fuse |
| Random behavior after storm | Power surge glitch | Do the 1 to 2 minute power reset |
Why it matters
A hard reset restores normal control operation after a power interruption or surge and helps you avoid unnecessary part replacement. If the problem returns quickly, focus on door closing and safety interlock components such as the microwave primary interlock switch WB24X10047.
Last updated: February 2026


