Installation guide
 Owner’s manual
 Error Codes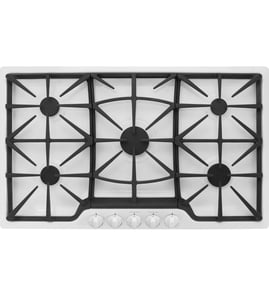





How long should a Kenmore gas stove last?
A Kenmore gas cooking appliance typically lasts about 15 years with normal household use. For your Kenmore 79032233401 gas cooktop, consistent cleaning and correct burner operation (proper flame size and keeping burner ports clear) help it run reliably for its full service life; see the 79032233401 owner's manual.
Typical lifespan and what affects it
Most gas cooktops and gas ranges land in the same general lifespan range, but real-world life depends on heat exposure, cleaning habits, and how often parts are used.
- Daily heavy cooking shortens life compared with light use
- Spillovers that clog burner ports cause poor ignition and uneven flames
- Using the wrong pan size can overheat surfaces and waste fuel
- Harsh cleaners can damage finishes and make cleaning harder over time
- Worn knobs, burner caps, and burner heads can lead to inconsistent flame control
Maintenance that helps this model last longer
The manual for the 79032233401 emphasizes safe ignition, proper flame size, and keeping burner openings clean for proper ignition and a complete, even flame.
- Turn the knob to LITE to ignite, then confirm the burner is lit before adjusting
- Adjust the flame so it does not extend beyond the edge of the utensil
- Clean burner ports (slots) routinely with a small-gauge wire or needle after spillovers
- Soak removable burner parts in a 1:1 ammonia and water solution for stubborn buildup (then dry thoroughly)
- Do not wash burner units in the dishwasher
Quick care guide (easy reference)
| Task | Good routine | Why it helps |
|---|---|---|
| Wipe cooktop after cooking | After it cools | Prevents baked-on grease and discoloration |
| Clean burner ports | Monthly or after spillovers | Improves ignition and flame pattern |
| Check flame size vs pan | Every use | Prevents wasted heat and flare risk |
| Deep-clean burner parts | Every 3 to 6 months | Reduces clogs and uneven heating |
Why it matters
A clean, properly adjusted burner produces a steady flame and efficient heat. When ports or the gas opening get dirty, you can see delayed ignition, clicking, uneven flames, and more wear on ignition components.
Last updated: January 2026
Is there a gas cooktop?
Yes. Kenmore model 79032233401 is a gas cooktop with surface burners that ignite using an electric igniter (you will hear a ticking sound when you turn a knob to LITE). For key safety, sizing, and hookup details, use the 79032233401 installation guide.
How to confirm you have a gas cooktop
A gas cooktop uses a gas supply line and burner components (cap, head, and igniter) to create a flame.
- You have a manual shutoff valve on the gas line feeding the cooktop.
- Turning a knob to LITE produces a ticking sound from the igniter.
- A burner lights and you see a visible flame at the burner head.
- The cooktop requires a grounded 3-prong outlet for the ignition system.
- You can light a burner with a match during a power outage (use caution).
Common parts that identify a gas burner setup
If you are missing pieces or the flame pattern looks uneven, these model-compatible parts are commonly involved:
| Part | What it does | When to consider it |
|---|---|---|
| Range surface burner head 316212400 | Directs gas to the ports for an even flame | Burner lights unevenly or has poor flame pattern |
| Range surface burner cap, 9,500-btu (black) 316213500 | Sits on top of the burner head to shape the flame | Cap is warped, cracked, or won’t sit flat |
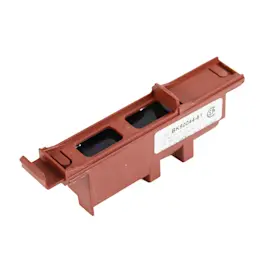
| Cooktop spark module 5304505695 | Sends spark to igniters to light burners | No clicking or no spark on multiple burners |
Why it matters
Gas cooktops need correct installation, grounding, and leak checks to operate safely and heat consistently. Proper burner head and cap placement also prevents hard lighting and uneven flames.
Last updated: January 2026
How to lift a Kenmore stove top?
On the Kenmore 79032233401 gas cooktop, you typically lift the cooktop top by first removing the grates, burner caps, and burner heads so nothing binds or breaks; then you release the cooktop from its countertop hold-down brackets so it can be lifted for service. Use the steps in the 79032233401 installation guide for the exact clamp-down style.
Before you lift the cooktop
- Turn all burner knobs to OFF and let the cooktop cool completely.
- Shut off the gas supply valve.
- Unplug the power cord (spark ignition uses electricity).
- Remove all cast iron grates.
- Lift off burner caps and then remove burner heads (protect the electrode while lifting parts).
How the cooktop is held down (what you are releasing)
Most Kenmore cooktops like model 79032233401 are secured to the countertop with angle brackets and thumb screws that clamp the unit down from underneath.
| What you see | What it means | What to do |
|---|---|---|
| Angle bracket in a side slot | Cooktop is clamped to the counter | Loosen the thumb screw(s) from below |
| Seal around the edge | Helps prevent spills from getting under the top | Lift slowly to avoid tearing |
| Burner parts removed | Prevents damage and binding | Keep parts organized by burner |
Step-by-step: lifting the top for service
- From above, remove grates, burner caps, and burner heads.
- From inside the cabinet below, locate the clamp-down brackets on the sides.
- Loosen the thumb screws until the cooktop is no longer drawn tight to the counter.
- Lift the cooktop top carefully from the front edge; support it so you do not strain the gas line or wiring.
- If you are servicing burner components, inspect for misalignment or damage before reassembly (burner head must sit correctly over the orifice and electrode).
Why it matters
Lifting the top without removing burner parts or releasing the clamp-down hardware can crack a burner cap, damage an electrode, or tear the cooktop seal, which can lead to ignition problems and harder cleanup.
Last updated: January 2026
What are the components of a gas cooktop?
A Kenmore gas cooktop like model 79032233401 is built around the burner system (burner heads, burner caps, and gas orifices) plus the controls and safety hardware that regulate gas flow and ignition. You will also have the cooktop top surface, seals, and mounting pieces that keep everything aligned and leak-free; see the 79032233401 installation guide for the full layout and clearances.
Core components you will see on this cooktop
- Surface burners: burner head and burner cap create and shape the flame.
- Orifices (spuds): meter the gas flow to each burner.
- Gas manifold and valves: route gas and let each knob control flame size.
- Ignition system: spark electrodes and a spark module light the burners.
- Pressure regulator: stabilizes incoming gas pressure for consistent flames.
- Cooktop top and seals: the main top and seals help prevent leaks and protect the cabinet.
Common replaceable parts for model 79032233401
If you are missing a piece, have uneven flames, or a burner will not light, these model-matched parts are typical suspects:
- Range surface burner head 316212400
- Range surface burner cap, 9,500-btu (black) 316213500
- Range surface burner orifice 316237902
- Cooktop burner knob 318271802
- Range pressure regulator 5308007974
Quick “what it does” reference
| Component | What it does | Common symptom when it fails or is missing |
|---|---|---|
| Burner head and cap | Shapes flame and distributes gas | Weak/uneven flame, delayed ignition |
| Orifice | Controls gas volume to burner | Very high flame, very low flame, yellow flame |
| Spark module/electrode | Creates spark to ignite gas | Clicking but no ignition, no clicking |
| Pressure regulator | Keeps gas pressure steady | Flames too high/low across multiple burners |
| Knob/valve interface | Lets you set flame level | Knob slips, hard to turn, valve not opening |
Why it matters
These components work together to keep flames stable and predictable. Proper alignment of valves and connections also helps prevent gas leaks, which is why installation details and clearances are important.
Safety notes we follow during service
- If you smell gas: do not light burners or touch electrical switches; contact your gas supplier from a neighbor’s phone.
- Use a properly grounded 120V, 60Hz circuit; do not use an extension cord.
- Installation and service are best handled by a qualified installer or service agency.
Last updated: January 2026