Get free shipping on your order, with any water filter subscription. Find my filter

Open Hamburger Menu
Sears Parts Direct
Tips to find your model number

GE JVM1790SK01 microwave Parts

Here are the diagrams and repair parts for GE JVM1790SK01 microwave, as well as links to manuals and error code tables, if available.

GE JVM1790SK01 microwave
By Schematic
SELECT DIAGRAM
?

This is the number corresponding to the part on the diagram / schematic

Browse Parts for JVM1790SK01 Microwave

  • Wall Oven Microwave Capacitor Bracket for GE JVM1790SK01 - Part WB02X32593

    Interior parts (1) diagram

    Wall Oven Microwave Capacitor Bracket

    Part #WB02X11226

    Replaced by #WB02X32593

    Info Icon
    Manufacturer substitution
    This part replaces WB02X11226. Substitute parts can look different from the original.
    In Stock
    $36.72
    Minus Item
    Qty
    Plus Item
  • Microwave Mounting Plate for GE JVM1790SK01 - Part WB56X35363

    Installation parts diagram

    Microwave Mounting Plate

    Part #WB56X10204

    Replaced by #WB56X35363

    Info Icon
    Manufacturer substitution
    This part replaces WB56X10204. Substitute parts can look different from the original.
    This item is not returnable
    In Stock
    $24.73
    20% OFF Phone Price : $30.73Info Icon
    Minus Item
    Qty
    Plus Item
  • Microwave Stirrer Fan Cover for GE JVM1790SK01 - Part WB02X32719

    Interior parts (1) diagram

    Microwave Stirrer Fan Cover

    Part #WB06X10787

    Replaced by #WB02X32719

    Info Icon
    Manufacturer substitution
    This part replaces WB06X10787. Substitute parts can look different from the original.
    This item is not returnable
    In Stock
    $19.49
    9% OFF Phone Price : $21.49Info Icon
    Minus Item
    Qty
    Plus Item
  • Washer for GE JVM1790SK01 - Part WB1X1522

    Interior parts (1) diagram

    "washer, Splk"

    Part #WB01X1522

    Replaced by #WB1X1522

    Info Icon
    Manufacturer substitution
    This part replaces WB01X1522. Substitute parts can look different from the original.
    In Stock
    $11.26
    15% OFF Phone Price : $13.26Info Icon
    Minus Item
    Qty
    Plus Item
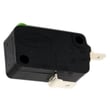
  • Microwave Door Interlock Switch for GE JVM1790SK01 - Part WB24X25397

    Interior parts (1) diagram

    Micro-switch

    Part #WB24X10112

    Replaced by #WB24X25397

    Info Icon
    Manufacturer substitution
    This part replaces WB24X10112. Substitute parts can look different from the original.
    In Stock
    $33.51
    15% OFF Phone Price : $39.51Info Icon
    Minus Item
    Qty
    Plus Item
  • Microwave Door Inner Frame for GE JVM1790SK01 - Part WB56X21097

    Door parts diagram

    Microwave Door Inner Frame

    Part #WB55X10789

    Replaced by #WB56X21097

    Info Icon
    Manufacturer substitution
    This part replaces WB55X10789. Substitute parts can look different from the original.
    In Stock
    $128.71
    9% OFF Phone Price : $140.71Info Icon
    Minus Item
    Qty
    Plus Item
  • Heater Holde for GE JVM1790SK01 - Part WB02X32605

    Interior parts (1) diagram

    Holder - Hea

    Part #WB06X10264

    Replaced by #WB02X32605

    Info Icon
    Manufacturer substitution
    This part replaces WB06X10264. Substitute parts can look different from the original.
    In Stock
    $32.61
    Minus Item
    Qty
    Plus Item
  • Pcba Screw for GE JVM1790SK01 - Part WB02X10729

    Interior parts (2) diagram

    Screw Tappin

    Part #WB01X10122

    Replaced by #WB02X10729

    Info Icon
    Manufacturer substitution
    This part replaces WB01X10122. Substitute parts can look different from the original.
    This item is not returnable
    In Stock
    $11.56
    15% OFF Phone Price : $13.56Info Icon
    Minus Item
    Qty
    Plus Item
  • Outer Case for GE JVM1790SK01 - Part WB56X32812

    Oven cavity parts diagram

    Flat Case

    Part #WB56X10855

    Replaced by #WB56X32812

    Info Icon
    Manufacturer substitution
    This part replaces WB56X10855. Substitute parts can look different from the original.
    In Stock
    $145.40
    Minus Item
    Qty
    Plus Item
  • Microwave Vent Fan Motor Assembly for GE JVM1790SK01 - Part WB26X36106

    Interior parts (2) diagram

    Vent Motor

    Part #WB26X10100

    Replaced by #WB26X36106

    Info Icon
    Manufacturer substitution
    This part replaces WB26X10100. Substitute parts can look different from the original.
    In Stock
    $161.94
    Minus Item
    Qty
    Plus Item

GE Microwave JVM1790SK01 FAQs

To reset the touchpad on your GE JVM1790SK01 microwave/hood combo, disconnect power for 1 to 2 minutes, then restore power and re-set the clock. This clears minor control glitches and reboots the control board.

Reset steps (JVM1790SK01)
  • Press CLEAR/OFF once to stop any active cooking cycle.
  • Unplug the microwave (or switch the dedicated breaker off).
  • Wait 1 to 2 minutes.
  • Restore power.
  • Set the clock (use the Clock feature described in the JVM1790SK01 owner’s manual).
If the touchpad still will not respond

A power reset helps with temporary software lockups. If keys are still dead or random buttons activate, the issue is usually a door-interlock problem, a stuck key, or a control-related failure.

  • Confirm the door closes firmly and latches cleanly.
  • Try a different outlet only if it is properly grounded and on the correct circuit.
  • If the display is blank after reset, check the home breaker and outlet first.
Symptom after reset Most likely direction What we recommend next
Display works, keys do nothing Touchpad/control issue Use the manual’s control-panel guidance; service may be needed
Unit goes dead, then returns Power interruption Verify outlet and breaker stability
Dead display, no interior light Power supply or internal protection Consider professional diagnosis; internal testing involves high voltage
Why it matters

Resetting power is the safest first step because it can clear a frozen control without disassembly. If the problem repeats, it points to an underlying electrical or control issue that a reset will not fix.

Last updated: January 2026

GE microwaves, including the GE JVM1790SK01 microwave/hood combo, typically last 7 to 10 years with normal household use. Lifespan depends most on how often it runs, how well the door and vents are treated, and whether it is kept clean and properly vented per the JVM1790SK01 owner’s manual.

What affects lifespan the most

A microwave/hood combo like the JVM1790SK01 works harder than a countertop unit because it also handles ventilation and heat from the cooktop.

  • Heavy daily use (multiple long cook cycles) shortens life
  • Running empty overheats internal components
  • Slamming or forcing the door wears door latches and interlock switches
  • Grease buildup restricts airflow and raises internal temperatures
  • Poor venting or blocked filters makes the vent fan work harder
Simple habits that help it reach 10 years
  • Keep the cavity clean; wipe spills before they carbonize
  • Use microwave-safe cookware; avoid metal trim that can cause arcing
  • Do not operate the unit with no food inside
  • Clean or replace vent filters on schedule (grease and charcoal, if used)
  • Let the fan run after high-heat stovetop cooking to clear heat
Repair vs. replace: a quick rule of thumb

If your JVM1790SK01 is near the 7 to 10 year mark, the decision often comes down to the type of failure.

Symptom More likely a repair More likely replacement consideration
Dead display/no power Fuse, door switch, wiring Repeated electrical failures
Runs but does not heat Not typical DIY; high-voltage system Major high-voltage component issues
Loud noises Fan/motor related Multiple worn components

If the microwave is completely dead, a common first check is the internal fuse; see how to replace a microwave fuse and match the correct part for this model such as the microwave fuse WB27X10928.

Why it matters

A microwave that is overheating, arcing, or struggling to vent can fail sooner and may also cook unevenly. Basic cleaning and airflow maintenance are the easiest ways to protect key components like the magnetron, thermal cut-offs, and vent fan.

Last updated: January 2026

A GE microwave/hood combo like model JVM1790SK01 includes cooking components (turntable system, cooking cavity, controls) plus ventilation parts (fan, filters, ducting or recirculation hardware). Some internal high-voltage parts exist as well, but they are service items and should be handled only by qualified technicians.

Main parts you will see and use
  • Door assembly: door, handle, latches, and safety interlock system
  • Control panel: display, keypad or dial, and control board behind it
  • Cooking cavity: interior box where food sits
  • Turntable system: glass tray, support ring, and drive shaft
  • Vent hood system: vent fan, grease filters, and (on some setups) a charcoal filter
  • Lighting: cooktop light and cavity light (varies by configuration)
Key internal components (not typically DIY)

Microwaves also rely on high-voltage and heating-related components that are not meant for casual inspection.

Component What it does Typical symptom if it fails
Fuse Protects the microwave from electrical overload Unit goes completely dead
Door interlock switches Prevents operation with the door open Won’t start, runs with door issues
Thermal cut-off Shuts unit down if it overheats Dead or intermittent operation
Convection element (on combo units) Provides convection bake/roast heat Convection won’t heat properly
Model-specific examples of parts for JVM1790SK01

If you are identifying parts on your specific unit, these are common examples we see for GE JVM1790SK01:

Why it matters

Knowing the major parts helps you describe symptoms accurately (for example, “turntable not rotating” vs. “not heating”) and quickly narrow down whether you need a cleaning, a simple replacement part, or professional service.

For diagrams, operating features, and care/cleaning details, use the JVM1790SK01 owner’s manual.

Last updated: January 2026

Symptoms for gas grills

Choose a symptom to see related gas grill repairs.

Main causes: damaged or dirty flame tamers, corroded firebox, accumulated grease and debris in the grease pan…

Main causes: empty fuel tank, tripped flow-limiting device on the pressure regulator, faulty manifold valves, burner tub…

Main causes: nearly empty fuel tank, faulty pressure regulator, burner tube clogs, bad burner tube alignment to gas valv…

Main causes: clogged burner tubes, cracked insulators on igniter electrodes, wiring failures, bad ignition module, manif…

Repair guides for gas grills

These step-by-step repair guides will help you safely fix what’s broken on your gas grill.

How to replace a gas grill pressure regulator

How to replace a gas grill pressure regulator

You can install a new pressure regulator on your gas grill if the pressure regulator won’t let gas flow.…

Repair time and Difficulty

 15 minutes or less
How to replace a gas grill igniter electrode

How to replace a gas grill igniter electrode

Replace the igniter electrode on your gas grill if it won’t light the burner.…

Repair time and Difficulty

 15 minutes or less
How to replace a gas grill ignition module

How to replace a gas grill ignition module

Follow these steps to replace the ignition module if it doesn't produce a spark. …

Repair time and Difficulty

 15 minutes or less

Effective articles & videos to help repair your microwave/hood combos

Use the advice and tips in these articles and videos to get the most out of your gas grill.

Are DIY appliance repairs safe?

Are DIY appliance repairs safe?

Find out how to stay safe when repairing your appliances.…

Top questions about Sears and Sears PartsDirect

Top questions about Sears and Sears PartsDirect

Get answers to frequently asked questions about Sears and Sears PartsDirect.…

How to tell if a fuse is blown

How to tell if a fuse is blown

Learn how to tell whether a fuse is blown…

Parts & More

Air Compressor
Bottom-Mount Refrigerator
Camping
Dishwasher
Dryer
Electronic Sewing Machine
Front-Engine Lawn Tractor
Gas Chainsaw
Gas Cooktop
Gas Snowblower
Gas Walk-Behind Mower
Parts
Side-By-Side Refrigerator
Washer