Installation guide
 Owner’s manual


How do I do a hard reset on my GE microwave?
To hard reset a GE JVM1740SP1SS microwave/hood combo, unplug the microwave (or switch off the breaker) for about 1 minute, then restore power and set the clock. This clears many control glitches caused by a brief power surge; see the GE JVM1740SP1SS owner’s manual for model-specific control details.
Hard reset steps (JVM1740SP1SS)
- Press CLEAR/OFF once to stop any cooking cycle.
- Unplug the microwave from the wall outlet; if it’s hardwired, turn OFF the kitchen circuit breaker.
- Wait 60 seconds (up to 5 minutes if the display was acting erratic).
- Restore power.
- Re-enter the clock and test with a 30-second cup-of-water heat.
If the display says “LOCKED”
This is not a power reset issue; it’s the control lock.
- Press and hold CLEAR/OFF for about 3 seconds to unlock.
What a hard reset fixes (and what it won’t)
| Symptom | Hard reset helps? | What to check next |
|---|---|---|
| Blank display after a power flicker | Often | House fuse/circuit breaker, outlet power |
| Random beeping or unresponsive keypad | Often | Moisture/grease on control panel, stuck key |
| “LOCKED” on display | No | Use CLEAR/OFF hold to unlock |
| Runs but does not heat | No | Heating circuit diagnosis (pro service recommended) |
Why it matters
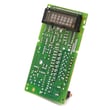
A quick power interruption can confuse the electronic control. Resetting power forces the control board to reboot, which often restores normal keypad and display operation without replacing parts.
When to stop and schedule service
- The breaker trips repeatedly after restoring power.
- You smell burning, see arcing, or hear loud buzzing.
- The microwave runs but does not heat (common causes include high-voltage components).
Last updated: January 2026
What are common problems with GE profile microwaves?
Common problems we see with GE Profile microwaves (including over-the-range models like GE JVM1740SP1SS) are “won’t start,” “not heating,” sparking (arcing), a vent fan that runs on, and door or keypad issues. Many symptoms trace back to power supply, door interlocks, or high-voltage heating components.
Most common symptoms and what they usually mean
- Microwave won’t start: often a tripped breaker, blown house fuse, loose plug, or the door not closing fully.
- “LOCKED” on the display: the control lock is on; it typically unlocks by holding CLEAR/OFF for about 3 seconds.
- Vent fan won’t turn off: the fan can run automatically to cool internal parts during or after cooking.
- Not heating: commonly points to the high-voltage circuit (magnetron, capacitor, diode) or a safety thermostat opening.
- Sparking (arcing) inside: usually caused by metal or foil contacting the cavity wall, twist ties, or metal-trimmed dishes.
Quick checks you can do safely
- Confirm the 3-prong plug is fully seated and the outlet has power.
- Open and close the door firmly; a partially latched door can prevent operation.
- Remove any foil, metal twist ties, or metal-rimmed cookware.
- If the oven ran empty, stop doing that; running with no food can overheat the magnetron and shorten microwave life.
- Review operating and safety notes in the JVM1740SP1SS owner’s manual.
Parts that commonly relate to these problems
| Problem | Common part area | Example part for JVM1740SP1SS |
|---|---|---|
| Won’t start or intermittent start | Door interlock system | Micro-switch WB24X830 |
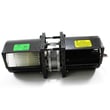
| Not heating | High-voltage components | Microwave magnetron (WB27X11079), capacitor (WB27X10011), diode (WB27X10597) |
| Shuts off or overheats | Safety thermostats/cutoffs | Thermostat switch (WB27X709), thermal cut-off (WB21X10162) |
Why it matters
Microwaves rely on door safety interlocks and high-voltage components to operate safely. Addressing arcing causes, door-latch problems, and overheating symptoms early helps prevent repeat failures and protects key components like the magnetron.
Last updated: January 2026
What is the average lifespan of a GE microwave?
A GE microwave typically lasts about 9 to 10 years with normal household use and basic care. For your GE JVM1740SP1SS microwave/hood combo, keeping the venting and door system in good shape helps it reach that expected lifespan; see the JVM1740SP1SS owner's manual for care and safety guidance.
Typical lifespan and what affects it
Most over-the-range microwaves wear out based on heat, grease, and door use cycles. These factors have the biggest impact:
- Ventilation load: frequent use of the hood fan over high-heat cooking increases grease buildup
- Door use and slamming: stresses the latch and interlock system
- Power level habits: long cook times at full power create more internal heat
- Cleaning routine: grease and food debris can cause overheating and arcing
- Electrical events: power surges and repeated breaker trips shorten component life
Quick “is it worth fixing?” guide
Use this as a practical rule of thumb for a GE over-the-range microwave like the JVM1740SP1SS.
| Microwave age | Typical recommendation | Why |
|---|---|---|
| 0 to 5 years | Repair is usually worthwhile | Parts cost is often lower than replacement |
| 6 to 10 years | Depends on the failure and part cost | Major electrical parts can be expensive |
| 10+ years | Replacement is often the better value | Multiple parts may be near end-of-life |
Common failures near end of life (and related parts)
If the unit is otherwise in good condition, these are common repair paths:
- No heat but it runs: high-voltage components such as the microwave magnetron WB27X11079 or microwave high-voltage capacitor WB27X10011
- Intermittent running or won’t start: door interlock components such as the micro-switch WB24X830 or latch parts
- Shuts off during cooking: overheating protection such as thermostats or thermal cut-offs
Why it matters
Microwaves rely on a door interlock system and high-voltage components to operate safely. As the unit ages, small issues (like a weak door switch or restricted airflow) can turn into no-heat symptoms, nuisance shutoffs, or repeated fuse trips.
Last updated: January 2026