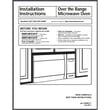
 Installation guide
 Owner’s manual




How do I reset a Kenmore microwave?
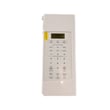
To reset your Kenmore microwave model 79080322310, we recommend doing a basic power reset first (unplug for a short time, then restore power). This clears many temporary control glitches; then re-set the clock and any settings using the 79080322310 owner's manual.
Quick reset options (start here)
- Power reset (most common): Unplug the microwave (or switch off the breaker), wait 1 to 2 minutes, then restore power.
- Clear/stop reset: Press STOP to cancel a cooking program or clear an incorrect entry on the display.
- Settings reset (if available on your keypad): Use Clock & Settings to review options and return changed settings back to normal.
What to do after a reset
After power is restored, do these basics so the microwave and hood functions work normally:
- Set the clock using Clock & Settings.
- Confirm the turntable is enabled (Turntable On/Off shows ON or OFF on the display).
- Verify the glass tray and ring are installed correctly.
- Test a simple heat cycle (for example, 30 seconds) to confirm normal operation.
If the microwave still will not run
A reset will not fix a failed door-safety circuit or a blown internal fuse. If the display works but cooking will not start, focus on door-latch and interlock symptoms:
- Door feels loose, does not “click” shut, or you must lift/push the door to start
- Unit starts then stops when you release the door
- “Door” type error or intermittent operation
| Symptom | Most likely area | Common next step |
|---|---|---|
| Won’t start, door must be held | Door latch or interlock | Inspect latch alignment; test switches |
| Starts then stops when door moves | Interlock switch mounting | Check switch bracket and actuator |
| Dead/no display after power is confirmed | Fuse or thermal cut-off | Diagnose power path with a meter |
Why it matters
Microwave/hood combos like the Kenmore 79080322310 use door interlock switches as a critical safety system. If the control thinks the door is not fully latched, it will prevent cooking even after a reset. A worn latch or switch can look like a “needs reset” problem.
Last updated: February 2026
What is the life expectancy of a Kenmore microwave?
Most Kenmore microwaves, including over-the-range models like 79080322310, typically last 9 to 10 years with normal household use. Heavy daily use, poor ventilation, and skipped cleaning can shorten that lifespan, while routine care and prompt repairs can extend it.
What affects lifespan the most
- Daily run time: multiple long cook cycles per day wear components faster.
- Heat and grease exposure: common on microwave/hood combos above a range.
- Vent fan and filter maintenance: clogged filters trap heat and strain the unit.
- Door closing and latching: slamming the door can damage switches and latch parts.
- Power quality: frequent surges can stress the control board and high-voltage system.
Signs it may be near end-of-life (or needs repair)
- Food takes noticeably longer to heat than it used to.
- Loud humming, buzzing, or a burning smell during operation.
- Turntable stops rotating or rotates intermittently.
- Door does not close firmly, or the unit only runs when you push on the door.
- Display or keypad becomes erratic.
Common “repair vs. replace” cost guide
| What you’re seeing | Common area involved | Typical direction |
|---|---|---|
| Not heating | High-voltage components | Repair only if cost-effective |
| Runs only with door pressure | Door latch or switches | Repair is often worthwhile |
| Dead/no power | Fuse/thermal protection/control | Diagnose first; varies |
For door-related failures on this model, the latch and interlock system are frequent suspects; examples include the microwave door switch 5304509459 and latch hook 5304509457. For heating complaints, use the troubleshooting steps in the 79080322310 use & care guide and our why is my microwave not heating article to narrow down likely causes.
Why it matters
A microwave/hood combo has to manage cooking heat plus cooktop steam and grease. Keeping airflow clear and the door system aligned helps prevent nuisance shutdowns, weak heating, and premature part wear.
Last updated: February 2026
Where is the fuse located on a Kenmore microwave?
On the Kenmore microwave/hood combo model 79080322310, the main fuse is typically located behind the top vent grille area (above the door), near the control compartment. Access usually involves unplugging power, removing the top grille or vent screws, and then opening the control area to reach the fuse; follow the 79080322310 installation guide for safe access steps.
Before you open anything (important safety)
Microwaves store high voltage even when unplugged. For fuse access and testing, we recommend basic electrical safety and careful disassembly.
- Unplug the microwave or switch off the breaker before removing any screws
- Use a dedicated 15 to 20 amp grounded outlet for operation (do not use an extension cord)
- If you see burned wiring, melted plastic, or arcing marks, stop and have the unit serviced
- Replace a fuse only with the exact same type and rating
- If the new fuse blows immediately, troubleshoot the cause before replacing it again
How to get to the fuse on an over-the-range Kenmore microwave
On this style of over-the-range unit, you normally reach the fuse from the top front area.
- Disconnect power.
- Remove the top vent grille or vent panel screws (these are commonly accessed with the door open).
- Locate the control compartment behind the grille area; the fuse is usually in a small holder on or near the noise filter and line input wiring.
- Test the fuse with a multimeter before replacing it.
For model-specific screw locations and panel removal order, use the 79080322310 owner’s manual.
What a blown fuse usually means
A blown fuse is often a symptom, not the root problem. Common causes include door switch problems, a shorted high-voltage component, or wiring issues.
| Symptom | Most common area to check | Example part for this model |
|---|---|---|
| Dead display, no lights | Line fuse, noise filter, wiring | Microwave noise filter 5304509452 |
| Fuse blows when door opens/closes | Door interlock switches, latch | Microwave door switch 5304509459 |
| Runs but does not heat | High-voltage circuit | Microwave diode 5304509479 |
Why it matters
The fuse protects the Kenmore 79080322310 from overheating and electrical damage. Replacing it without fixing the underlying issue can lead to repeated failures and unsafe operation.
Last updated: February 2026
How many cubic feet is a Kenmore Model 79080322310 microwave?
The Kenmore microwave/hood combo model 79080322310 has a 1.6 cu. ft. interior capacity. This is the cooking cavity volume (usable space inside the oven), not the exterior size or the required mounting clearances; confirm the spec in the 79080322310 use and care guide.
What “1.6 cu. ft.” means
Cubic feet is the volume of the microwave’s interior cavity. It helps you judge what size dishes fit and how much food you can heat at one time.
- Measures interior cooking space, not the outside dimensions
- Useful for comparing similar 30-inch over-the-range microwaves
- Helps you choose cookware that rotates freely on the turntable
- Does not change the required cabinet width or mounting height
Capacity vs. installation space (common mix-up)
Use capacity for cooking space; use installation specs for fit above the range.
| Spec | What it tells you | Where to check |
|---|---|---|
| Capacity (cu. ft.) | Interior cavity volume | 79080322310 use and care guide |
| Mounting clearances | Required space above cooktop and between cabinets | 79080322310 installation instructions |
Why it matters
Matching the correct cubic-foot capacity helps you avoid buying a replacement that feels smaller inside than expected, even when the microwave is still a standard 30-inch over-the-range size.
Last updated: February 2026


